
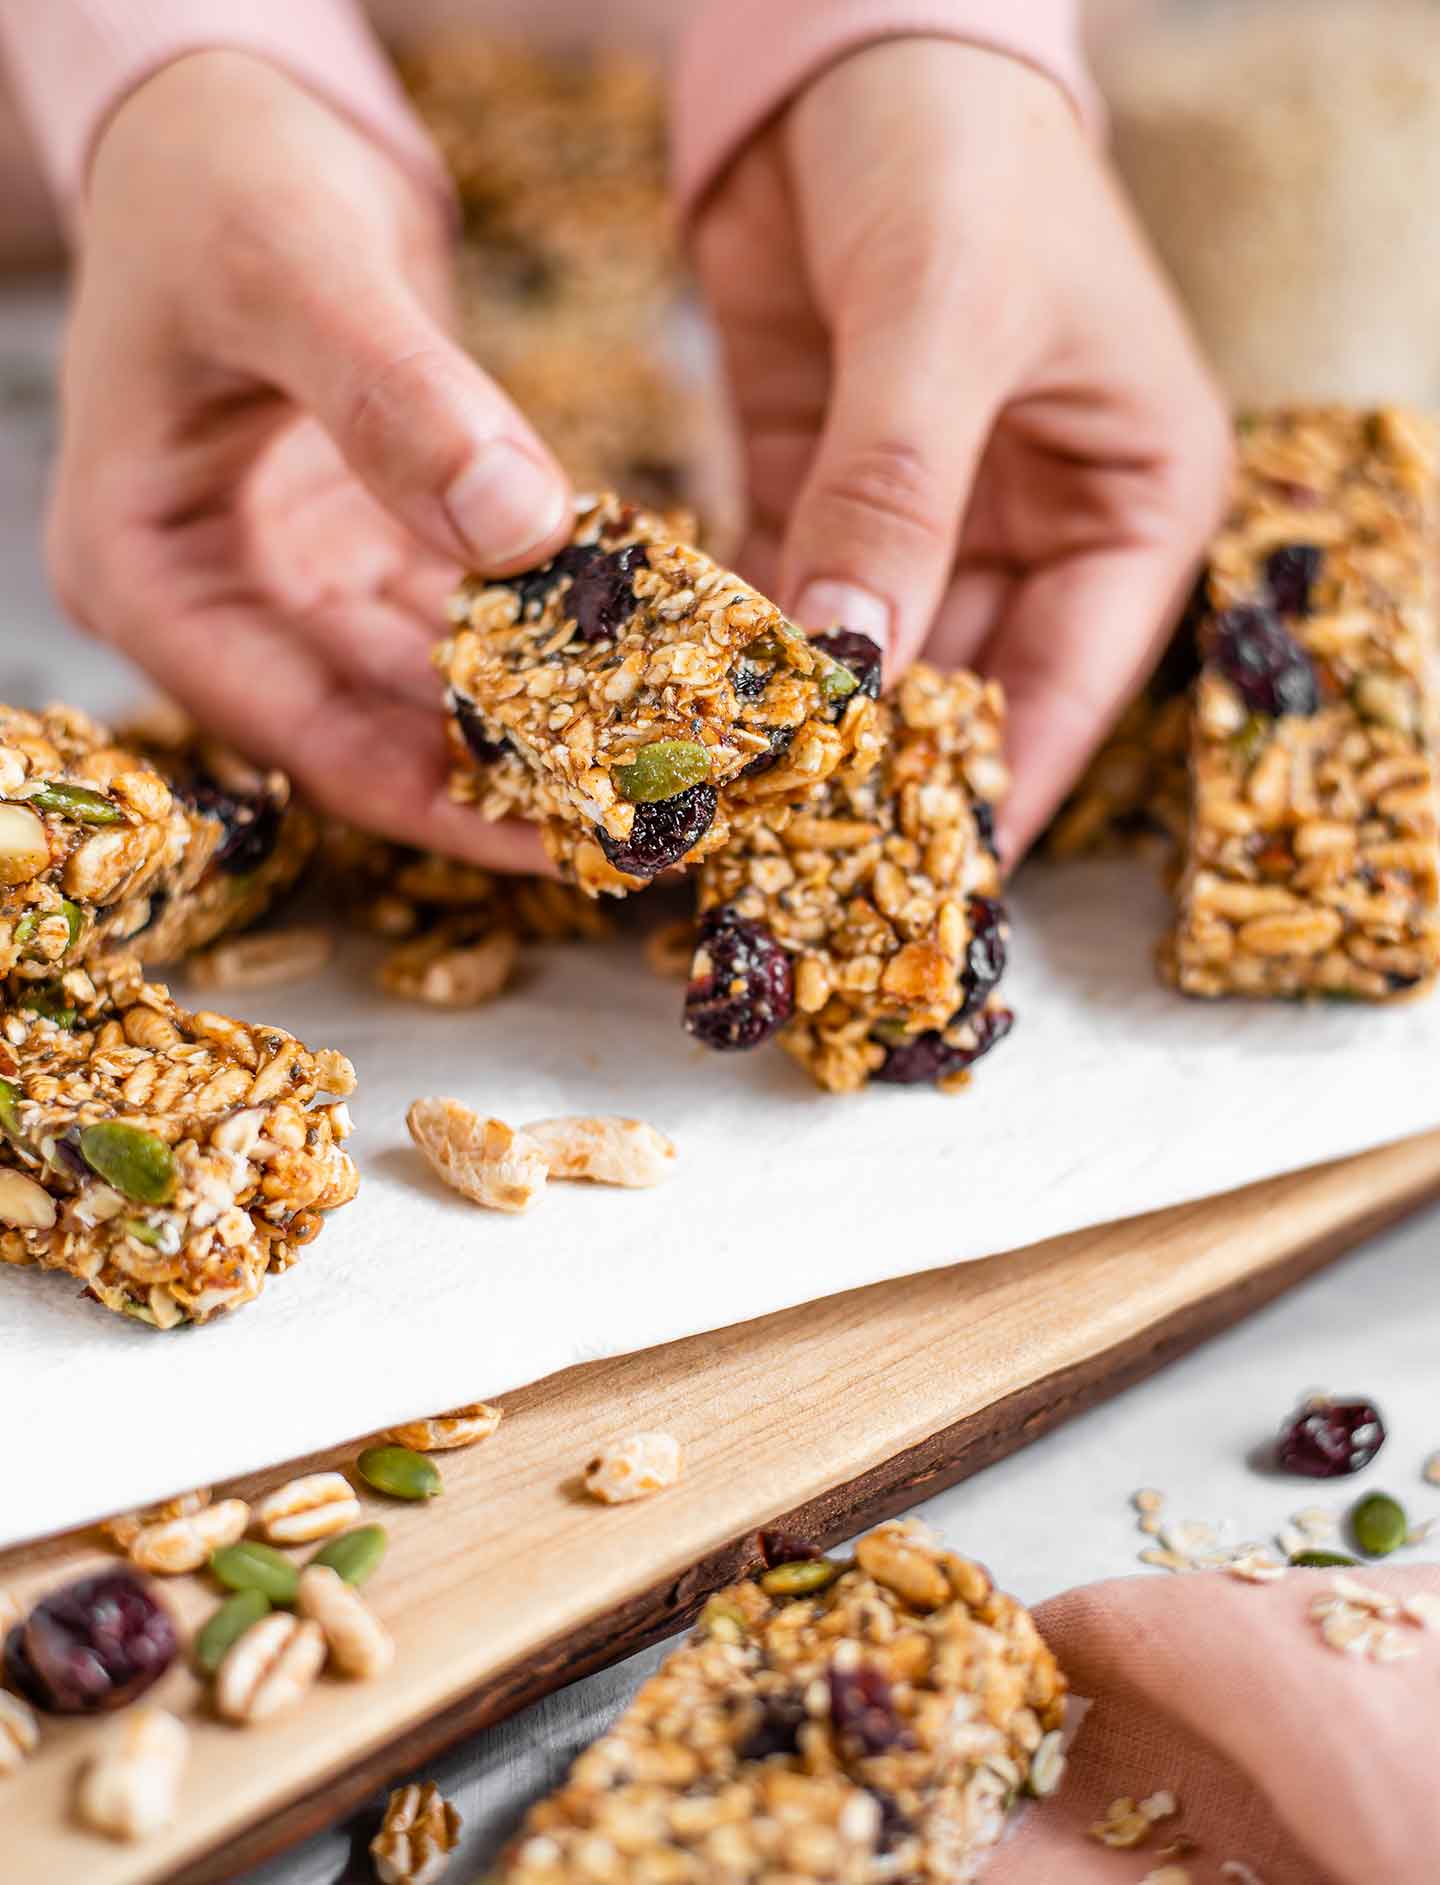
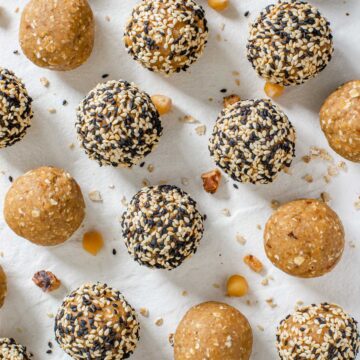
Probably my favourite things to make are "no bake" snacks. I really never thought that I would make my own granola bars and snack foods because they are so accessible and easy to buy from a store. BUT making these puffed rice granola bars is so simple when my pantry is stocked with easy and essential ingredients. These bars are:
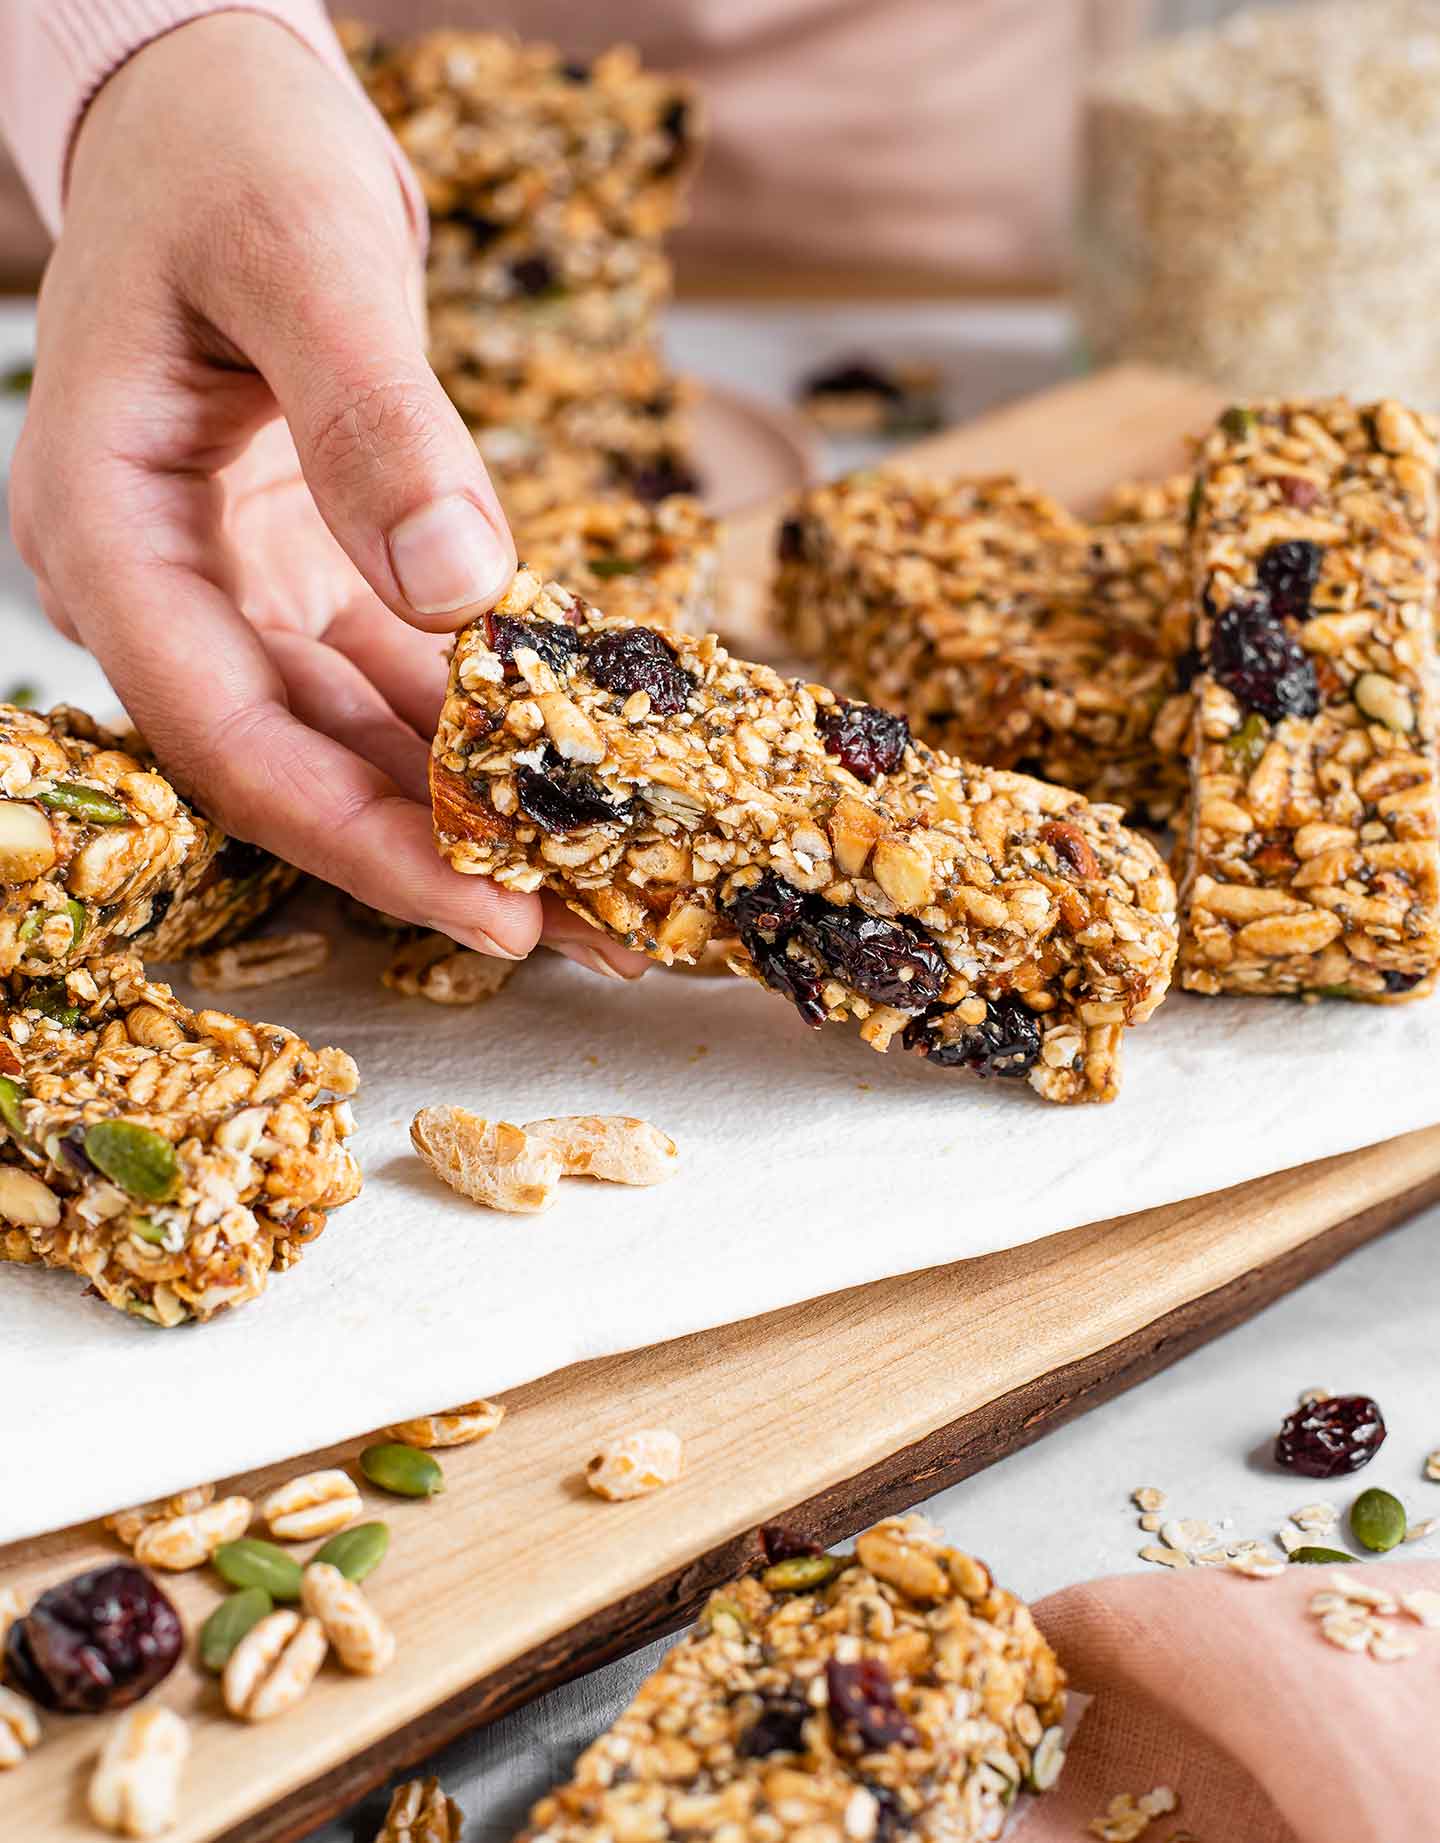
Sticky and soft but hold together and have some crunch!
Peanut buttery and filling
Festive and lightly sweetened
Easy and ready in minutes
Ingredients
All the ingredients for this recipe are easy to have on hand and part of our Pantry Tips!
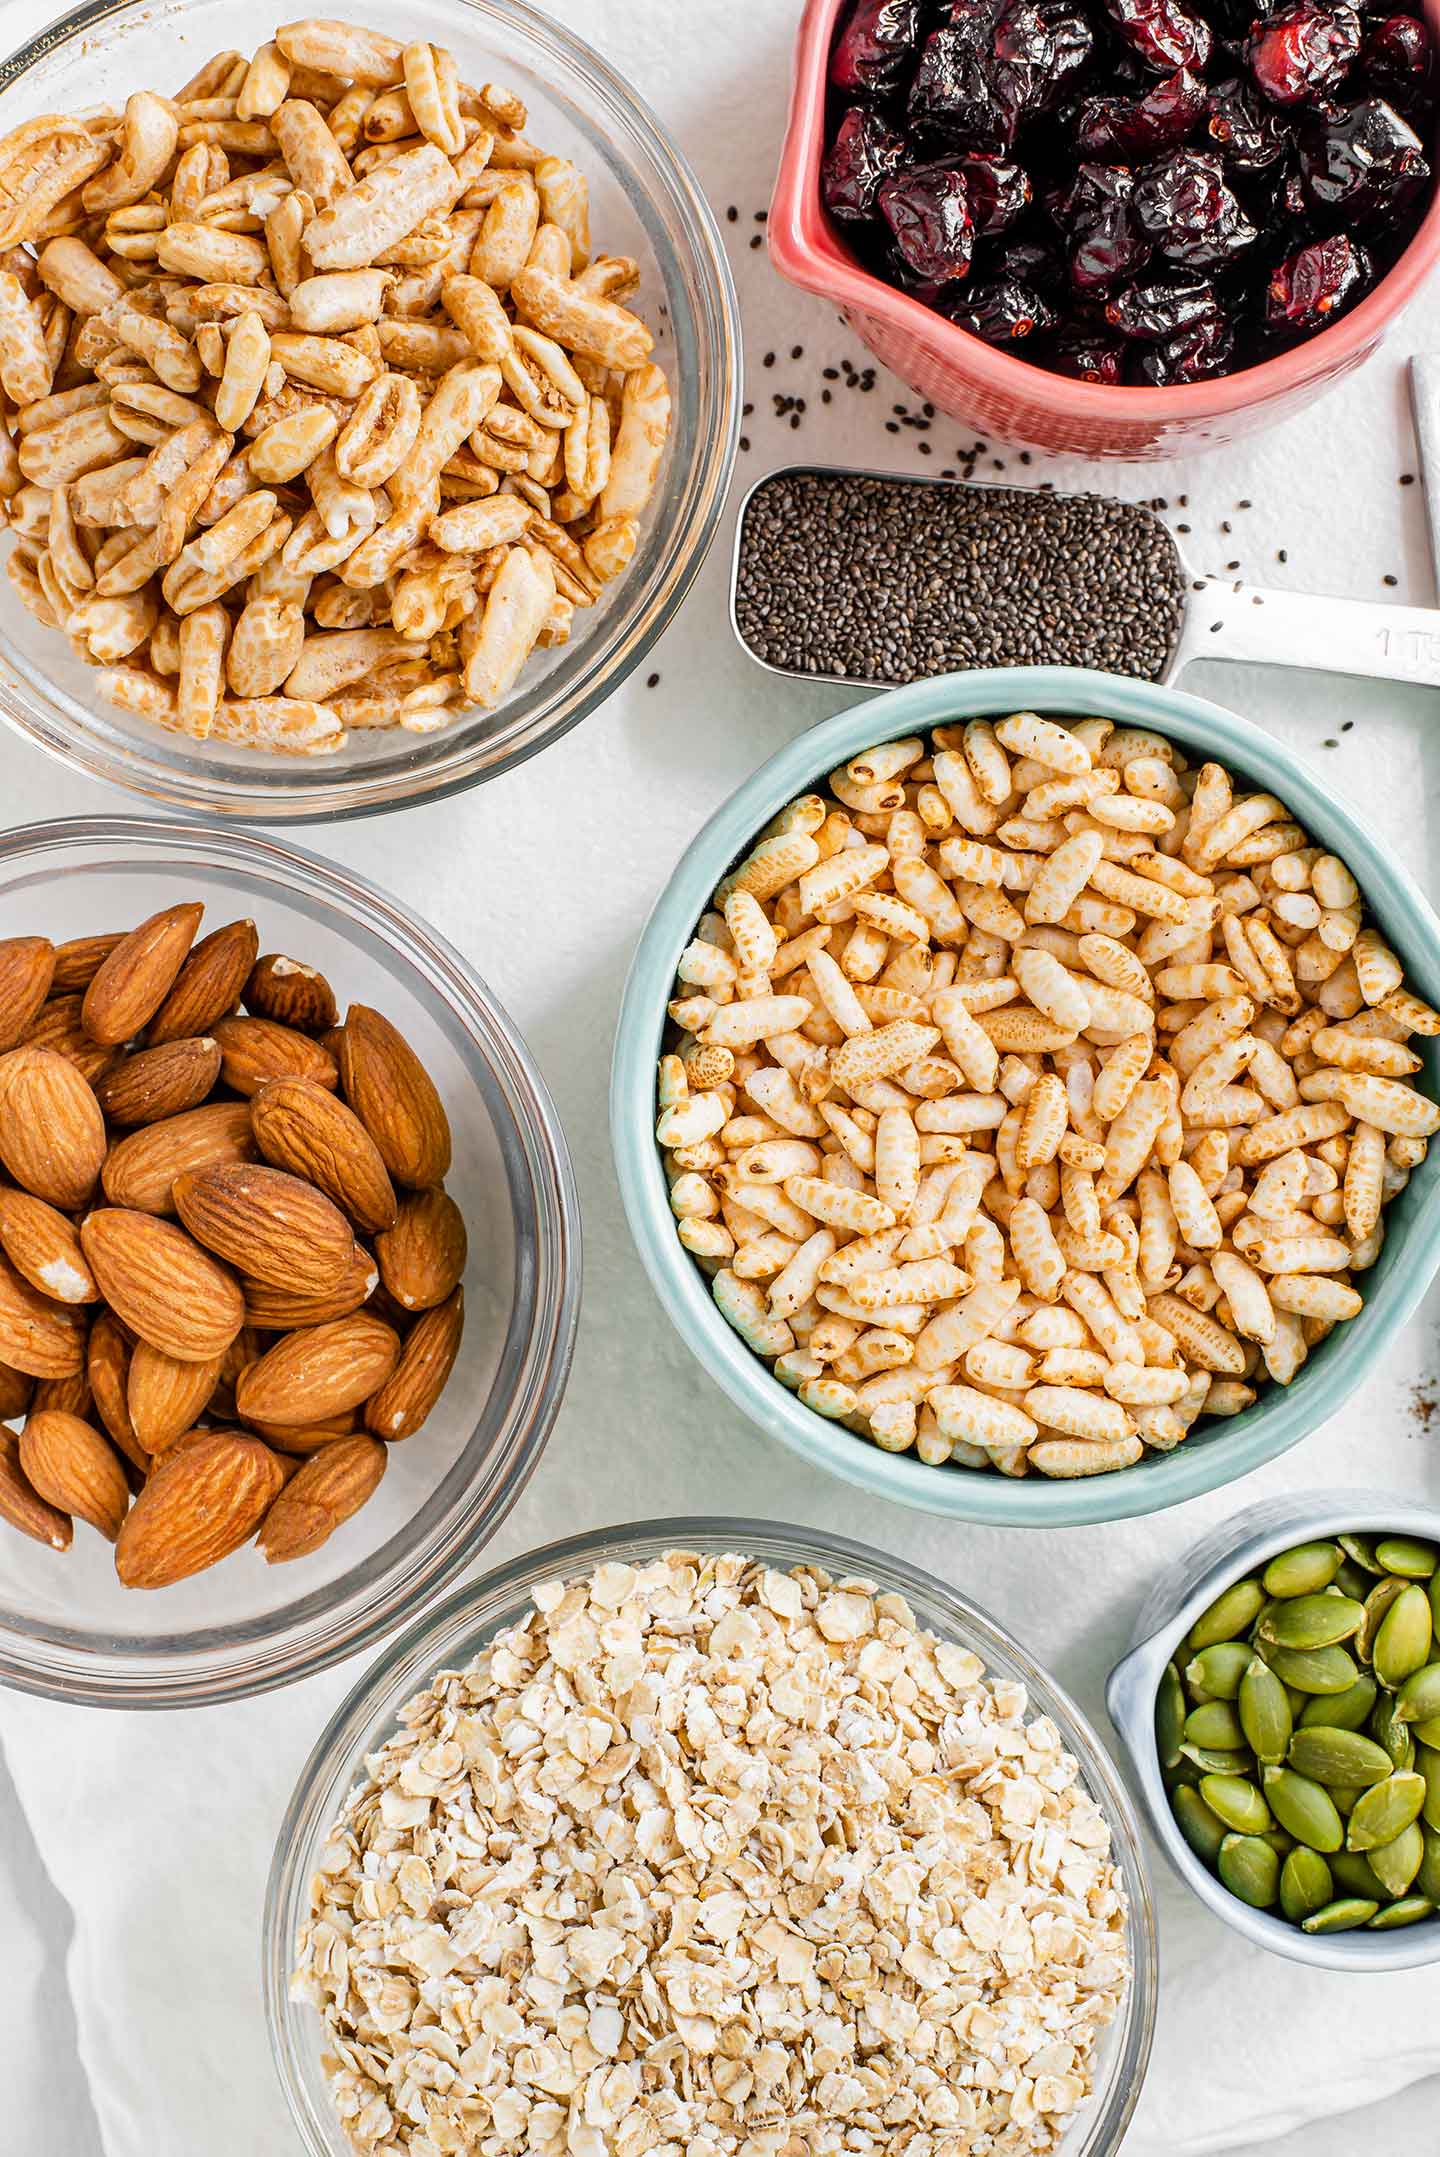
The bulk of this recipe is puffed rice! I have loved keeping puffed rice or other grains (like kamut) in my pantry for making granola bars at home. They are also great to toss on smoothie bowls or into energy balls if I want to bulk them up a bit. Chocolate puffed rice cereal is a little pricier but also a lot of fun for making chocolate granola bars!
For these easy and chunky granola bars I use:
- Puffed rice
- And puffed kamut (for a bit of a bigger grain and different texture)
- Quick (or rolled) oats
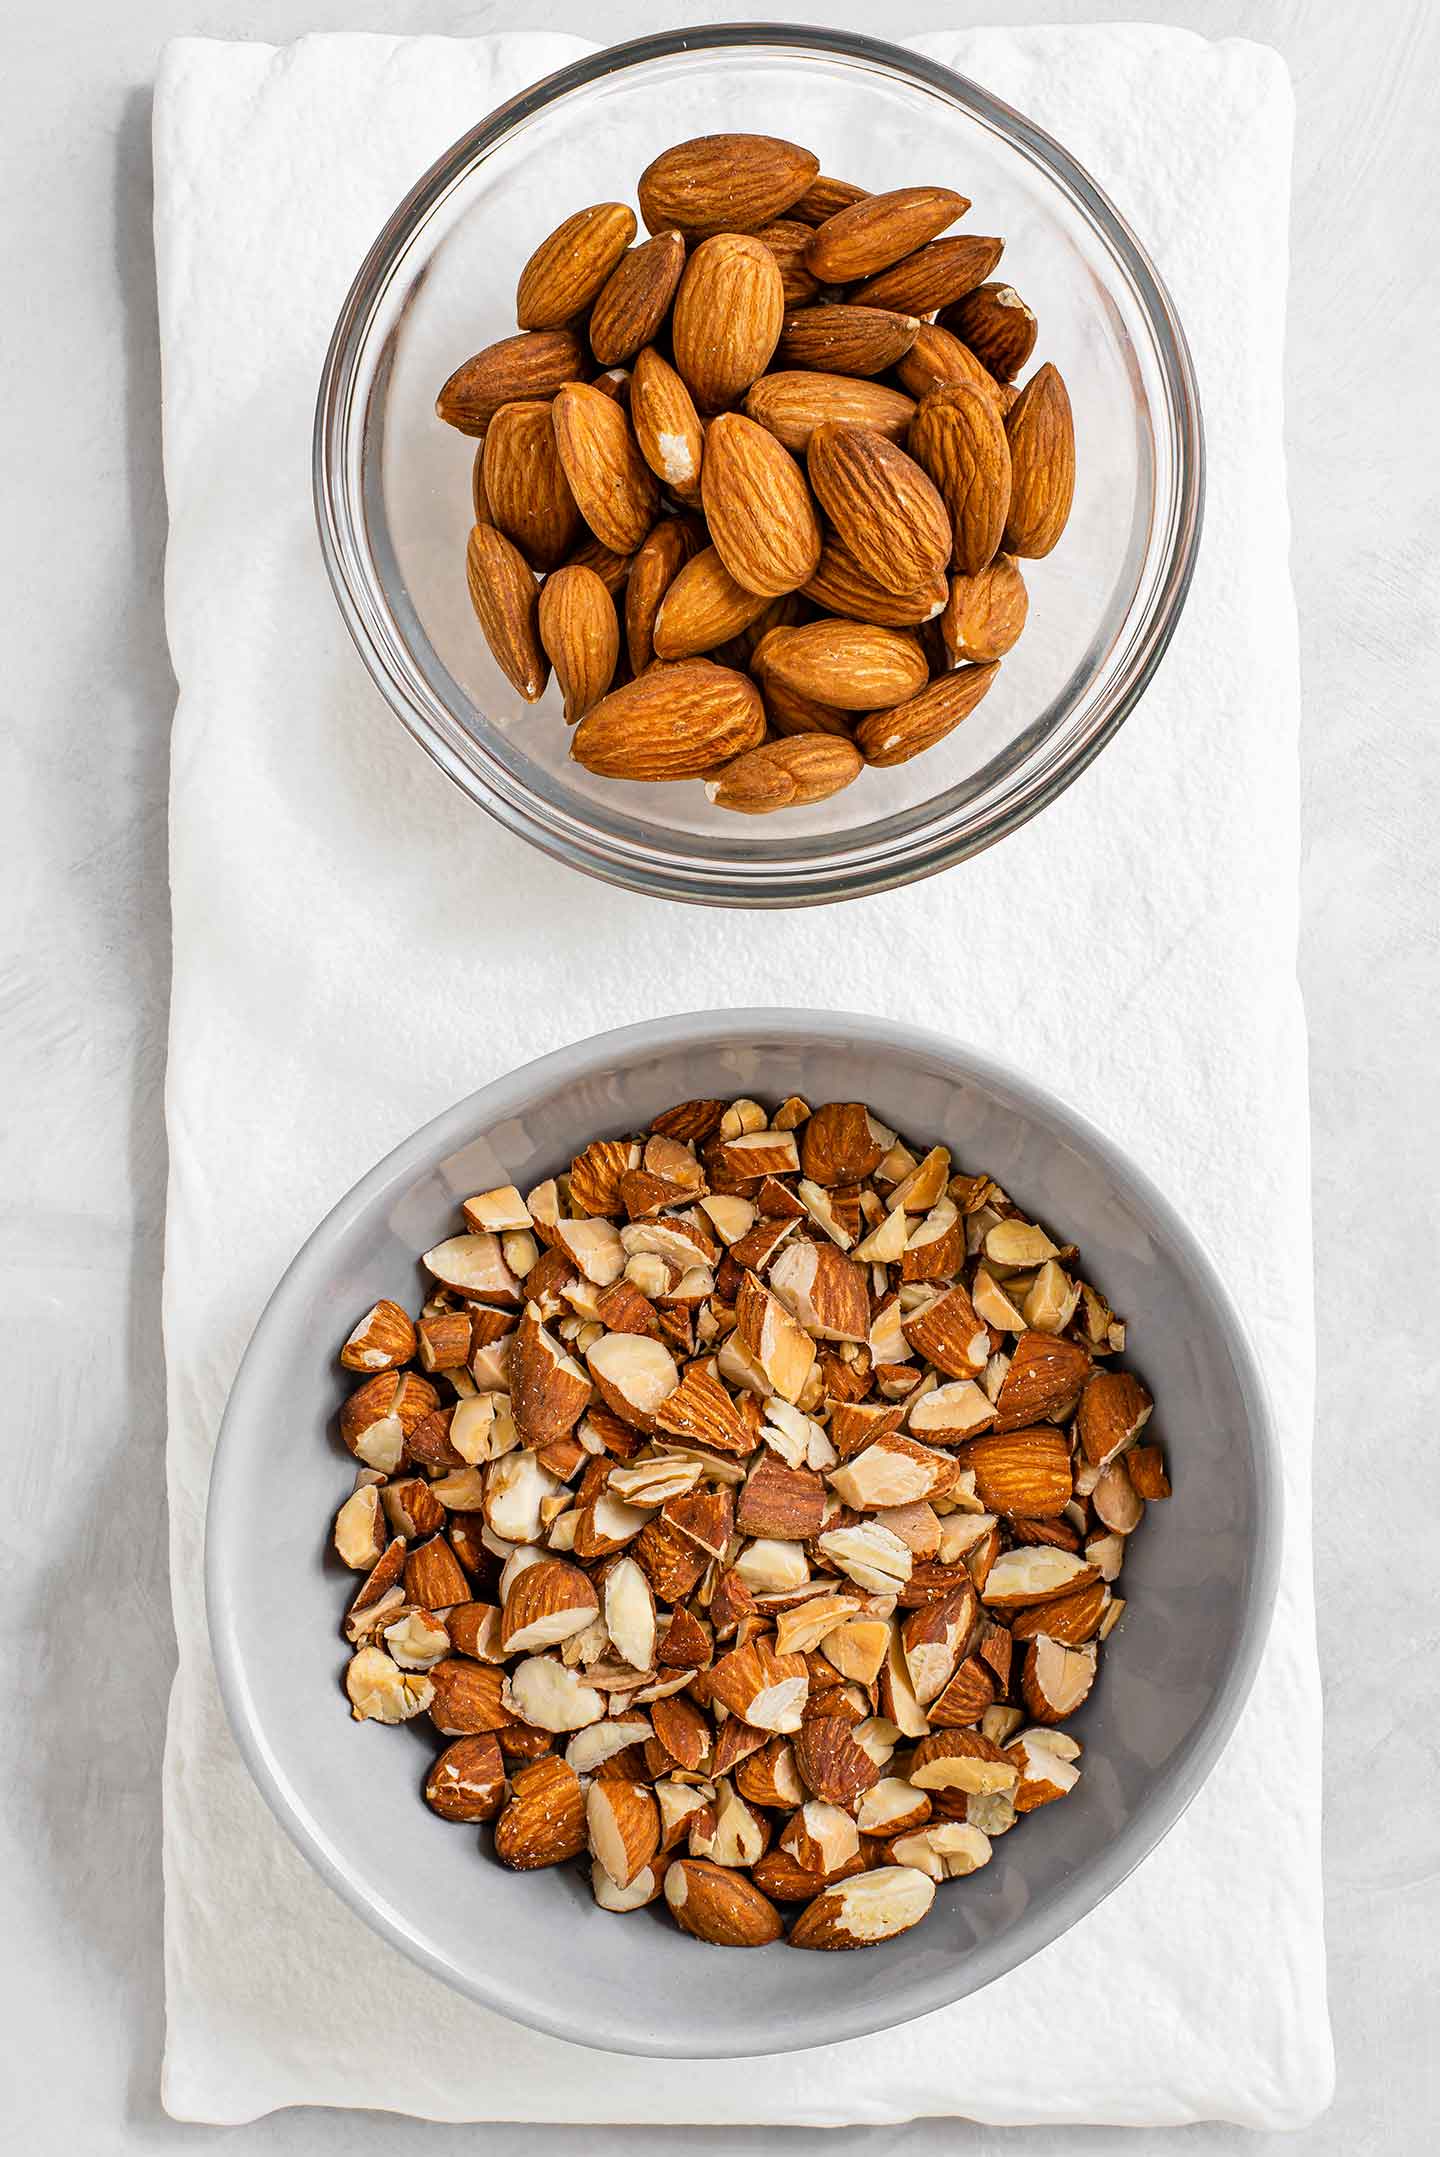
- Roasted almonds
- Pumpkin seeds
- Dried cranberries
- Chia seeds
- And hold them together with peanut butter, maple syrup, and applesauce
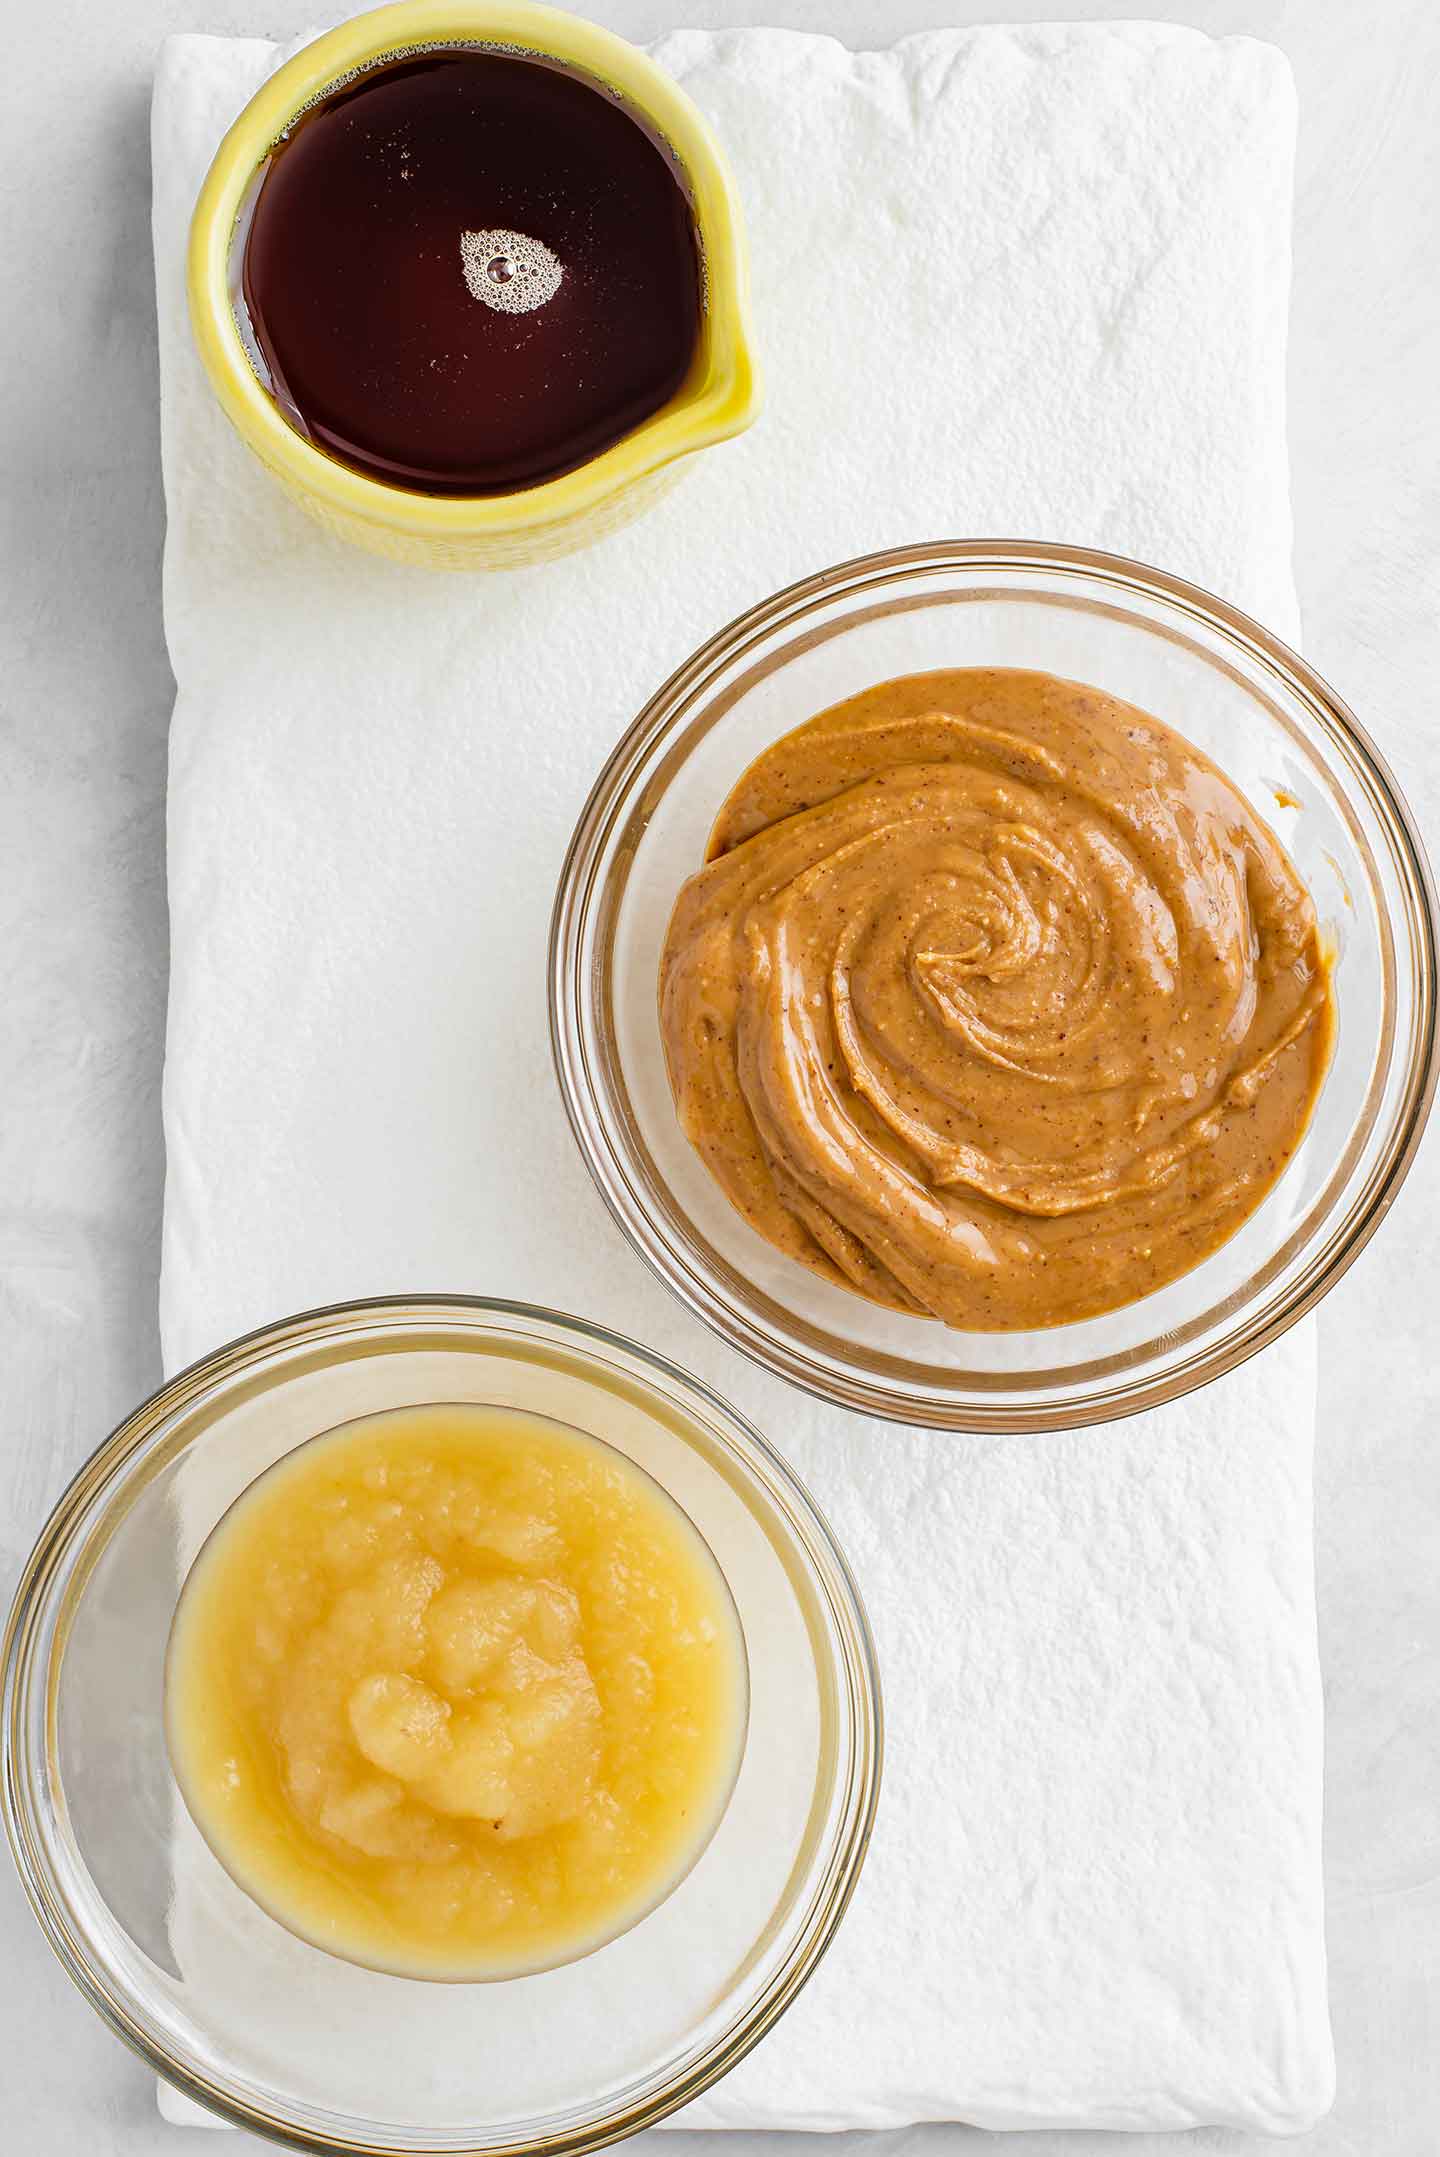
I love sneaking applesauce into this recipe to add enough moisture to keep these granola bars together. Unsweetened applesauce adds a bit of extra sweetness in a very natural way!
- Feel free to use all rice puffs instead of the kamut puffs or vice versa!
- Quick or rolled oats are a great way to add more bulk to granola bars without adding very much to the cost.
- Make these nut-free by omitting the almonds (or using another seed or dried fruit in their place) and using a seed butter in place of the peanut butter! Sunflower butter and tahini (made from sesame seeds) are two common substitutes.
Oh... and roasting the almonds isn't absolutely necessary but it gives the granola bars a HUGE boost of toasty flavour!
How To Make Puffed Rice Granola Bars At Home
Even with taking an extra few minutes to roast the almonds, I love how quick and easy it is to bring these granola bars together.
- Start by roasting the almonds at 350 degrees F for 6-8 minutes or until fragrant. Once cool enough to handle, coarsely chop the almonds.
- Combine the dry ingredients in a large bowl.
- Mix the peanut butter, maple syrup, and applesauce. If your peanut butter is very firm, heat the wet ingredients over very low heat on the stovetop or in the microwave. This softens the mixture making it really easy to pour over the dry ingredients and stir everything together.
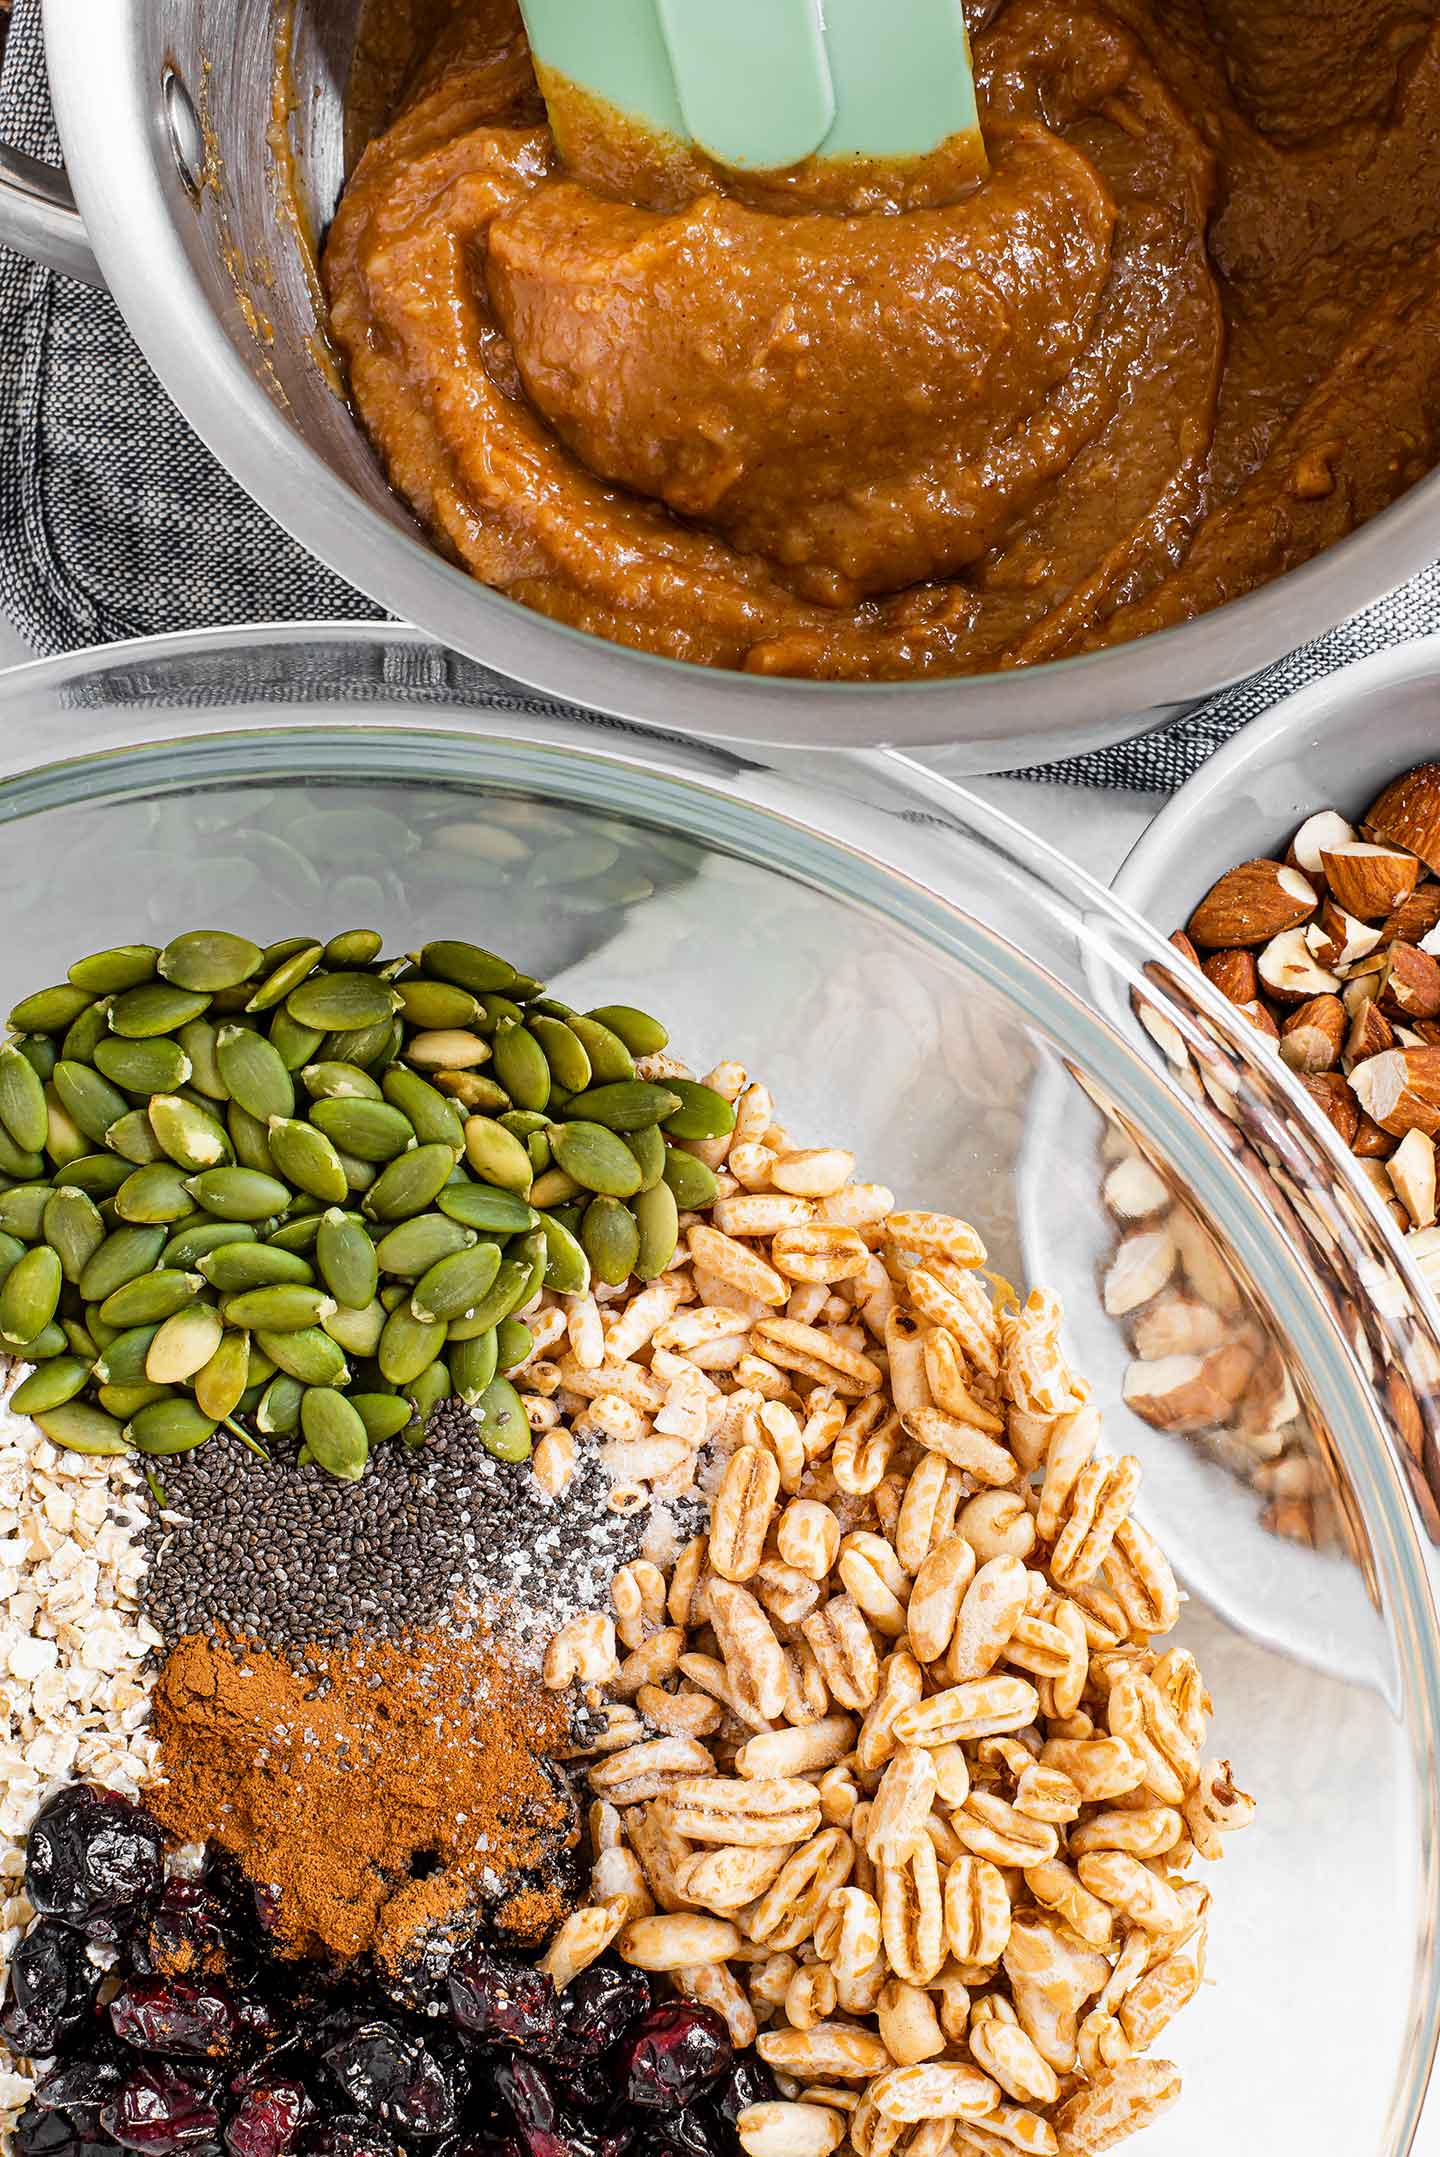
- Pour the sticky mixture over the dry ingredients.
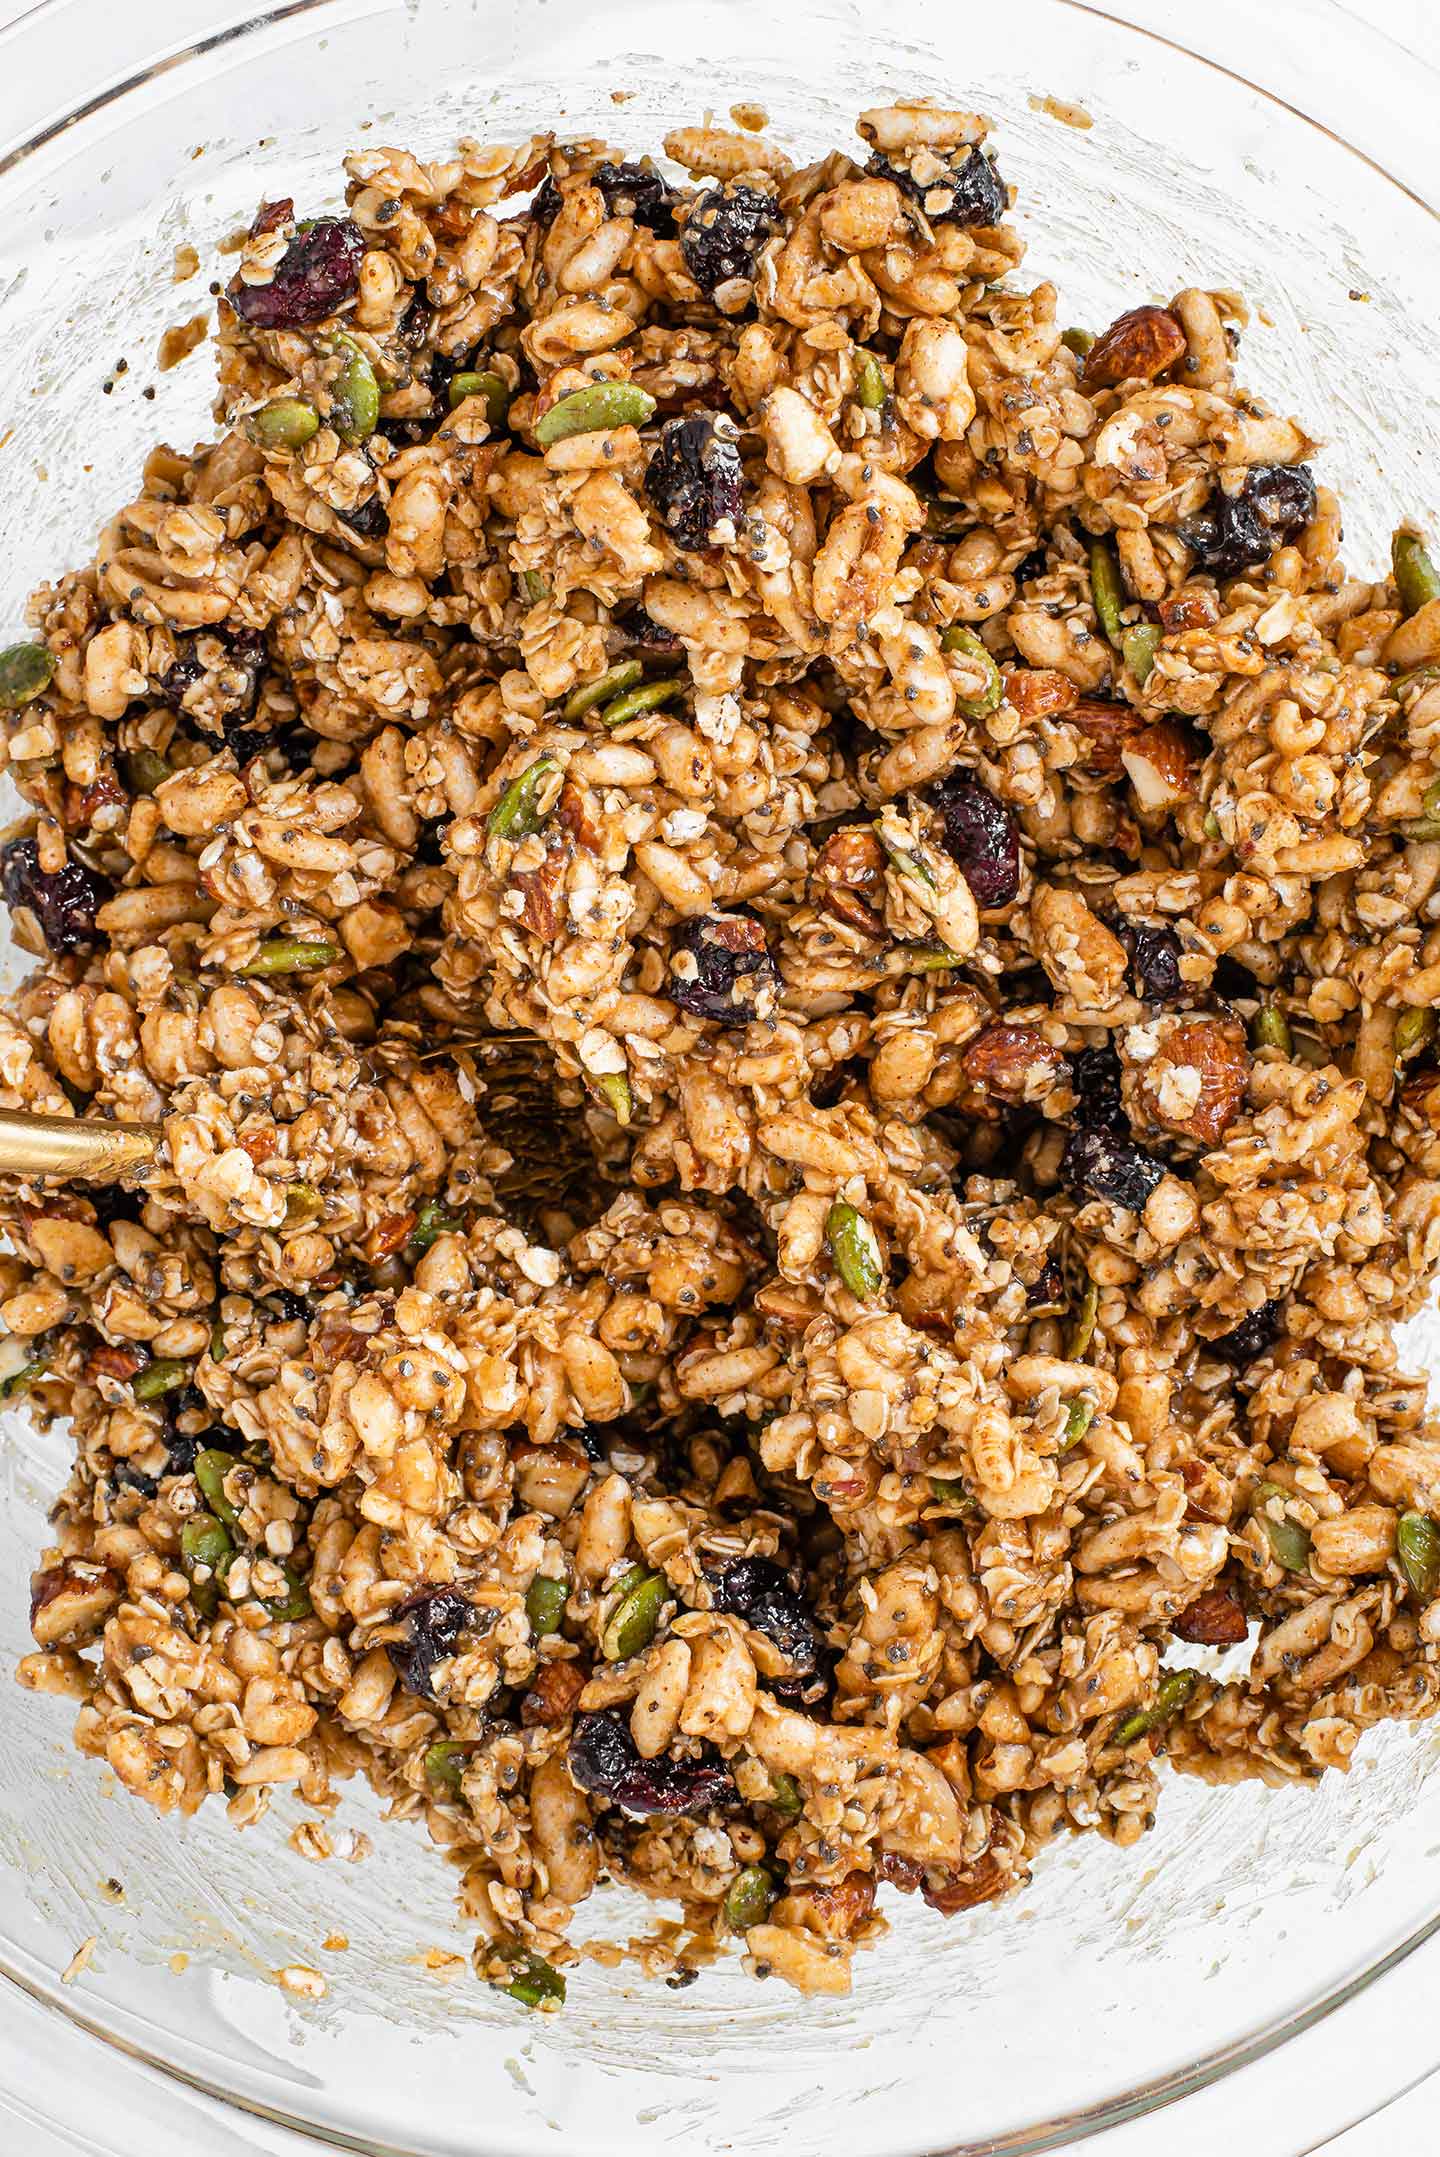
- Stir everything together.
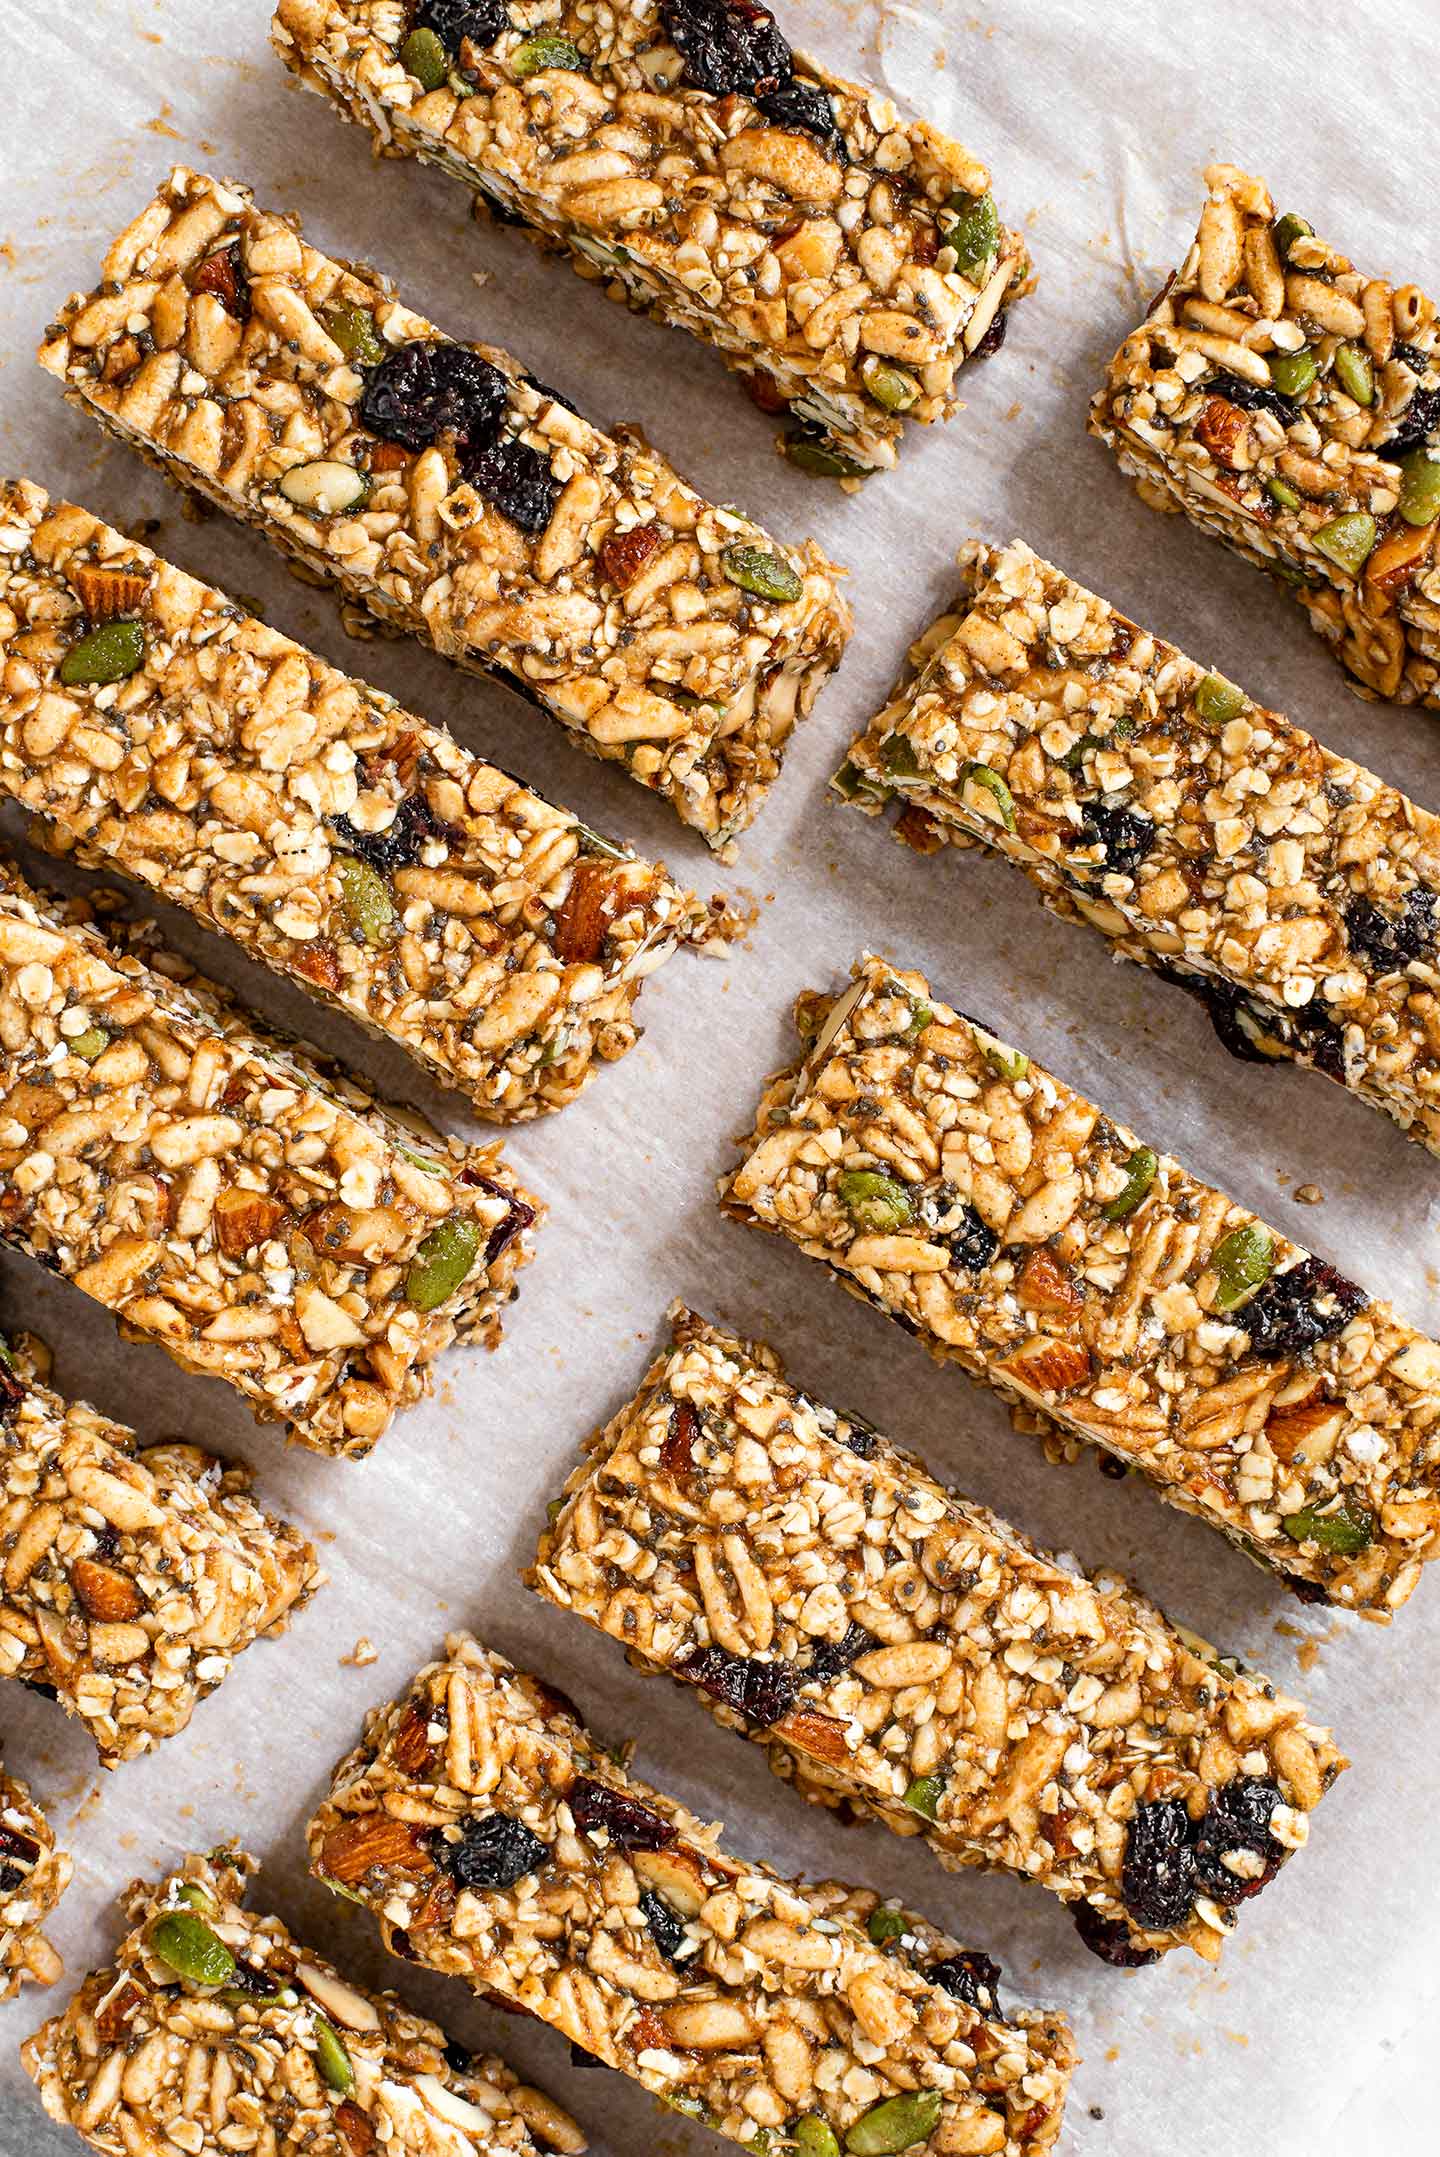
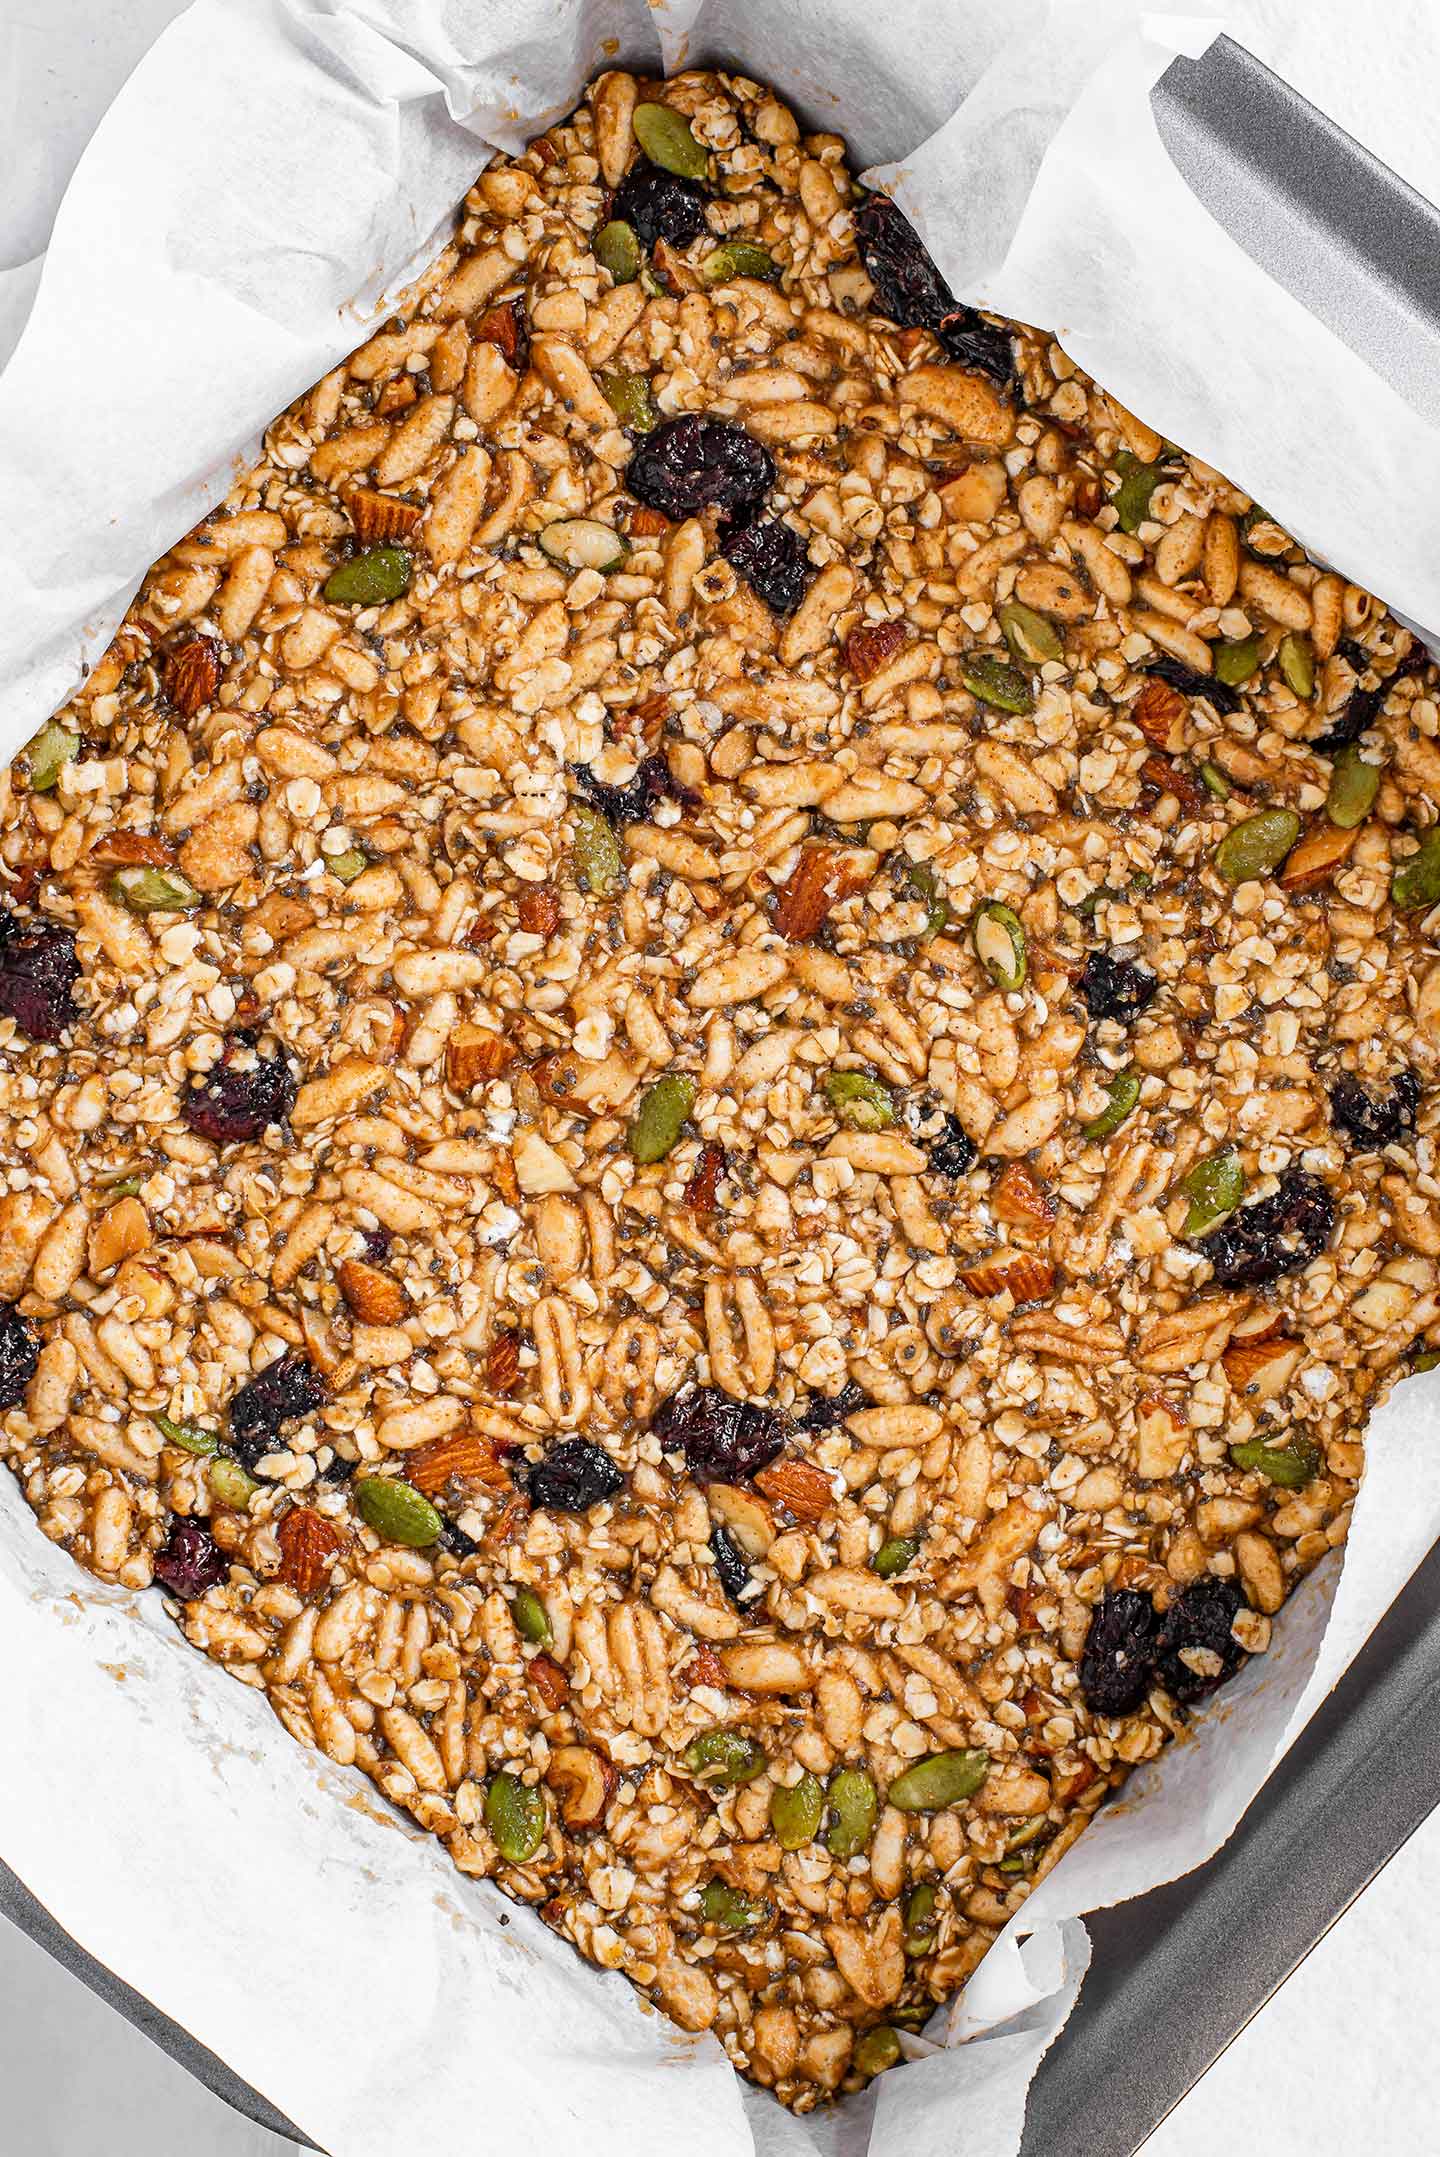
- And pour your granola bar mixture into a baking pan lined with parchment paper (this makes lifting your set granola bars out of the pan quick and easy).
- Pack the mixture down as firmly as possible using the bottom of a glass or your fingers. Wrapping a piece of parchment paper around the bottom of a glass or lightly dampening your fingertips will make this much easier!
- And allow the mixture to set for about 30 minutes in the freezer so that it is easier to cut into clean bars!
- Use the edges of the parchment paper to lift the mixture out of the baking pan.
- And slice into bars!
- I like making 12 4" bars but feel free to slice them larger or smaller to suit your preference!
Recipe Cost
These puffed rice granola bars cost us roughly: $5.06 Canadian or ($0.42/bar). We end up with 12 homemade granola bars that are quite thick and filling.
In comparison, buying higher end granola bars from our local grocery store would cost us roughly $1.00/bar.
If we buy granola bars from our wholesale store, these homemade bars are still more cost effective than buying the higher end granola bars and roughly $0.10 more than the middle range brands.
I often adapt this recipe with some small changes that can reduce the cost of these bars:
- Using less maple syrup and peanut butter will mean the bars don't stick together as well BUT you end up with a really tasty crumbly granola mixture to enjoy as is or use as a topping on yogurt etc!
- Omitting the almonds and using just puffed grains and oats will bring the cost down.
- Substituting another seed like sunflower seeds for the pumpkin seeds could work.
- And substituting raisins for the dried cranberries can be another thrifty option!
I love that these puffed rice granola bars feel festive and perfect for fall. Let me know in the comments below if you make this recipe as is or how you adapt it to your preference!
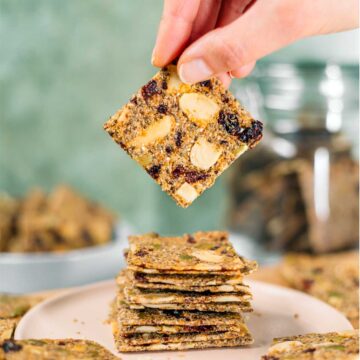
For a thrifty chocolate flavoured granola bar make sure to jump over to our Easy No Bake Chewy Chocolate Chip Bars! And if you're in a festive mood... our Easy Pumpkin Pie Energy Balls are one of our favourites!
Print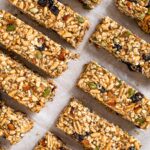
Puffed Rice Granola Bars For On The Go
- Total Time: 15 minutes (plus at least 10 minutes setting time)
- Yield: 12 bars 1x
- Diet: Vegan
Description
Easy vegan puffed rice granola bars are ready in minutes! Sticky and soft with a bit of crunch! Peanut buttery, filling, and festive!
Ingredients
- ½ cup almonds (roasted and coarsely chopped, can omit for nut-free version)
- 1 cup rolled oats (can use quick oats)
- 1 cup puffed rice
- ¾ cup puffed kamut (can use more oats or puffed rice)
- ½ cup dried cranberries
- ¼ cup pumpkin seeds
- 1 tbsp chia seeds
- ¾ tsp cinnamon
- ¼ tsp salt
- ½ cup peanut butter (or seed butter)
- ⅓ cup maple syrup (see notes for decreasing syrup)
- ¼ cup applesauce (or sub more maple syrup, peanut butter, or tahini)
*All the ingredients for this recipe are from our pantry and freezer tips!
Instructions
*For a nut-free version you can omit the almonds or use another seed or dried fruit in their place. The peanut butter can be replaced with a seed butter like sunflower or tahini.
- Preheat your oven to 350 degrees F. When the oven is hot, spread the almonds on a baking sheet and toast for 6-8 minutes until lightly browned and fragrant. Once cool enough to handle, coarsely chop the almonds.
- Line an 8x8 inch pan with baking paper so that you can easily lift out the granola bars when they’re done. (Cutting a slit through the paper in each corner of the tin will allow you to fold the corners and create cleaner edges for your granola bars).
- Combine the dry ingredients in a large bowl and stir to mix.
- If your peanut butter is runny you can mix the wet ingredients in a separate bowl. If your peanut butter is too firm, gently heat the wet ingredients over very low heat on your stovetop or in the microwave to combine them evenly.
- Pour the wet mixture over the dry. Stir to coat evenly until your granola is sticky and evenly combined.
- Spoon the sticky mixture in your lined 8x8 inch pan and spread it evenly into the corners. Pack the mixture down as firmly as possible using the back of a glass wrapped in baking paper to minimize any sticking. Alternatively, you can lightly dampen your fingers and compress the mixture as much as possible with your fingers.
- Place the pan in the freezer and allow the mixture to harden for at least 10 minutes but ideally 30. This will make it easier to slice the bars without much crumbling.
- Using the edges of the baking paper, lift out the mixture, and slice into 12 bars.
- Store in the refrigerator for up to 2 weeks or in the freezer for 1 month.
Notes
Approximate Cost: CAD $5.06 for 12 bars ($.42/bar) vs. approximately $1.00/bar for higher end granola bars at our local grocery store. These are still more cost effective than higher end bars at our wholesale store and $0.10 more than the middle range bars.
I do often make these with decreased amounts of peanut butter and maple syrup. The bars will crumble quite a bit so if you don’t mind some looser granola… feel free to decrease the peanut butter and sweetness from the maple syrup. It makes a great oatmeal/yogurt topping as more of a crumbled granola!
- Category: Snacks
- Method: No Bake
- Cuisine: Raw
Maria
This granola is so quick and easy to make. I love it! I wasn’t able to get many bars because mine was a bit crumbly. I think perhaps I didn’t push it down into the pan tightly enough? No harm done because I’m adding it to my yogurt and oatmeal as you suggested!
Kathryn Alexandre
Aw yes, thank you for letting me know. I just highlighted to pack the mixture down as much as possible in the recipe card so that others can do the same. I'm so glad that you are still enjoying it even though it is a little more crumbly!
Pauline
Hi! I’m confused! Why am I preheating the oven if they go into the freezer to harden and not cook? Am I missing something? 🙂
Pauline
Nevermind silly me. It’s for the nuts (I skipped the nuts)
Kathryn Alexandre
haha not a problem! I'm sorry for the confusion and I'm glad you realized it was for the nuts. I hope you enjoyed the bars! Thank you for trying them!
farah
Can I replace maple syrup with honey instead ? Should I use same measurement ?
Kathryn Alexandre
Yes that should work! I think using the same amount should be good. Honey might be a little more sticky than maple syrup but you want the granola bars to hold together so I think that's a good thing! Let me know how it works out and how you find the taste to be with honey!
Anonymous
Recently got a huge bag of puffed rice for a great price and this recipe was awesome. kids and wife loved them too. made a second batch without the nuts and school safe "nut butter" for the kiddos.
Kathryn Alexandre
oh great! I'm glad you loved using up that puffed rice for these. It's great to know that the kids liked them with the school safe "nut butter" too. Thank you so much for trying it and letting me know it was a hit!
Steph
Am I able to substitute the peanut butter with something else (due to allergies)....maybe more maple syrup & applesauce? Thanks
Kathryn Alexandre
Yes for sure! The bars will taste more sweet but that should work to hold them together. They may be a little crumbly since peanut butter is such a great binder but if it does crumble a bit it makes a really delicious looser granola! Any nut or seed butter (like tahini) will work to bind them so if there are any that you are not sensitive to then you can certainly sub one of those in too. I hope you enjoy them!
Christeen
These were fabulous and so easy to make! I love how versatile the recipe is and I could easily make subs using what I have in my pantry. I would never think to use apple sauce but it worked really well. Thank you!
Kathryn Alexandre
I'm so glad you enjoyed these and can see how you can adjust them to suit what's in your pantry. I really like using applesauce to lend some natural sweetness and act as a bit of an egg or oil substitute in snacks and desserts so I'm glad you liked that addition. Thank you so much for taking the time to leave a lovely 5 star review!
Jo Jessop
Recipe tried. Nice. Even 2 days later.
Kathryn Alexandre
Awesome! I'm glad to know you're liking them! Thank you so much for giving them a try!
Max
Use this recipe for crunchy flapjacks! Place the tray in an oven at 350F for 25 mins until the top is golden. Highly recommend
Kathryn Alexandre
Oh cool! Thanks for letting us all know you use this recipe for flapjacks. I'll give this a try. Thank you so much Max!
Neha
Hi I tried this , it came out really yum . But it didn’t get hardened . Slightly sticky and soft .
Is it because I did not pack it properly ?
Kathryn Alexandre
I'm glad you liked the flavour. Because the bars aren't baked they stay a little sticky and soft and don't get hard. You do have to pack them down firmly for them not to fall apart but it sounds like they might have held together for you so I don't think that contributed. If you store them in the freezer and can take one out just before you eat it then they won't be as soft but if you store them in the fridge or have them out of the fridge for a little while they will be a softer/slightly sticky texture for sure.
I'll keep in mind to try and create a hard granola bar. I might be able to take my "Chunky Peanut Butter Granola" recipe which is baked and turn it into a bar.
Eleanor
Delicious I had puffed Quinoa so that’s what I used and didn’t put the whole amount of maple syrup in and didn’t use nuts 😃
Kathryn Alexandre
Oh great! I've been wanting to use puffed quinoa in a snack like these but I have a hard time finding it in stores around me. I'm so glad you enjoyed it with those few swaps and I really appreciate you taking the time to leave a lovely 5 star review! Enjoy!