
Ever wondered if there is a way to use up all the rind leftover from your tasty watermelon? Well there is! Add your favourite fruit to this watermelon rind jam for a great low waste recipe! Made with less sugar, it won't last forever in your pantry but it will be delicious.
Delicately Sweet On Its Own
Add Flavour With Your Favourite Fruit
Soft In 25 - 30 Minutes
Easily Blended For A Smooth Consistency
And Makes A Perfect Snack!
Prepare The Watermelon Rind
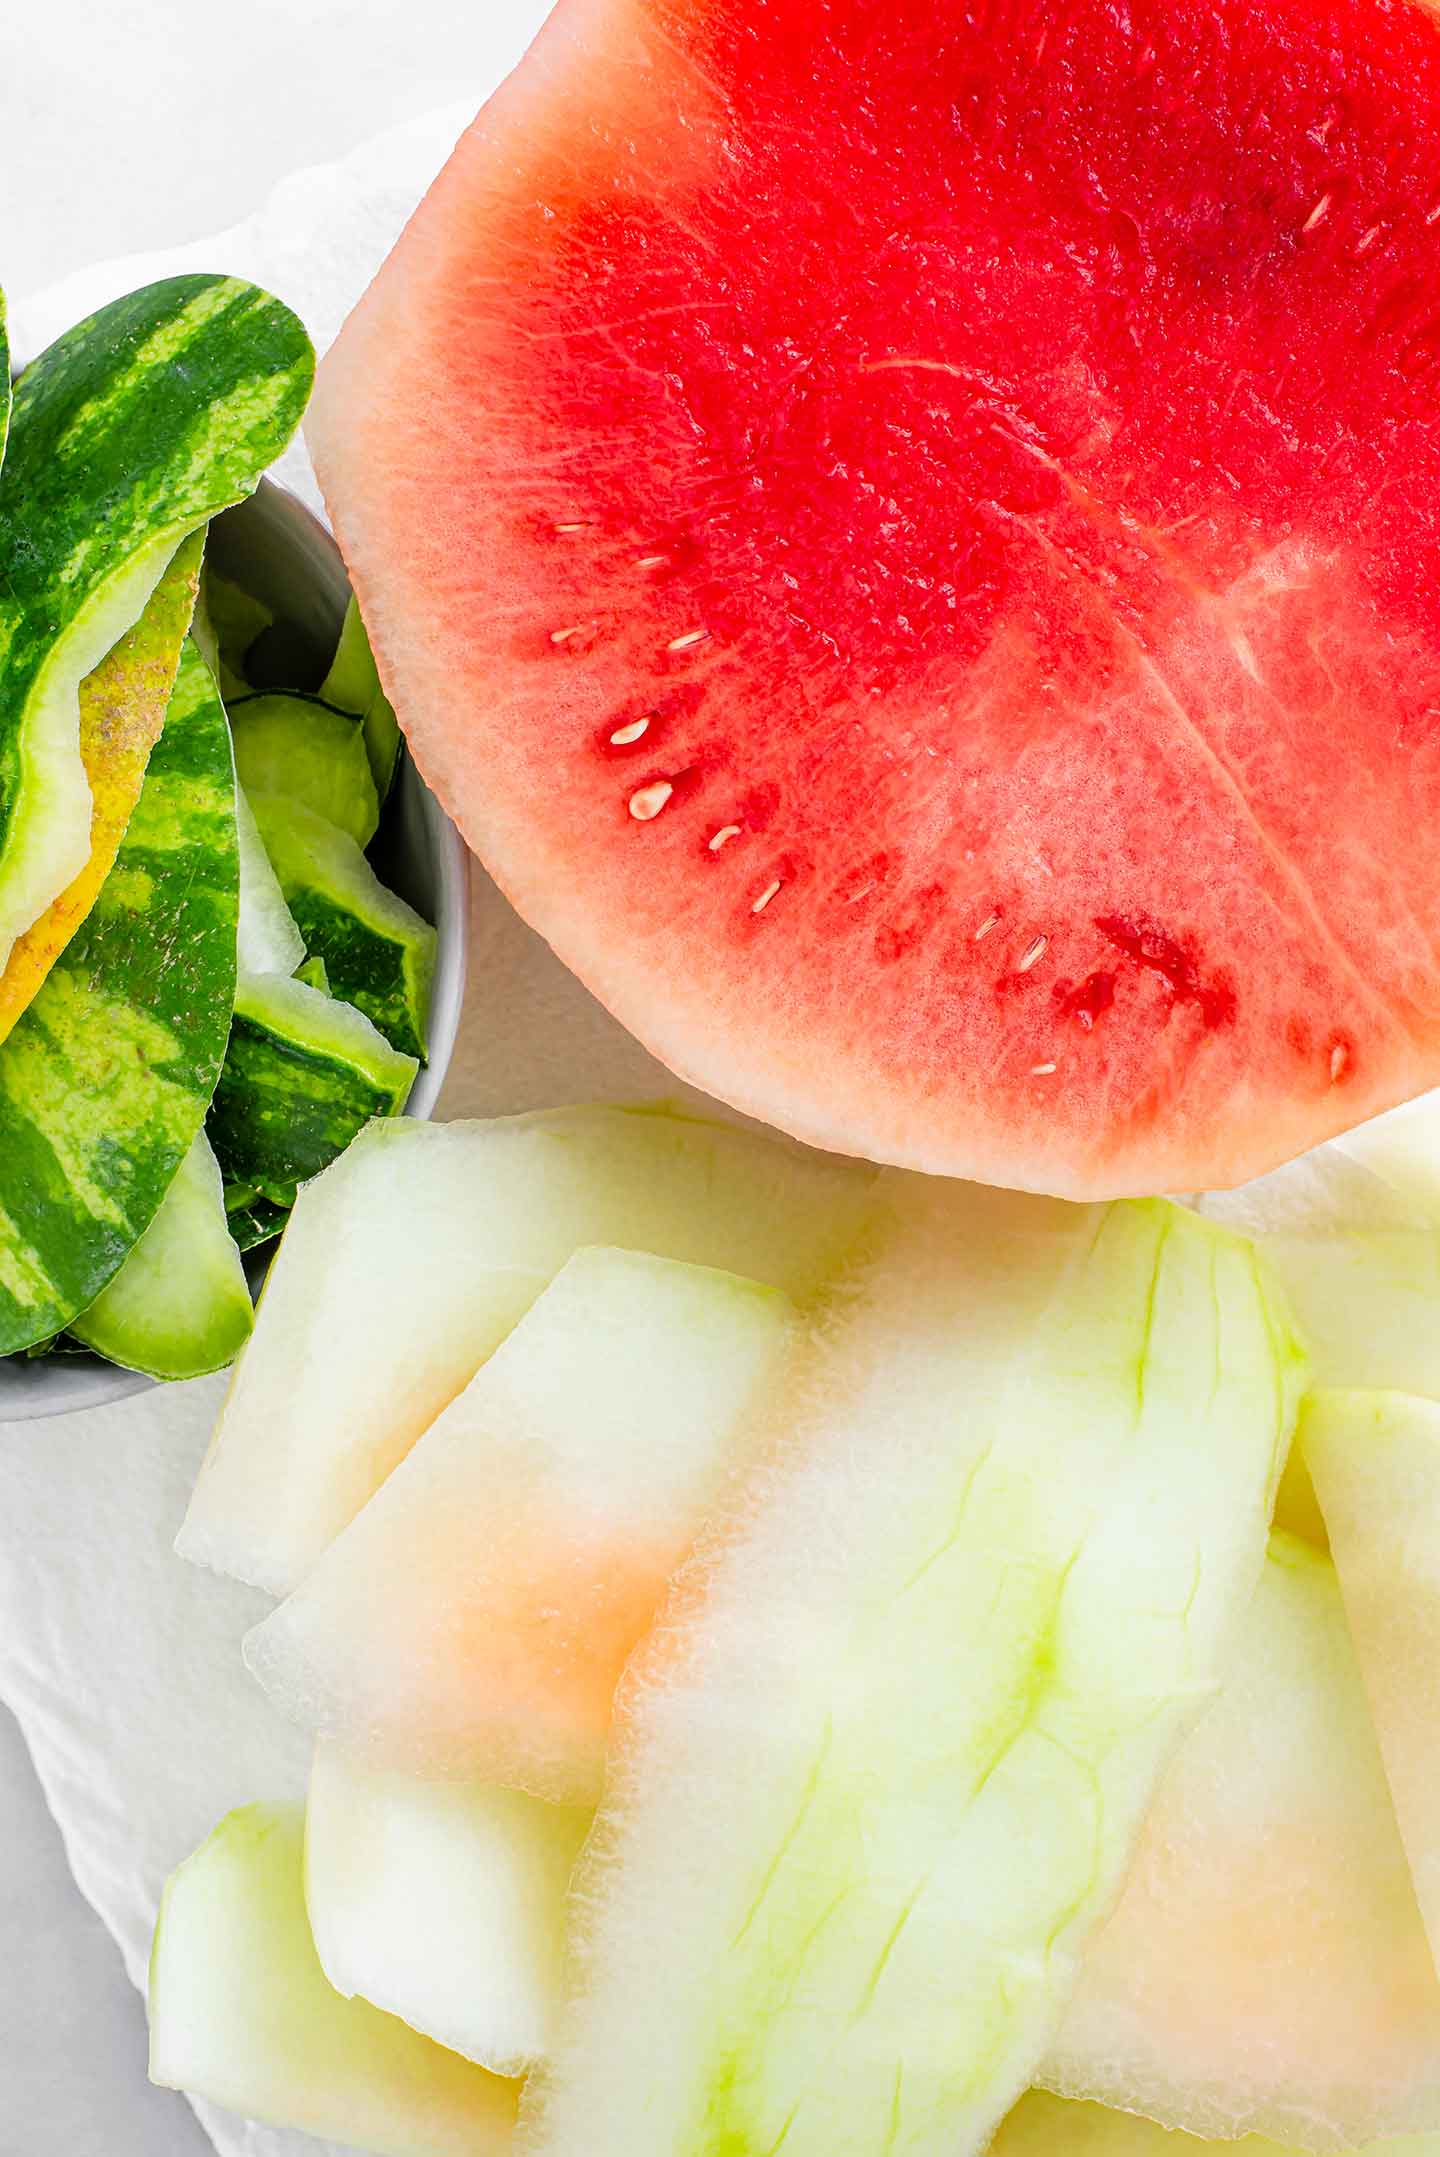
The part of the watermelon we are using for this recipe is the thick white rind between the green skin and the sweet fruit. When you're cutting up your watermelon, take an extra few minutes to:
- Slice away the tough outer layer of green skin.
- Then slice the thick white rind away from the pink (or yellow) fruit.
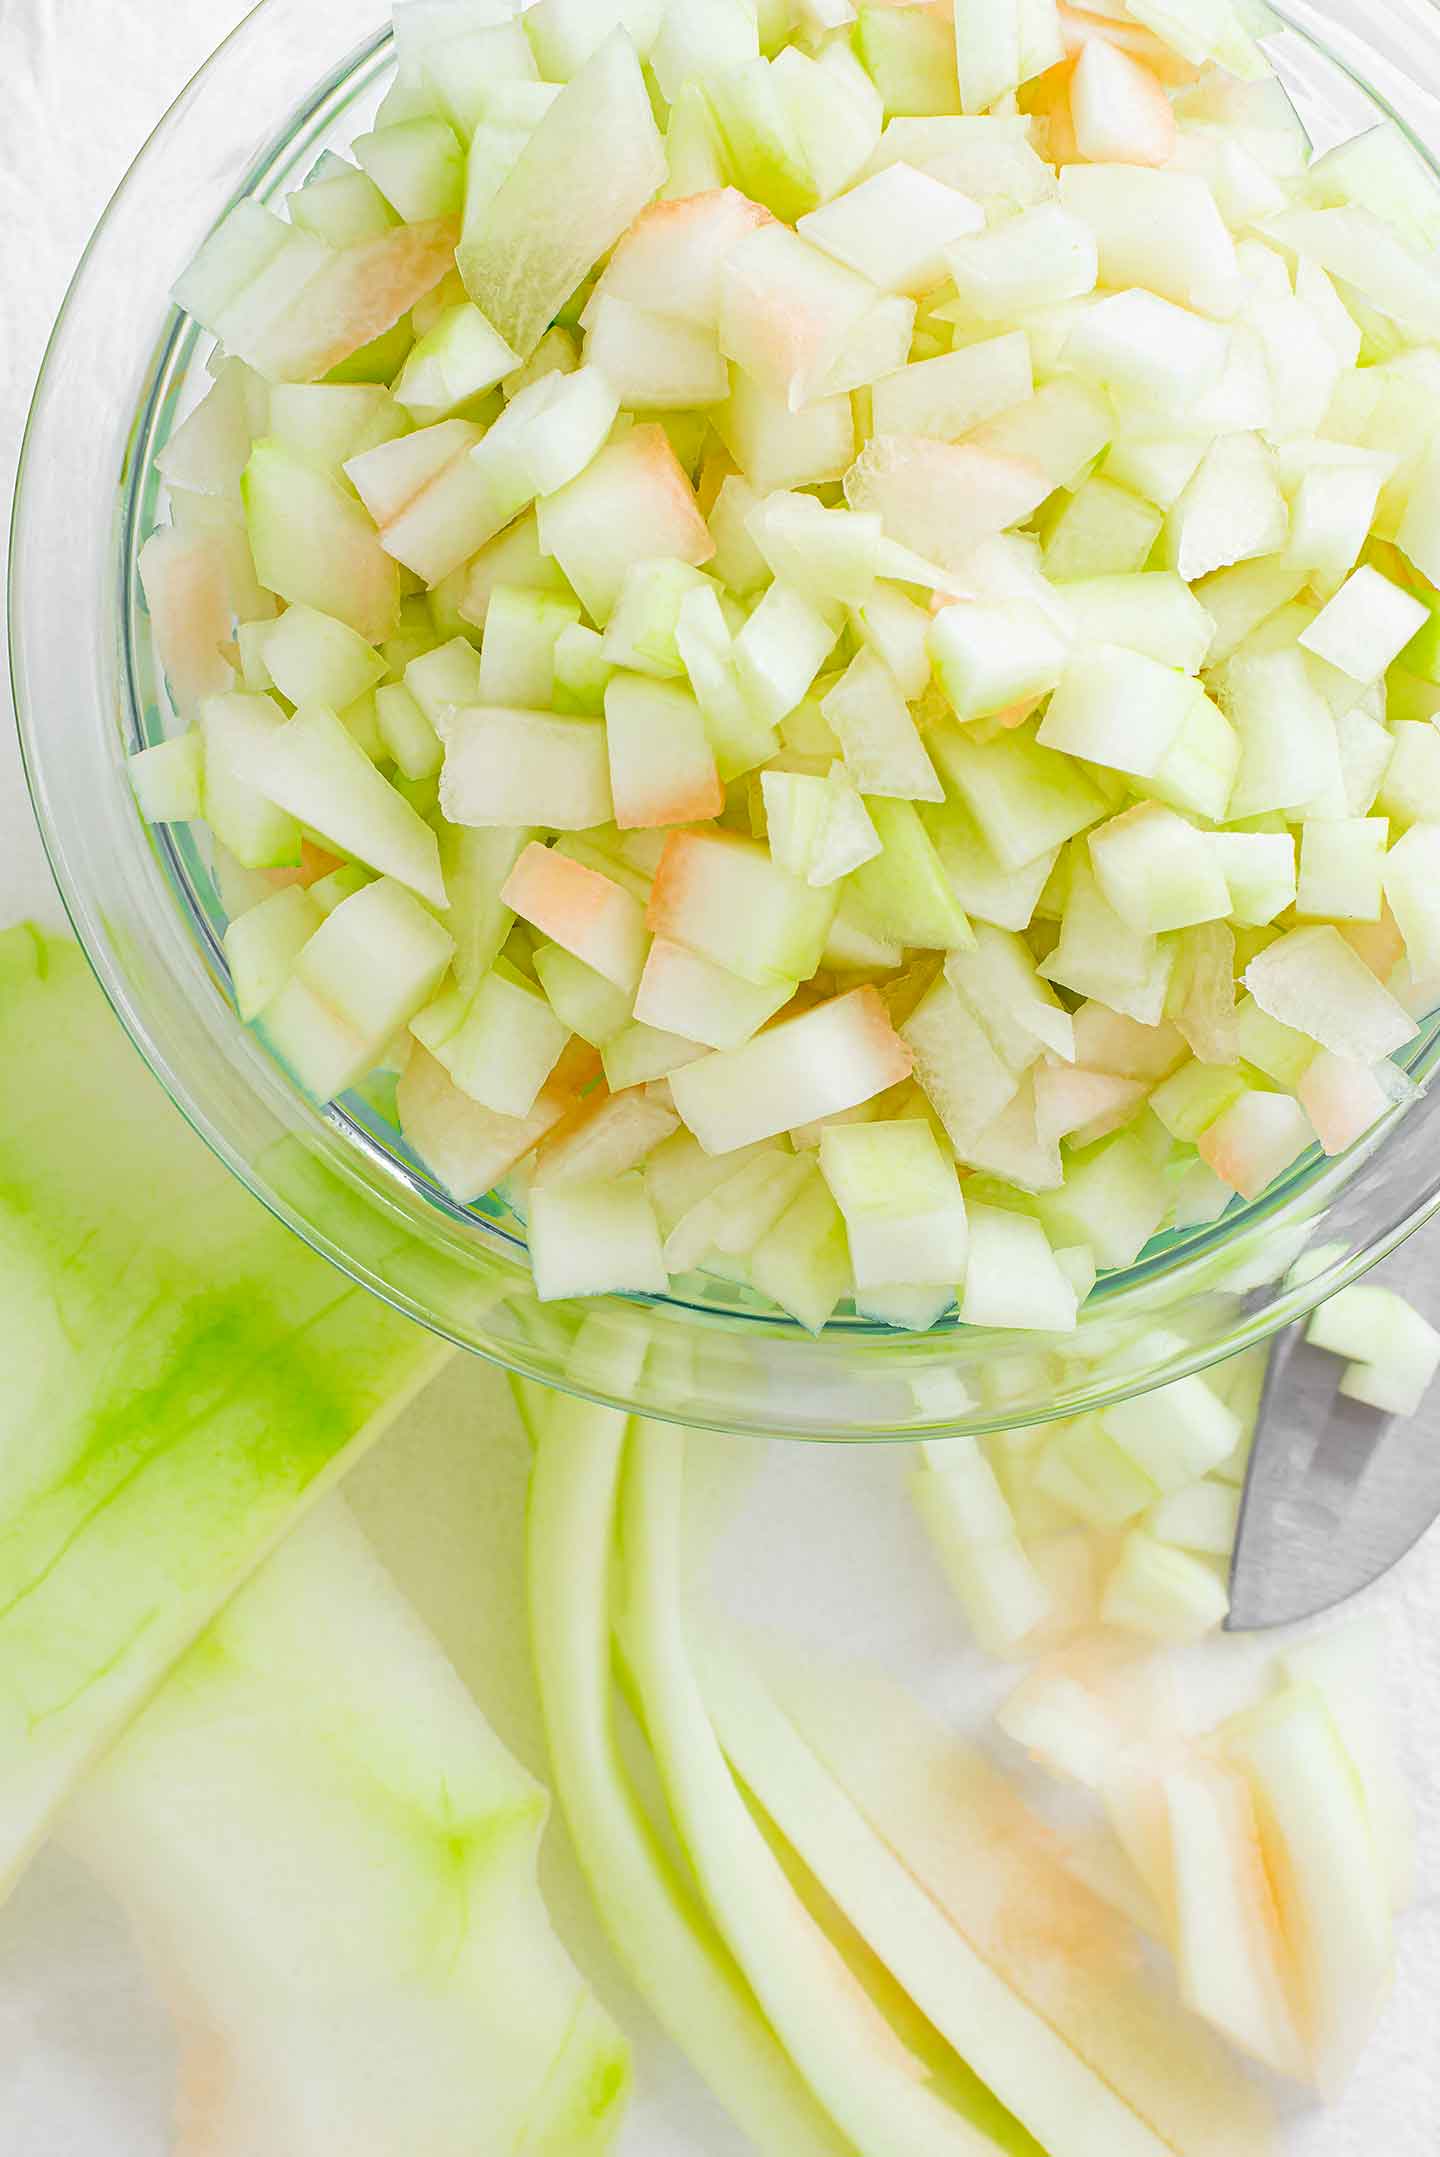
- Finally, dice the watermelon rind as small as you can for the quickest cooking time!
How To Make Watermelon Rind Jam
In order to soften the thick rind we boil the rind with some lemon juice and sugar until it's soft and translucent. Since there is only the two of us, we usually buy miniature watermelons. 1 mini watermelon tends to yield about 3-5 cups of diced rind.
*If you have a larger watermelon, adjust the recipe to suit how much rind you have OR freeze some of it so you can make multiple batches of jam.
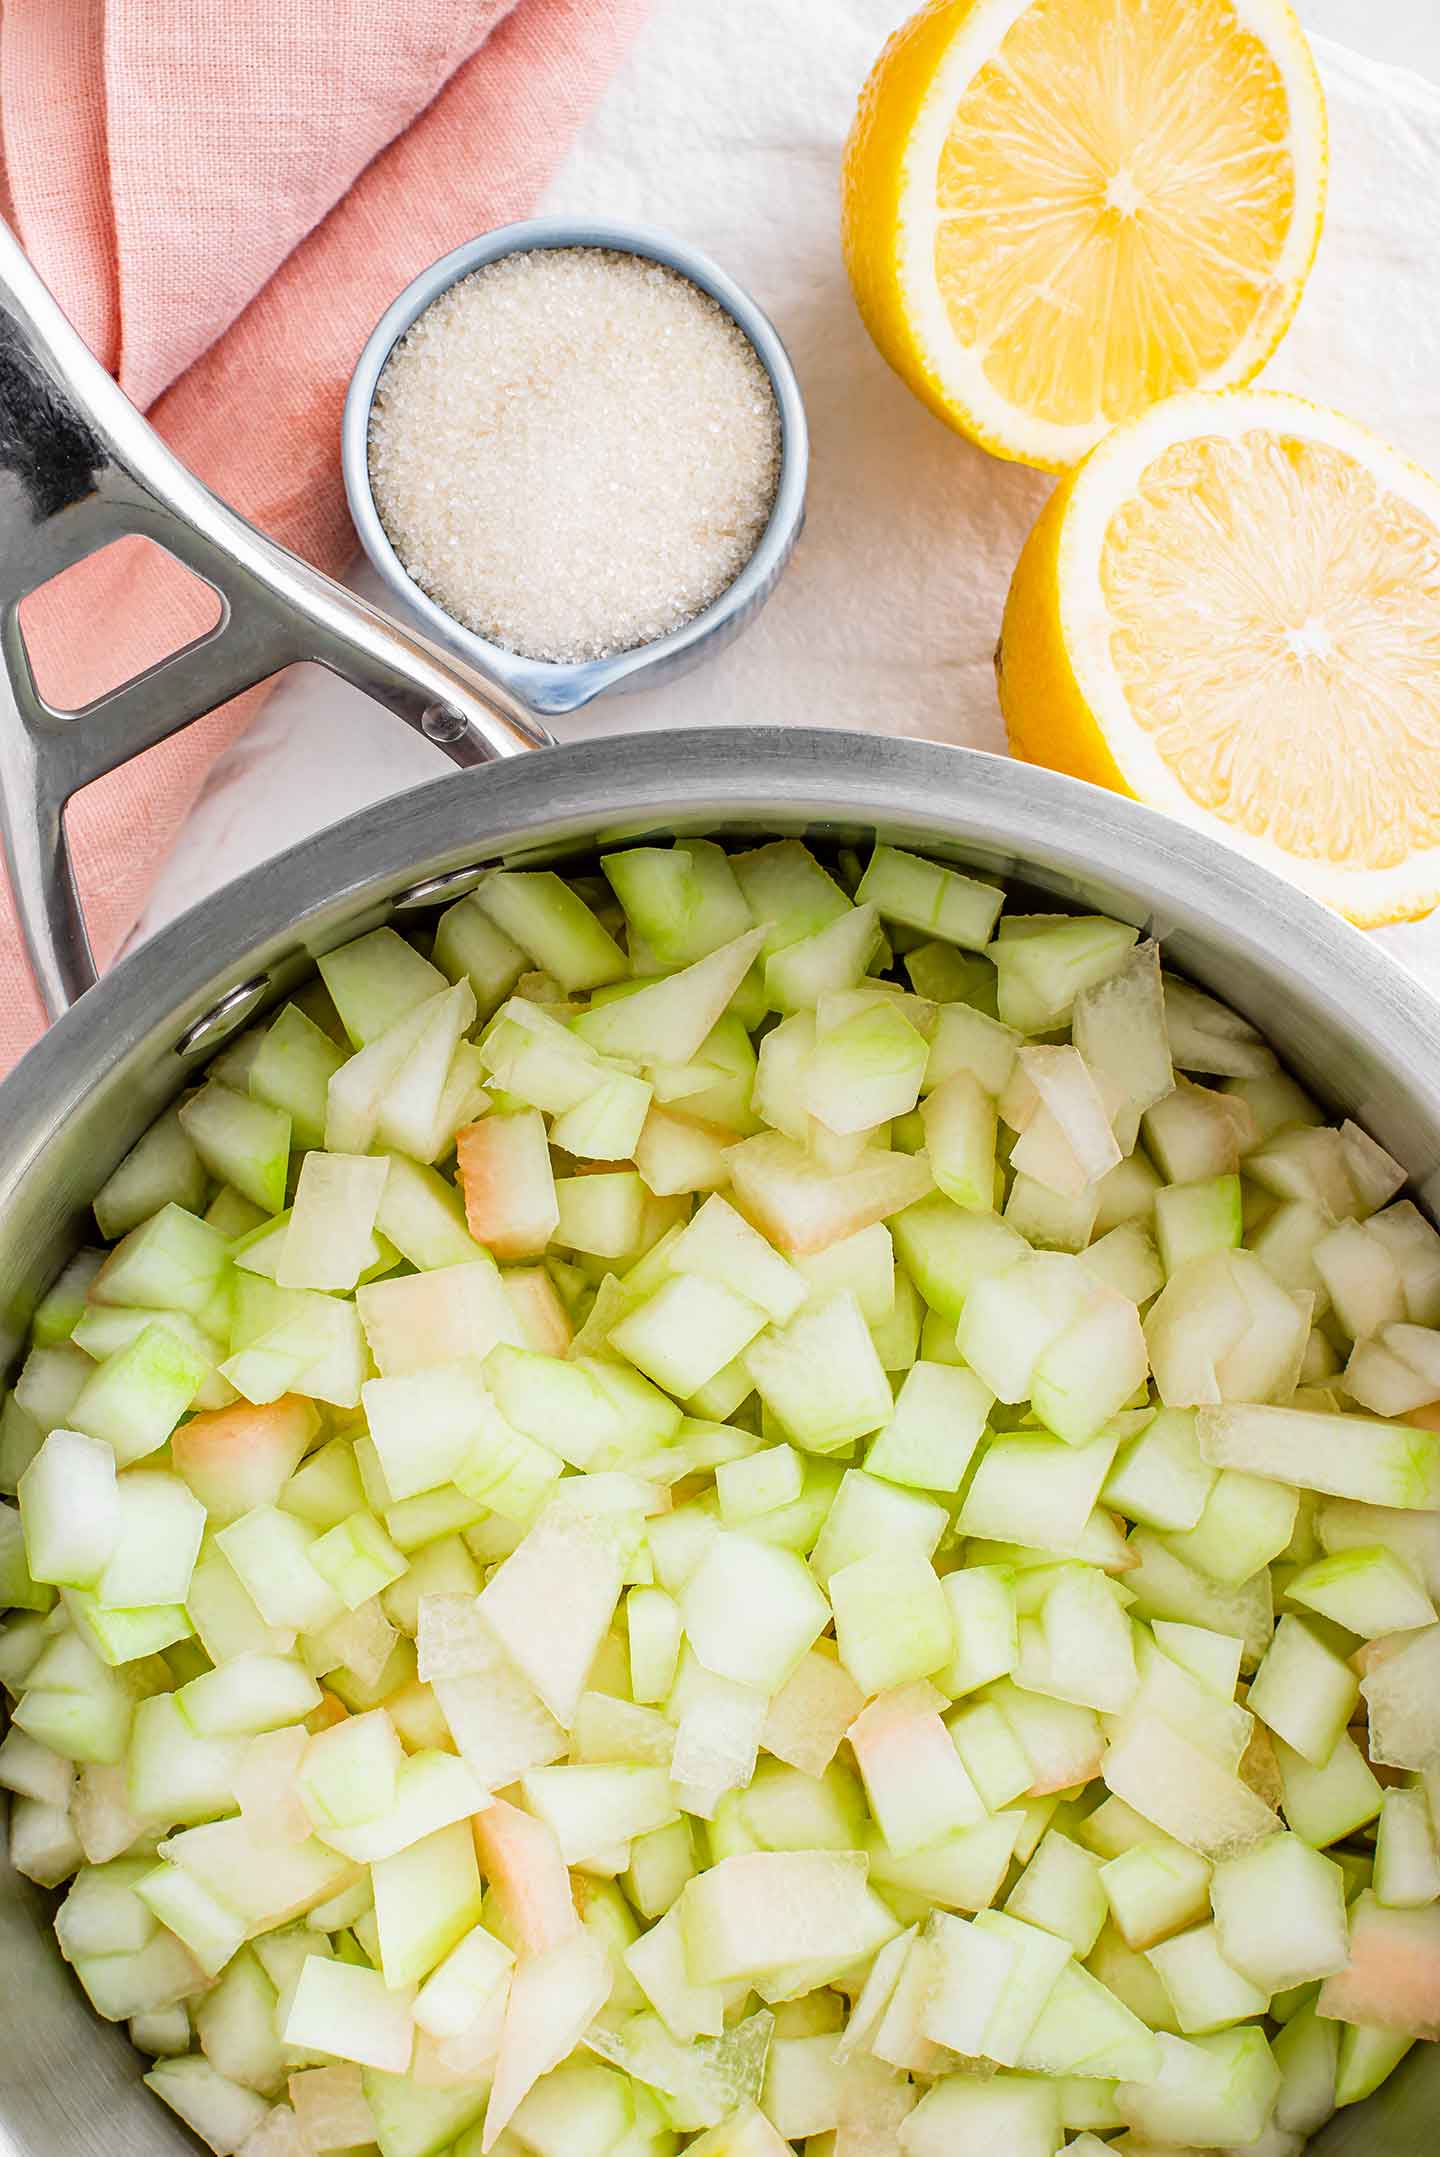
- Add your 3-5 cups of diced watermelon rind to a medium pot.
- With the juice of 1 lemon (or about 3 tbsp).
- And 3-5 tablespoon cane sugar (depending on how much rind you have).
- Bring the mixture to a boil over medium heat.
- Reduce the temperature to a low boil.
- Cover the pot.
- And allow to cook for 20-25 minutes (stirring occasionally) until the rind is translucent.
*You can make a sugar-free watermelon rind jam (or fruit sauce). The differences will be that the rind will not release as much liquid as it cooks so you will have to stir it occasionally to prevent sticking. The rind is also not very naturally sweet so you might find that you want to add 1 tablespoon maple syrup into the fruit sauce after blending.
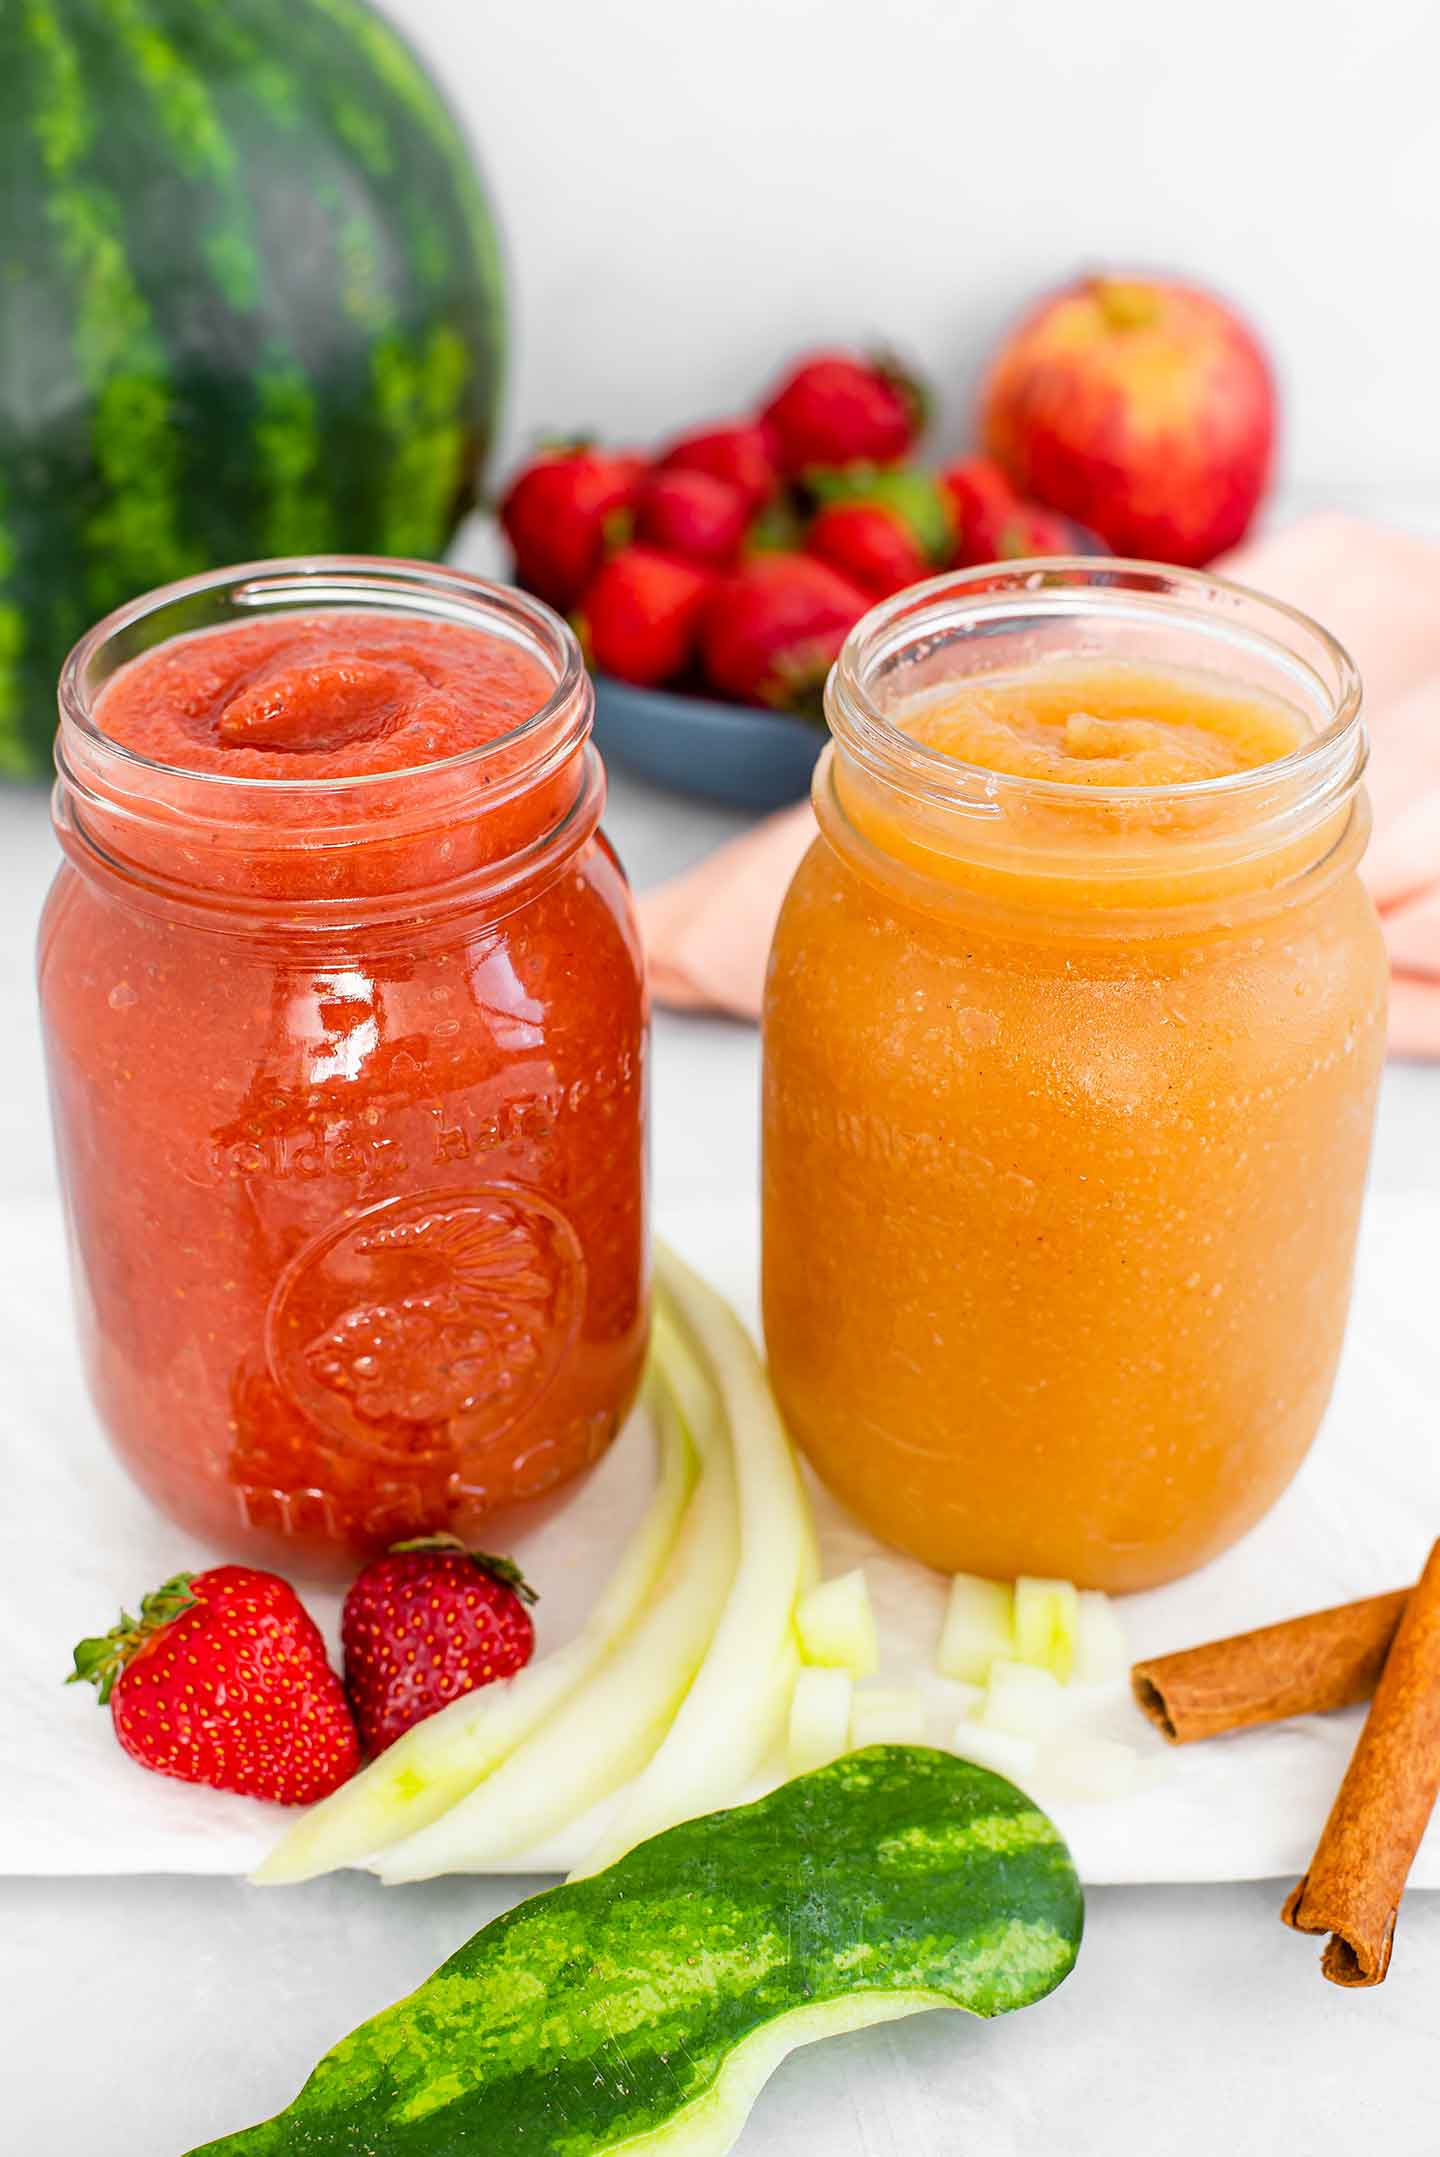
What Fruit To Add
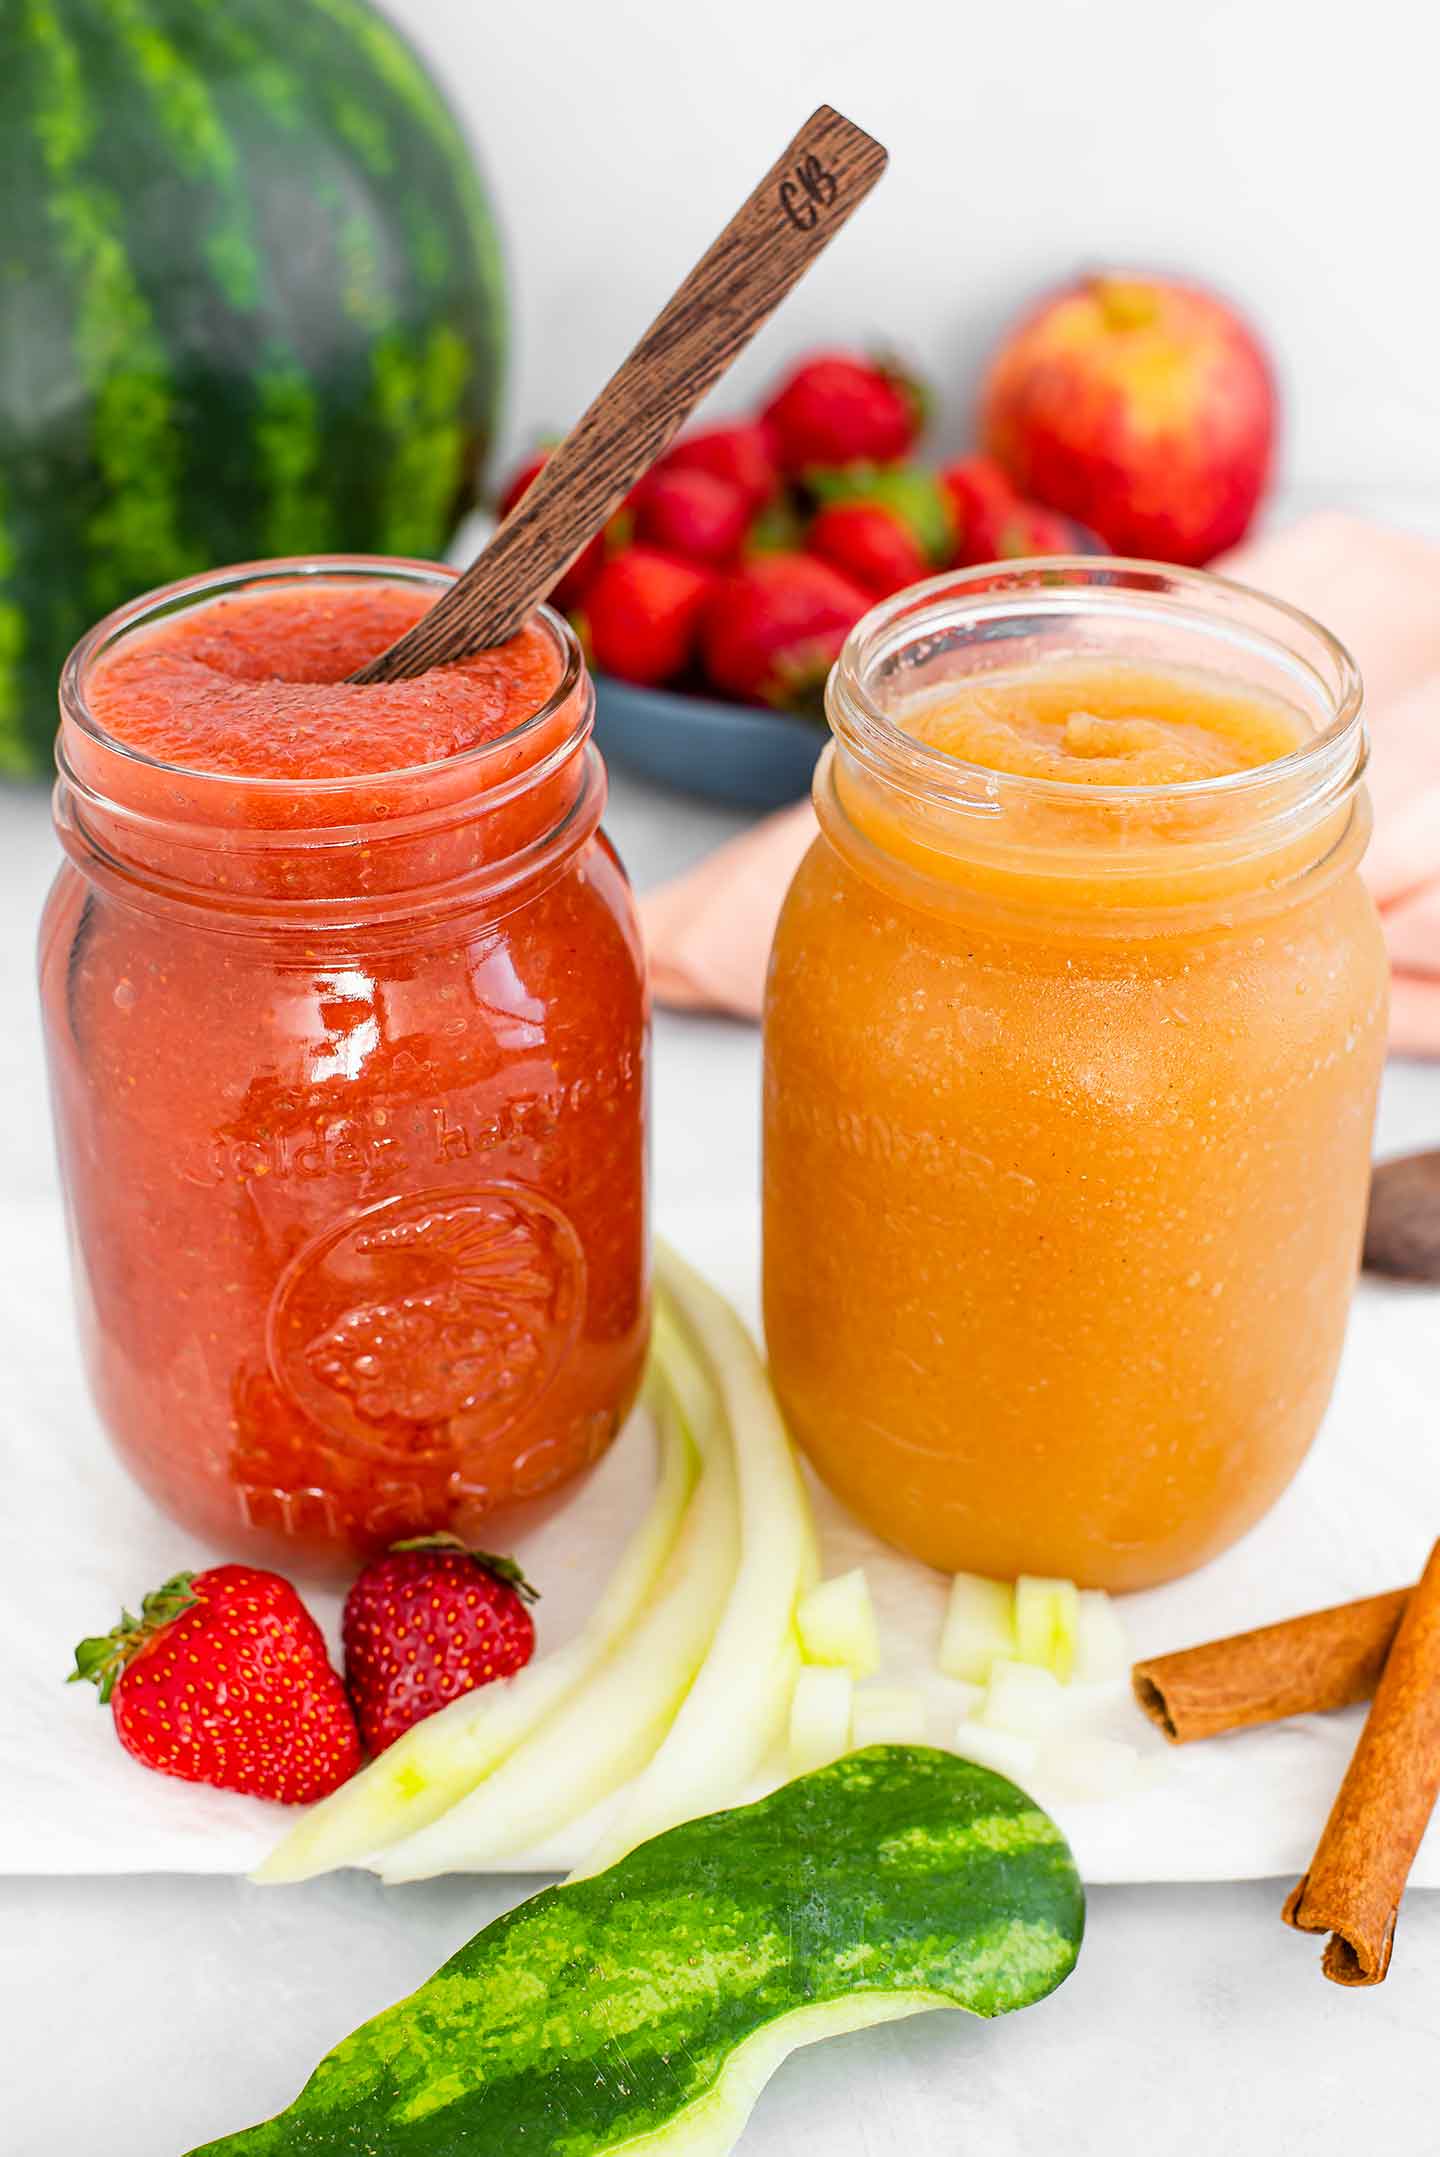
We love how versatile this watermelon rind jam is! Since less sugar is used in this recipe the "jam" will be more similar to the consistency of applesauce. For that reason, we love adding an apple into the mix. A strawberry version is also delicious and summery.
Watermelon Rind Applesauce: 1 peeled and diced apple, plus some cinnamon.
Strawberry Watermelon Sauce: 1 ½ cups diced strawberries, plus some added chia seeds!
You could make this jam with just the watermelon rind. However, the rind itself doesn't carry a ton of flavour so we love adding in some other fruit. A sturdier fruit, like an apple, could be added right from the beginning of the cooking process. BUT softer fruits, like berries, can be added just for the last 10 minutes of the cooking time.

How To Blend The Watermelon Rind Fruit Sauce
Cook the watermelon rind and any additional fruit until everything is soft and tender. Now, you can blend the sauce into a smooth consistency.

Carefully use an immersion blender OR transfer the mixture to your stand blender when it's cool. Blend until smooth and either enjoy as is or...
Return the fruit sauce to the heat and stir in any spices, like cinnamon, or any additional sweeteners. OR... to thicken the consistency:
- Add chia seeds
- Or some dissolved starch
*If you are a better jam maker than I am and you want to increase the sugar used, you can absolutely make your watermelon rind into a more traditional jam!
Recipe Cost
We call this a "Thrifty How-To" recipe because we love that we are able to get more out of watermelon and our dollars are actually going further!
Turning our watermelon rind into the applesauce version costs us an additional: CAD $1.22.
And the strawberry version costs us an additional: CAD $2.50.
What do you think? Will you be getting more out of your watermelon? Let us know in the comments below if you try this watermelon rind jam and what your favourite flavour combinations are!
For a more traditional applesauce recipe take a look at our 25 Minute Just Apples Applesauce!
Oh... and use that watermelon flesh for our show-stopping Spicy "Tuna" Watermelon Poke Bowl or Watermelon "Tuna" Steaks!
Print
Watermelon Rind Jam - Low Sugar & Low Waste
- Total Time: 50 minutes
- Yield: 350 - 750 ml 1x
- Diet: Vegan
Description
This watermelon rind jam is low sugar so it won't last forever but it will be delicious! Add your favorite fruit to create different flavours!
Ingredients
Kathryn’s Pick - Watermelon Rind Strawberry "Jam"
- 3 - 5 cups white watermelon rind (375g - 625g)*
- 1 lemon, juiced (or 3 tbsp concentrated lemon juice)
- 3 - 5 tablespoon cane sugar (depending on how much rind you have)
- 1 ½ cup strawberries, sliced*
- optional: 1 tablespoon chia seeds
- optional: 1 tablespoon arrowroot starch (dissolved in 2 teaspoon water before adding)
Bryan’s Pick - Watermelon Rind Apple "Jam"
- 3 - 5 cups white watermelon rind (375g - 625g)*
- 1 apple (peeled, cored, and diced)*
- 1 lemon, juiced (or 3 tbsp concentrated lemon juice)
- 3 - 5 tablespoon cane sugar (depending on how much rind you have)
- ½ tsp ground cinnamon
*Fresh Ingredients you need that are not part of our pantry and freezer tips.
Instructions
*Since this recipe uses less sugar this "jam" will be closer to the texture of applesauce. It will also need to be refrigerated and ideally used within a week.
- To prepare the watermelon; remove the outer green peel (I often use a potato peeler), then slice the white rind away from the sweet fruit. Dice the strips of rind as small as you can for the quickest cooking time. If you're making the "jam" from frozen watermelon rind see the notes below!
- Combine diced watermelon rind, lemon juice, and sugar in a medium pot. If making the apple jam, add the diced apple now. Bring to a boil. Reduce the heat to a low boil, cover, and boil for 20-25 minutes stirring periodically until the watermelon pieces are translucent.
- If making the strawberry jam add 1 ½ cup strawberries and cook with the lid on for an additional 10 minutes to soften the strawberries.
- Carefully test a piece of watermelon and make sure it’s quite tender. When tender and translucent, remove the pot from the heat and either carefully blend with an immersion blender. Or allow the mixture to cool and transfer to a stand blender. Blend until it forms a smooth sauce.
- For the apple version you can stir cinnamon into the blended "jam" to finish it. If the strawberry version has too much liquid for your liking you can return it to the pot and add chia seeds or a starch to thicken the consistency. If using a starch, make sure to dissolve the starch in a bit of water before adding it to the blended jam and heat the jam back up until it reaches a low boil. If the jam doesn't come to a boil you may be able to taste some of the starch. Cook for an additional 3-5 minutes until your desired consistency has been reached.
- Allow your watermelon rind jam to cool and store in an airtight container in the refrigerator. Best enjoyed within the first week!
Notes
I tend to use a mini watermelon but if you have a larger watermelon, adjust the recipe to suit how much rind you have OR freeze some of the rind so you can make more sauce when you need a top up!
If you’re using frozen watermelon rind you can add the frozen pieces to your pot and heat them to defrost. You can pour out that first bit of water that is released. Then add the lemon juice and sugar and continue with the recipe. I have tried not discarding that initial water that is released and allowing the rind to cook with the pot lid off to encourage evaporation. However, I found that the flavour of the finished sauce tasted watered down.
For a sugar-free version know that less water will be released from the rind as it cooks. Stir the rind occasionally to ensure it is not sticking to the pot. You may find that you will want to add 1 - 2 tablespoon maple syrup or another less refined sweetener to the finished sauce. The watermelon rind doesn't have a lot of natural sweetness on its own.
Make sure to use the watermelon flesh for our Spicy "Tuna" Watermelon Poke Bowl!
- Prep Time: 15 minutes
- Cook Time: 35 minutes
- Category: Thrifty How-Tos
- Method: Stovetop
- Cuisine: American, Canadian

Maria
Who would have imagined? I will never throw watermelon rind away again. This recipe is quick and easy and oh so delicious. I added strawberries because Ontario strawberries are plentiful right now. The combination is fantastic!
Kathryn Alexandre
So glad to hear that! I love this with strawberries, especially when they are so fresh! Thank you for trying it and enjoy your fruit sauce!
Diane Albright
I need to fix this and eat it every day
Kathryn Alexandre
Haha! I made a batch and combined it with rhubarb just a few days ago! I hope you enjoy it!