
I waited much too long to try Kabocha squash, also known as Japanese pumpkin! If you're craving a new kind of squash packed with flavour and easy to cook... don't hesitate any longer. This simple roasted kabocha squash recipe allows the deliciousness of this squash to shine through and stand on its own.
Creamy texture
A taste reminiscent of chestnuts
Tender & pleasant skin (no need to peel)
The perfect addition to fall/winter recipes
Why Keep This Recipe So Simple
This roasted kabocha squash recipe is so simple because the squash is packed with so much flavour that you don't have to do too much to it! The chestnut-like flavour is so delicious, the texture so creamy, that it really does stand on its own.
If you are new to cooking with kabocha squash this is a great place to start. Follow these directions to cook your squash and delight in its natural flavour.
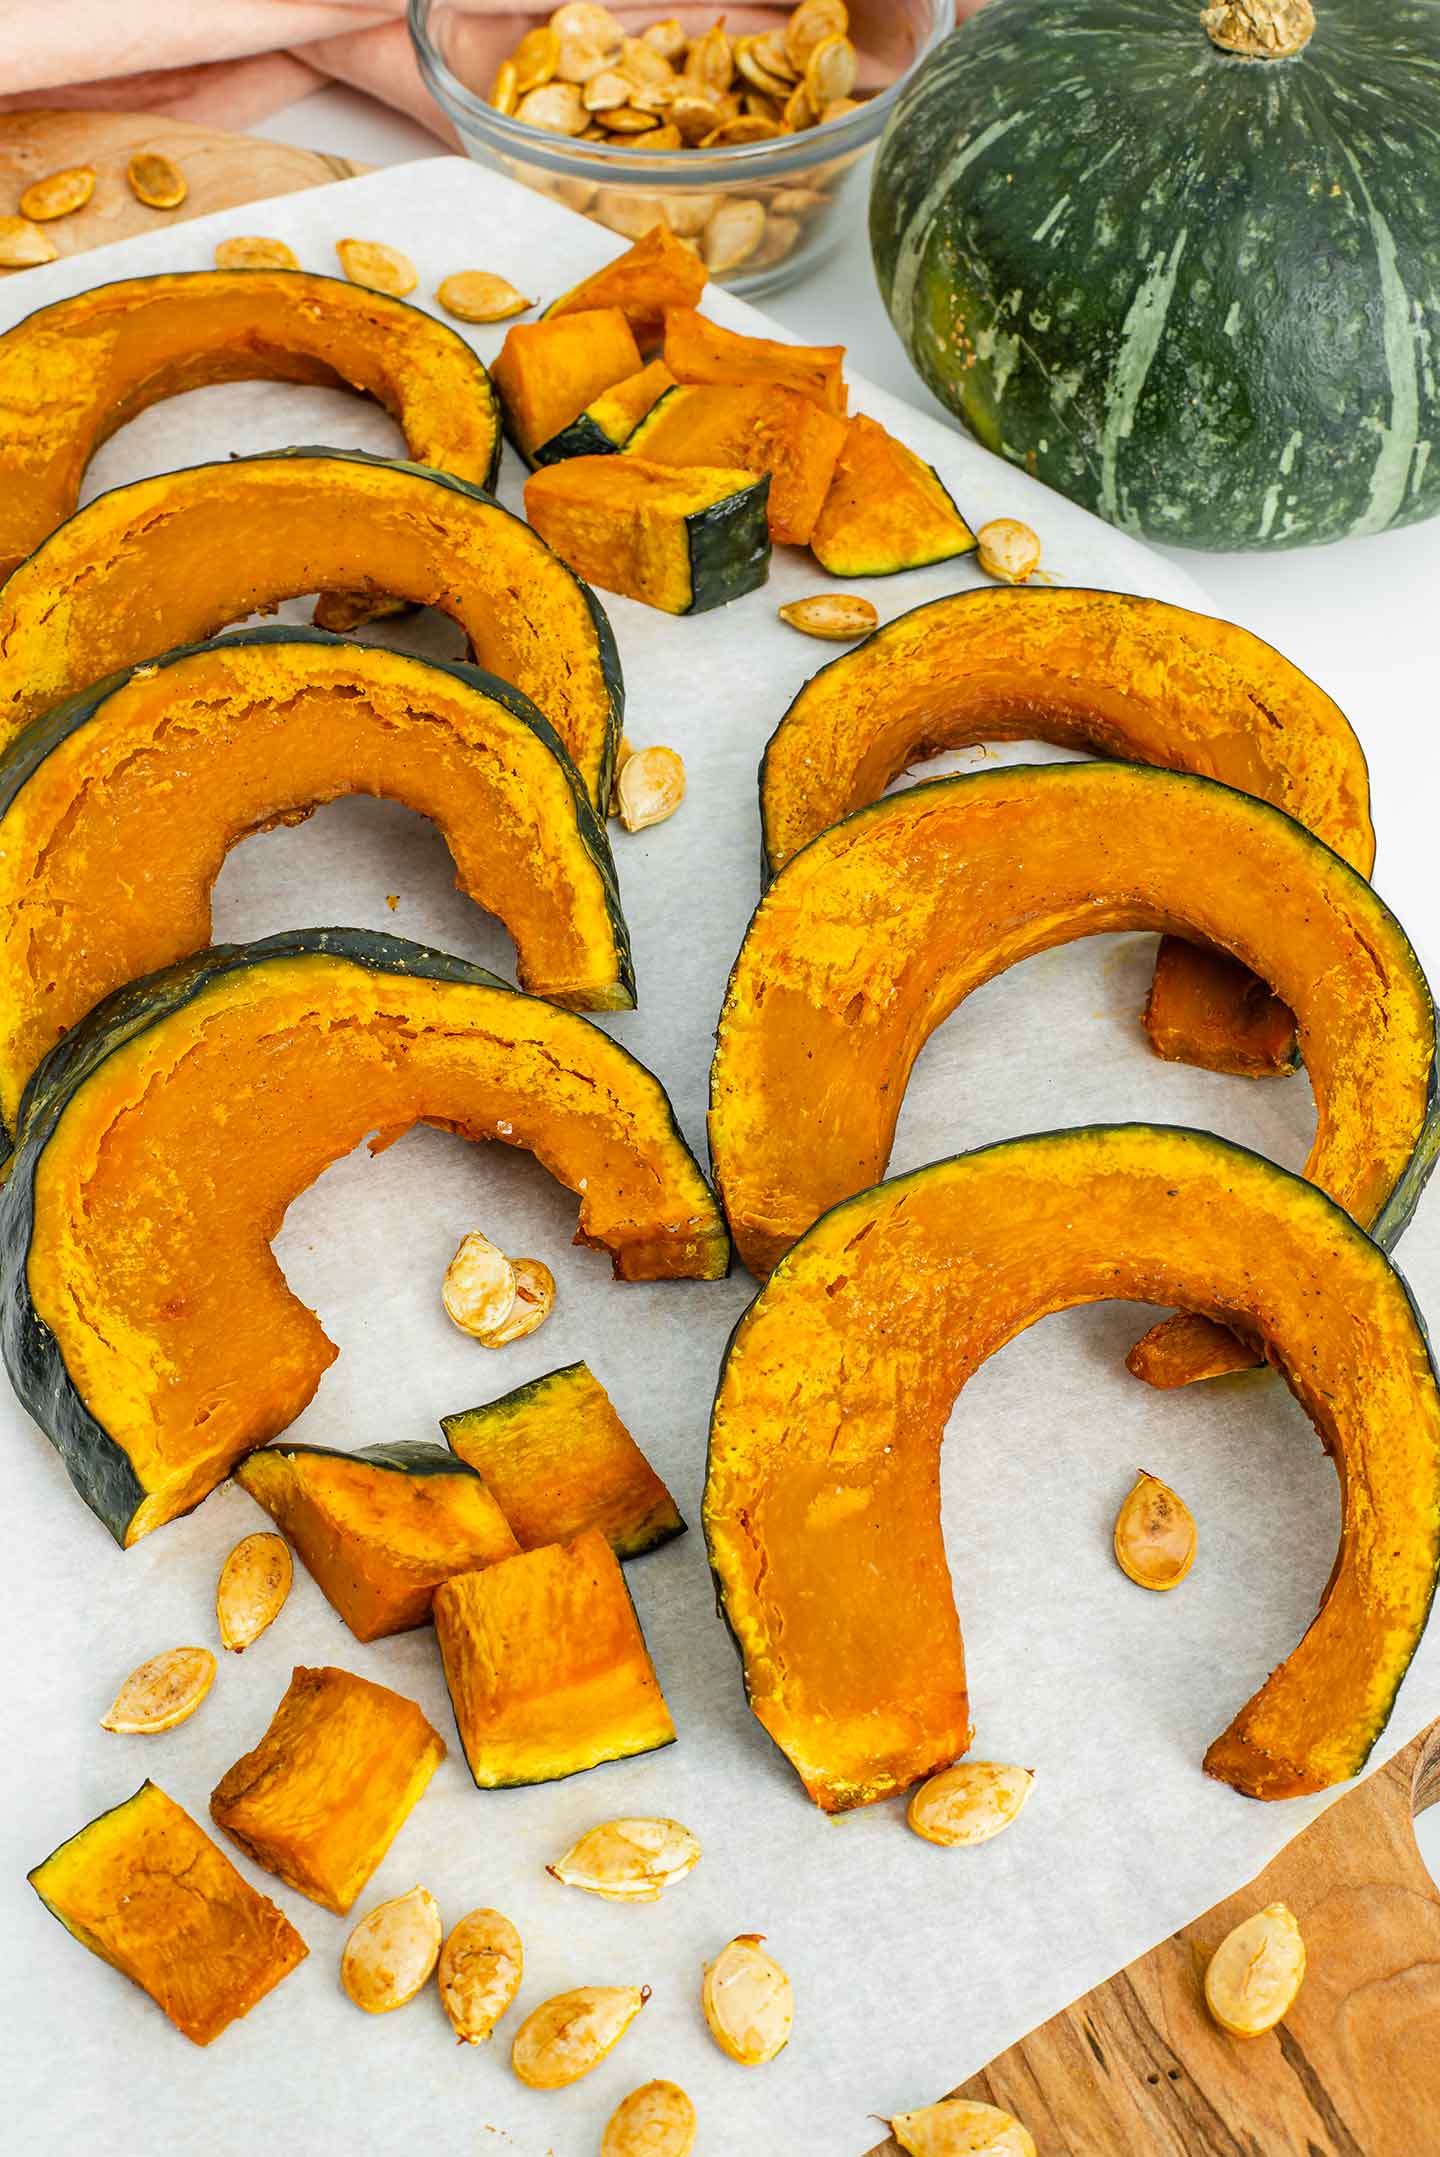
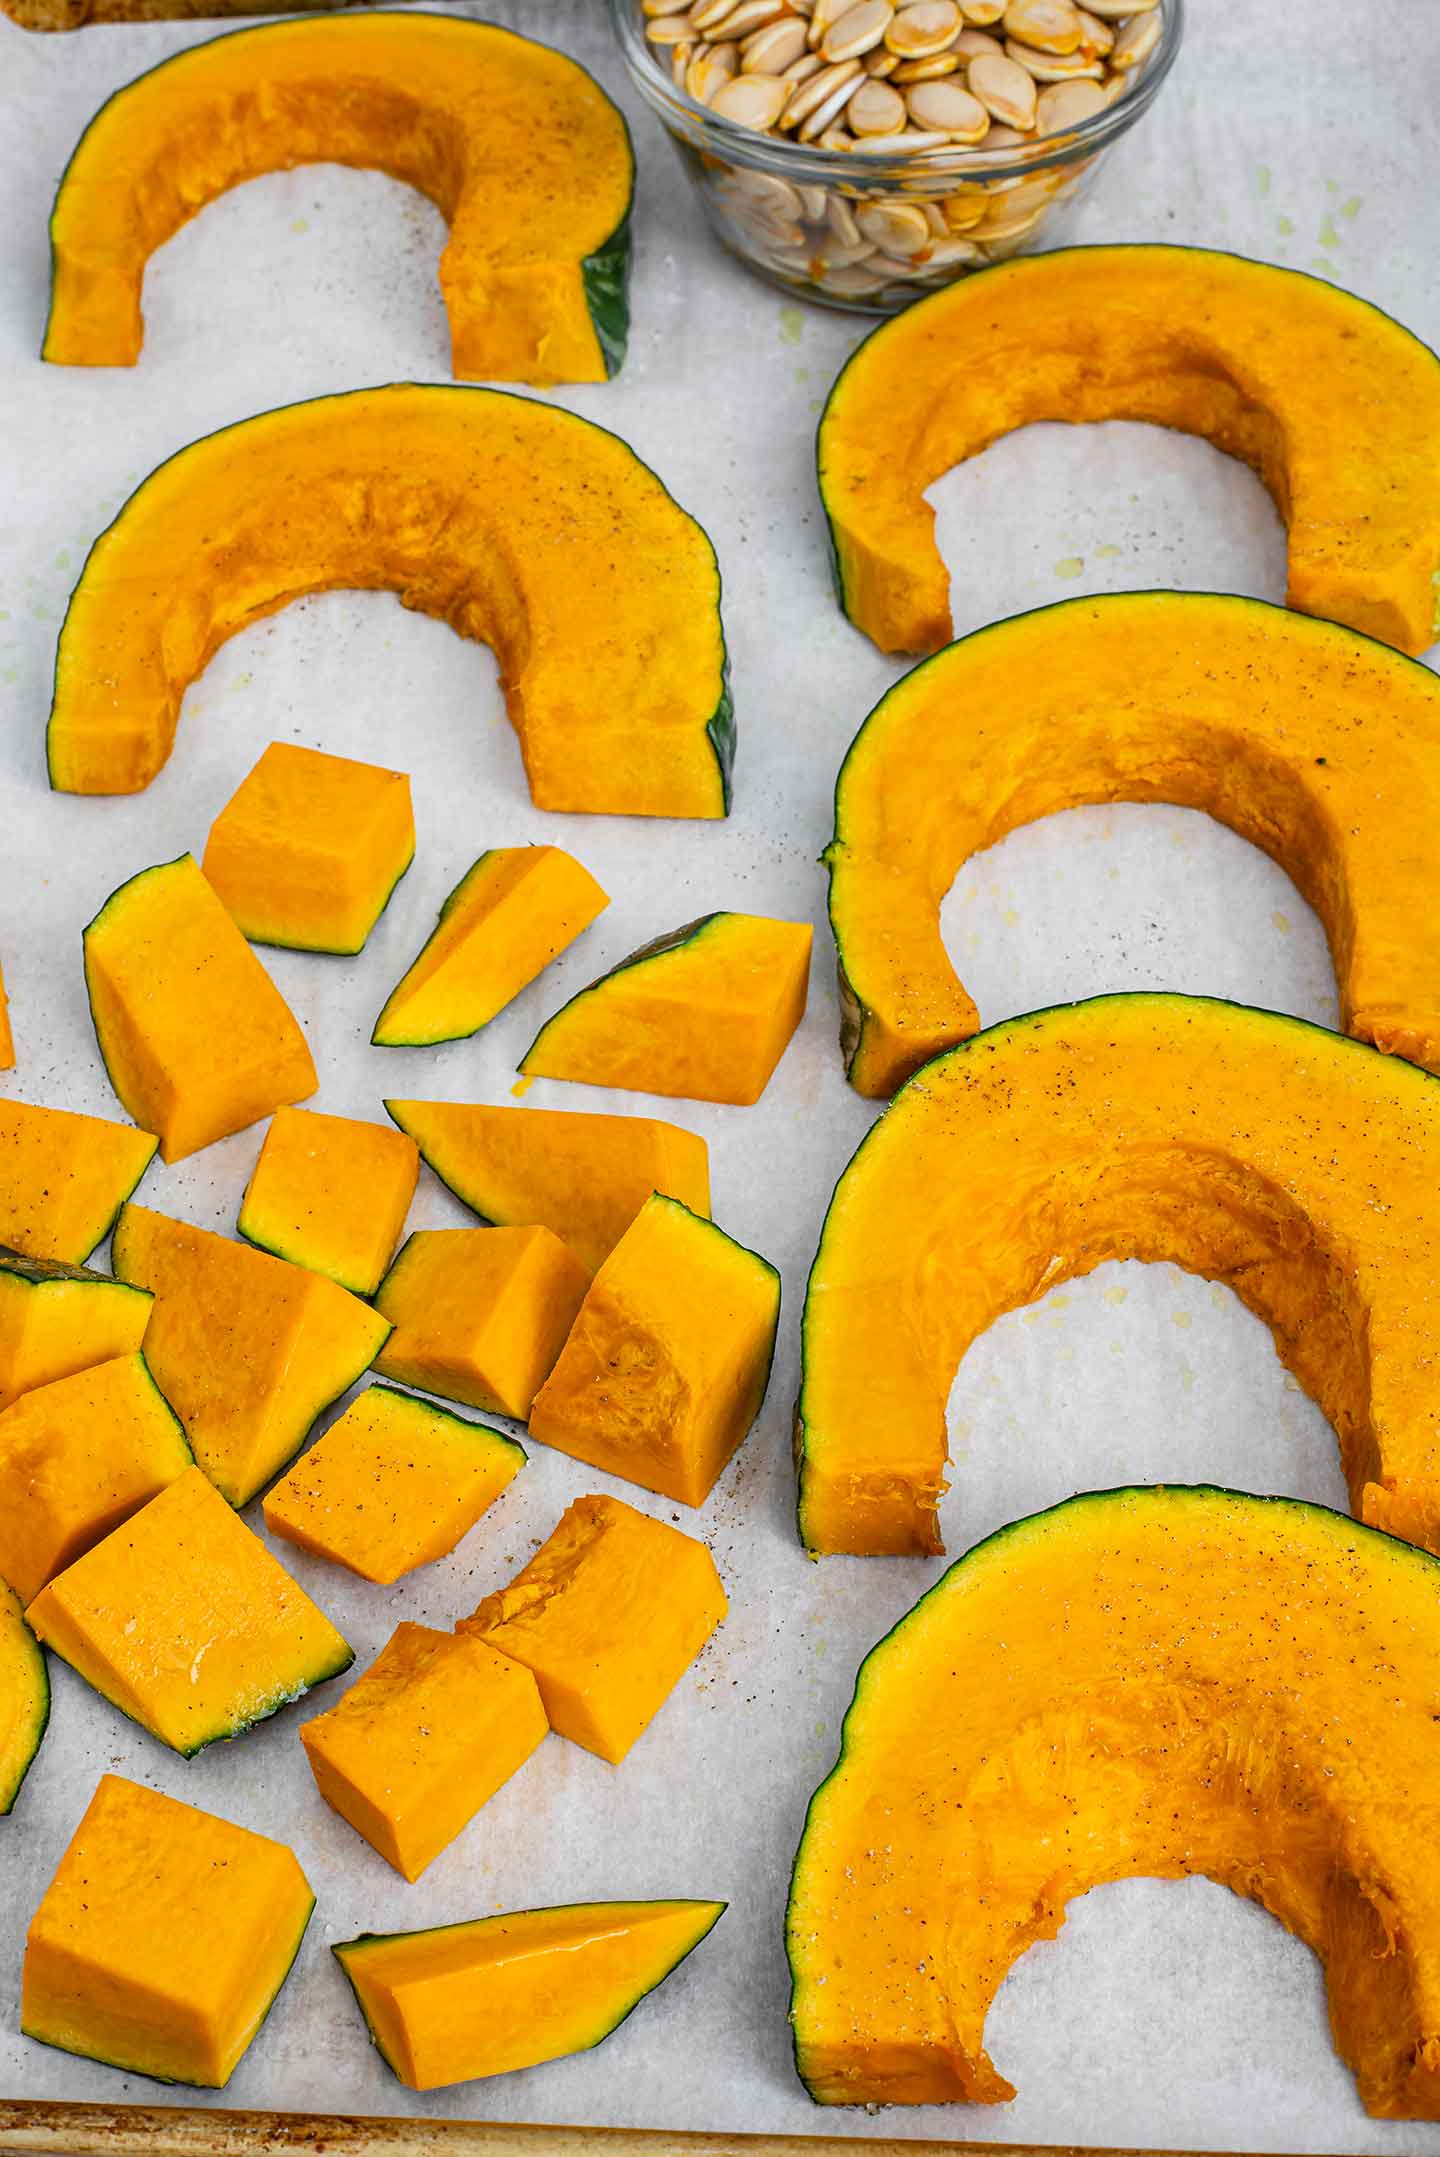
- Slice your squash in half.
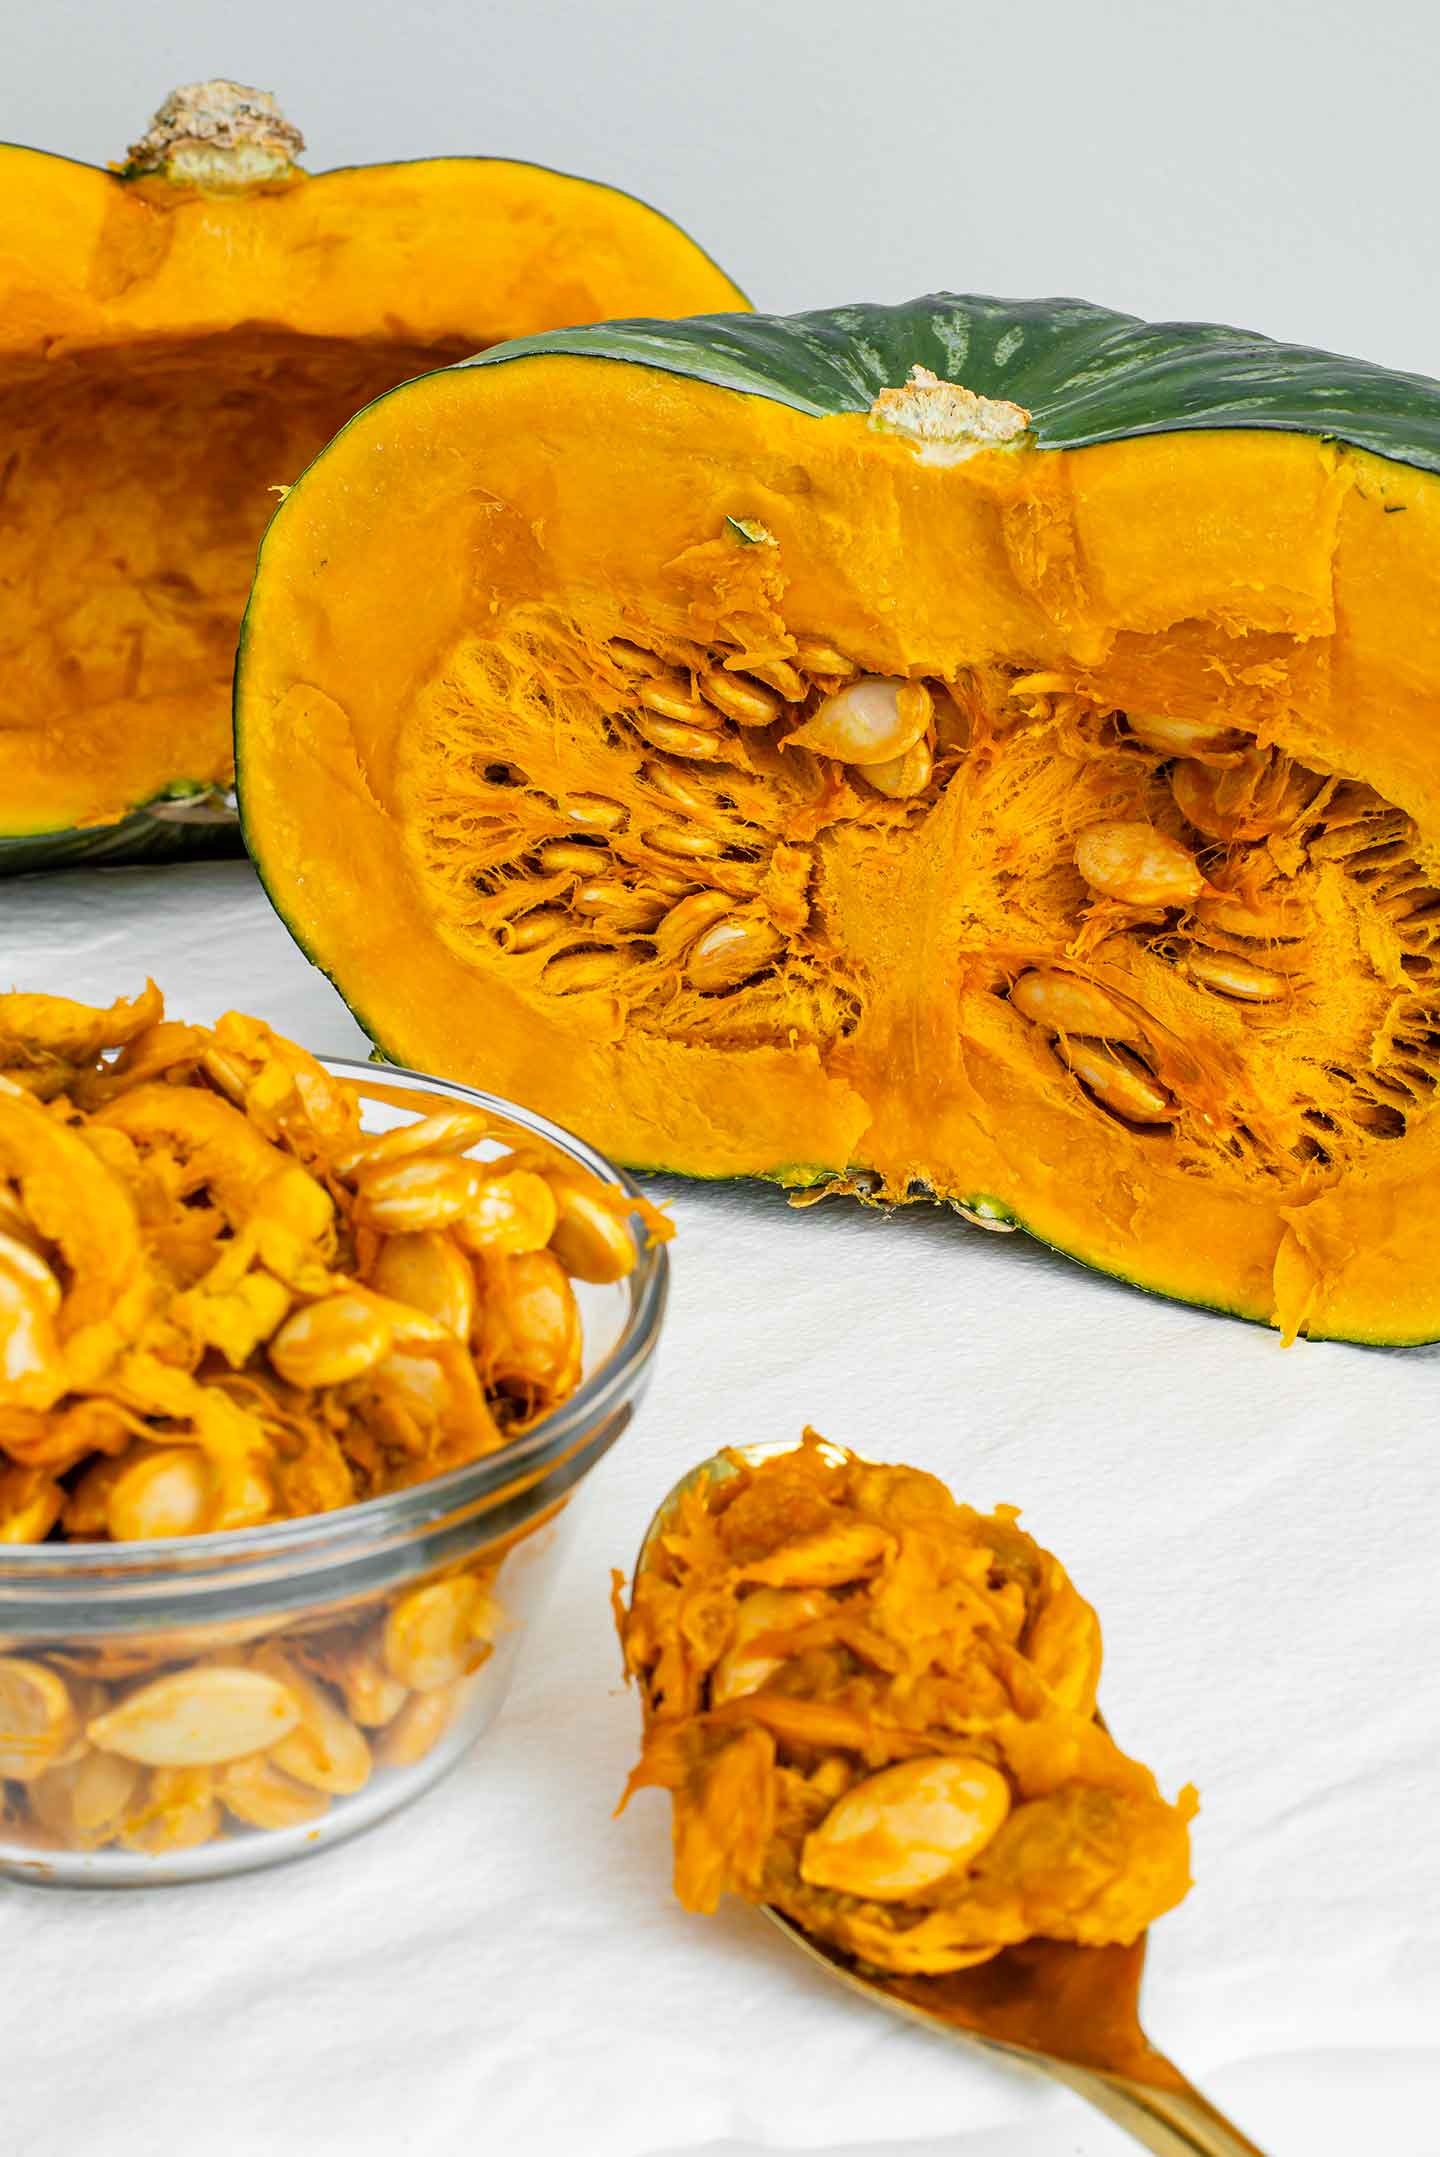
- Remove the seeds and stringy membrane.
- Rub olive oil on the flesh.
- Sprinkle with salt and pepper.
- And roast for 20-40 minutes depending on how you've chosen to cut the squash.
You can of course add extra flavour to your squash.
- Brush your squash with maple syrup and sprinkle with cinnamon for a sweeter side dish.
- Add tamari (or soy sauce) to maple syrup for a sweet & savoury glaze.
- Chili garlic sauce is my go to for adding a touch of spice to a maple & tamari glaze!
Are The Seeds Edible
The large seeds of kabocha squash are edible and I am a huge fan of roasting squash and pumpkin seeds alongside the flesh. I have found though:
- Kabocha squash seeds are quite tough and fibrous.
- The outer shell can be tough to chew and the meat of the seed is difficult to try and eat like a sunflower seed.
This said, I do always roast the seeds anyway. If seeds are generally tough on your digestion however, you may want to avoid these ones.
Many recipes for roasting kabocha squash seeds call for a lower oven temperature and 30-45 minutes in the oven. I have tried this longer roasting time and haven't found that it makes a difference in making the seeds more tender. For this reason, I find the simplest way to roast the seeds is alongside the squash for the last 10- 15 minutes of the cooking time.
How To Serve Kabocha Squash
If you're like me, you may find yourself eating a decent amount of this squash right off the baking pan after you have finished roasting it! But here are some ideas for how to enjoy your squash:
- Serve this roasted kabocha squash alongside a main dish for a fun and delicious veggie on the side.
- Add to curries, stir-fry's, or soups as you would pumpkin or sweet potato. Try my Kabocha Squash Coconut Curry or substitute the acorn squash in this Fall Thai Green Curry with kabocha!
- Slice into smaller cubes and make a delicious winter salad. Take a look at this Roasted Vegetable Salad for inspiration.
- Enjoy mashed for a change from mashed potatoes.
- Puree and use in place of pumpkin puree in baked goods.
What Does It Cost
The best time to snag kabocha squash will be when it is in season. Late summer to early fall is when this variety of squash will be quite easy to find in your supermarket. If you keep your eye on it throughout the fall you should be able to buy this Japanese pumpkin when it is on special.
If you have never tried kabocha squash before I would suggest starting with a small squash. I have found them to be just as delicious and still yield quite a bit of flesh.
An average kabocha weighs 2-3 pounds but larger ones can easily weigh 5 pounds or more. As I'm writing this post, the typical price per pound has been $2.69 CAN but I have bought my squash on special for $1.99/lb and even managed to find it for $0.88/lb so keep your eyes peeled during that peak squash season!

Let me know if you have found this simple roasted kabocha squash recipe helpful and what kinds of recipes you would like me to make with this Japanese pumpkin.
Try this Maple Roasted Acorn Squash for another festive side dish. And this beautiful Hassleback Butternut Squash Tray Bake for your next holiday meal!
Print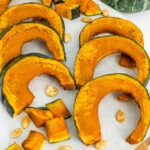
Simple Roasted Kabocha Squash
- Total Time: 50 minutes
- Yield: serves 4-6 1x
- Diet: Vegan
Description
Let the chestnut flavour of roasted kabocha squash (Japanese pumpkin) shine with these simple steps. A delicious addition to any fall meal!
Ingredients
- 1 kabocha squash (or Japanese pumpkin)
- 1-2 tablespoon olive oil
- ½ tsp salt
- ¼ tsp black pepper
- 1 tbsp maple syrup, optional
- ½ tbsp tamari (or soy sauce), optional
Instructions
- Preheat your oven to 400 degrees F and prepare a baking sheet with parchment paper.
- Wash and dry your kabocha squash well since the skin will stay on for this recipe.
- Using a sharp knife, carefully slice the squash from the stem to the base using a rocking motion. There’s no need to try slicing through the stem, just pull the two halves apart once you have the squash sliced all the way around and the stem will separate.
- Use a spoon to scoop out the seeds and the stringy membrane. I find kabocha squash seeds quite tough to chew but I usually roast them anyway. If you wish to roast the seeds; separate them from the stringy membrane, wash, and dry them. Dispose of the stringy membrane or add it to your veggie scraps bag for homemade vegetable broth.
- With the squash deseeded, slice each half into half moons about one inch thick. This is easiest if you flip the squash so the cavity is facing the cutting board. Leave the squash in half moons or slice further into cubes.
- Either brush the squash slices with oil or toss the cubes in oil and sprinkle with salt and pepper. *Kabocha squash is delicious prepared this simply but feel free to brush or toss the pieces with maple syrup and tamari (or soy sauce) for a more sweet and savoury flavour.
- Roast the squash for 40 minutes if sliced in half moons and 20 minutes if cubed. Remember to flip the pieces halfway through the cooking time to encourage even cooking. The squash is done when you can easily slide a fork into the pieces and they are lightly browned in places.
- To roast the cleaned and dried seeds; toss them with a bit of oil, salt, and pepper, and roast alongside the squash for the last 10 - 15 minutes of the cooking time. Once the seeds are nicely browned you can remove them from the oven to cool. (The seeds can also be tossed in tamari or maple syrup for a bit of extra flavour).
- Try adding your roasted squash to my Kabocha Squash Coconut Curry!
Notes
Many recipes for kabocha squash seeds recommend roasting the seeds at a lower temperature for 30 minutes or more. I have tried roasting the seeds longer and don’t find a difference in the texture compared to roasting alongside the squash for 10-15 minutes.
- Prep Time: 10 minutes
- Cook Time: 40 minutes
- Category: Side Dish
- Method: Roasted
- Cuisine: Thai Inspired


Ash
This is exactly the way my friend taught me to make Kabocha (but I needed a reminder so I’m glad I found this)! If you’re struggling to cut the squash, a trick I learned somewhere else on the Internet is that if you microwave it for 30 seconds it becomes remarkably easier to slice.
Kathryn Alexandre
I'm glad you found it too! That is a great trick! Thanks for mentioning it here for others. I've done that before with butternut squash and it can really help. I usually prick it a few times with a fork before microwaving too. I hope you enjoyed your kabocha squash!
Bea Nissenson
Brilliant trick! I too am happy to find it! Don’t have to worry about chopping off my hand!
Thanks for that!😄
Steve
Kabocha is my new favorite squash and Kathryn’s recipe is simple, foolproof, and delicious!
Kathryn Alexandre
I'm so glad you loved this simple recipe Steve. I agree, it's my new favourite too! Thank you so much for letting me know you appreciate the simplicity of this one and thank you for leaving a lovely star rating!
Adobe
Do you put the maple syrup / tamari glaze on before roasting or after. Thanks.
Kathryn Alexandre
Ah I can see how that was confusing. I have rearranged the bullet points in the method to make that more clear. You can brush the maple tamari glaze on before you roast the squash. Thank you and I hope you enjoy it!
Adobe
Thank you for getting back to me so quickly. We just ate dinner and the squash was delicious.
Kathryn Alexandre
Absolutely! I'm so glad you loved the squash!
Stephanie Ittner
We love squash and tried kabocha on a whim. Our new favorite- with butter and salt and pepper. Next time I will microwave before slicing. I can be pretty dangerous with knives!
Kathryn Alexandre
Haha microwaving it might be the safer way forward then 😜 I’m glad it’s your new favourite!!
Enga
Delicious way to eat the kabocha squash that was straight out of my garden! It was so easy too. I cut my squash just like the photo and I was surprised that the skin was also tasty. I was able to fit about 3/4 of a whole squash onto my baking sheet and i didn't bother flipping the slices because I forgot. I'll definitely be making it again soon for dinner or just as a healthy snack. Great recipe.
Kathryn Alexandre
I’m so glad you liked the simplicity of this recipe. Such a bonus that you could grow your own squash! Thank you so much for taking the time to leave a lovely 5 star review!
Eva
If I’m gonna use the stringy membranes for broth can I just leave the seeds in it?
I don’t plan on roasting the seeds so I don’t really want to pick them out of it.
The squash itself was fabulous! I’m in my 60’s and just now trying all the different kinds of squash! Simple seems to be the way to go. Thank you for teaching me how to prepare this one.
Kathryn Alexandre
You're welcome! I'm so glad you decided to try this one. You can definitely add the membranes and the seeds into broth. You will strain them out anyway so no need to pick through the seeds!
Faye
This was very tasty and simple to do
Kathryn Alexandre
I'm so glad you thought so Faye! Thank you for coming back to leave a 5 star review. That means a lot to us!