
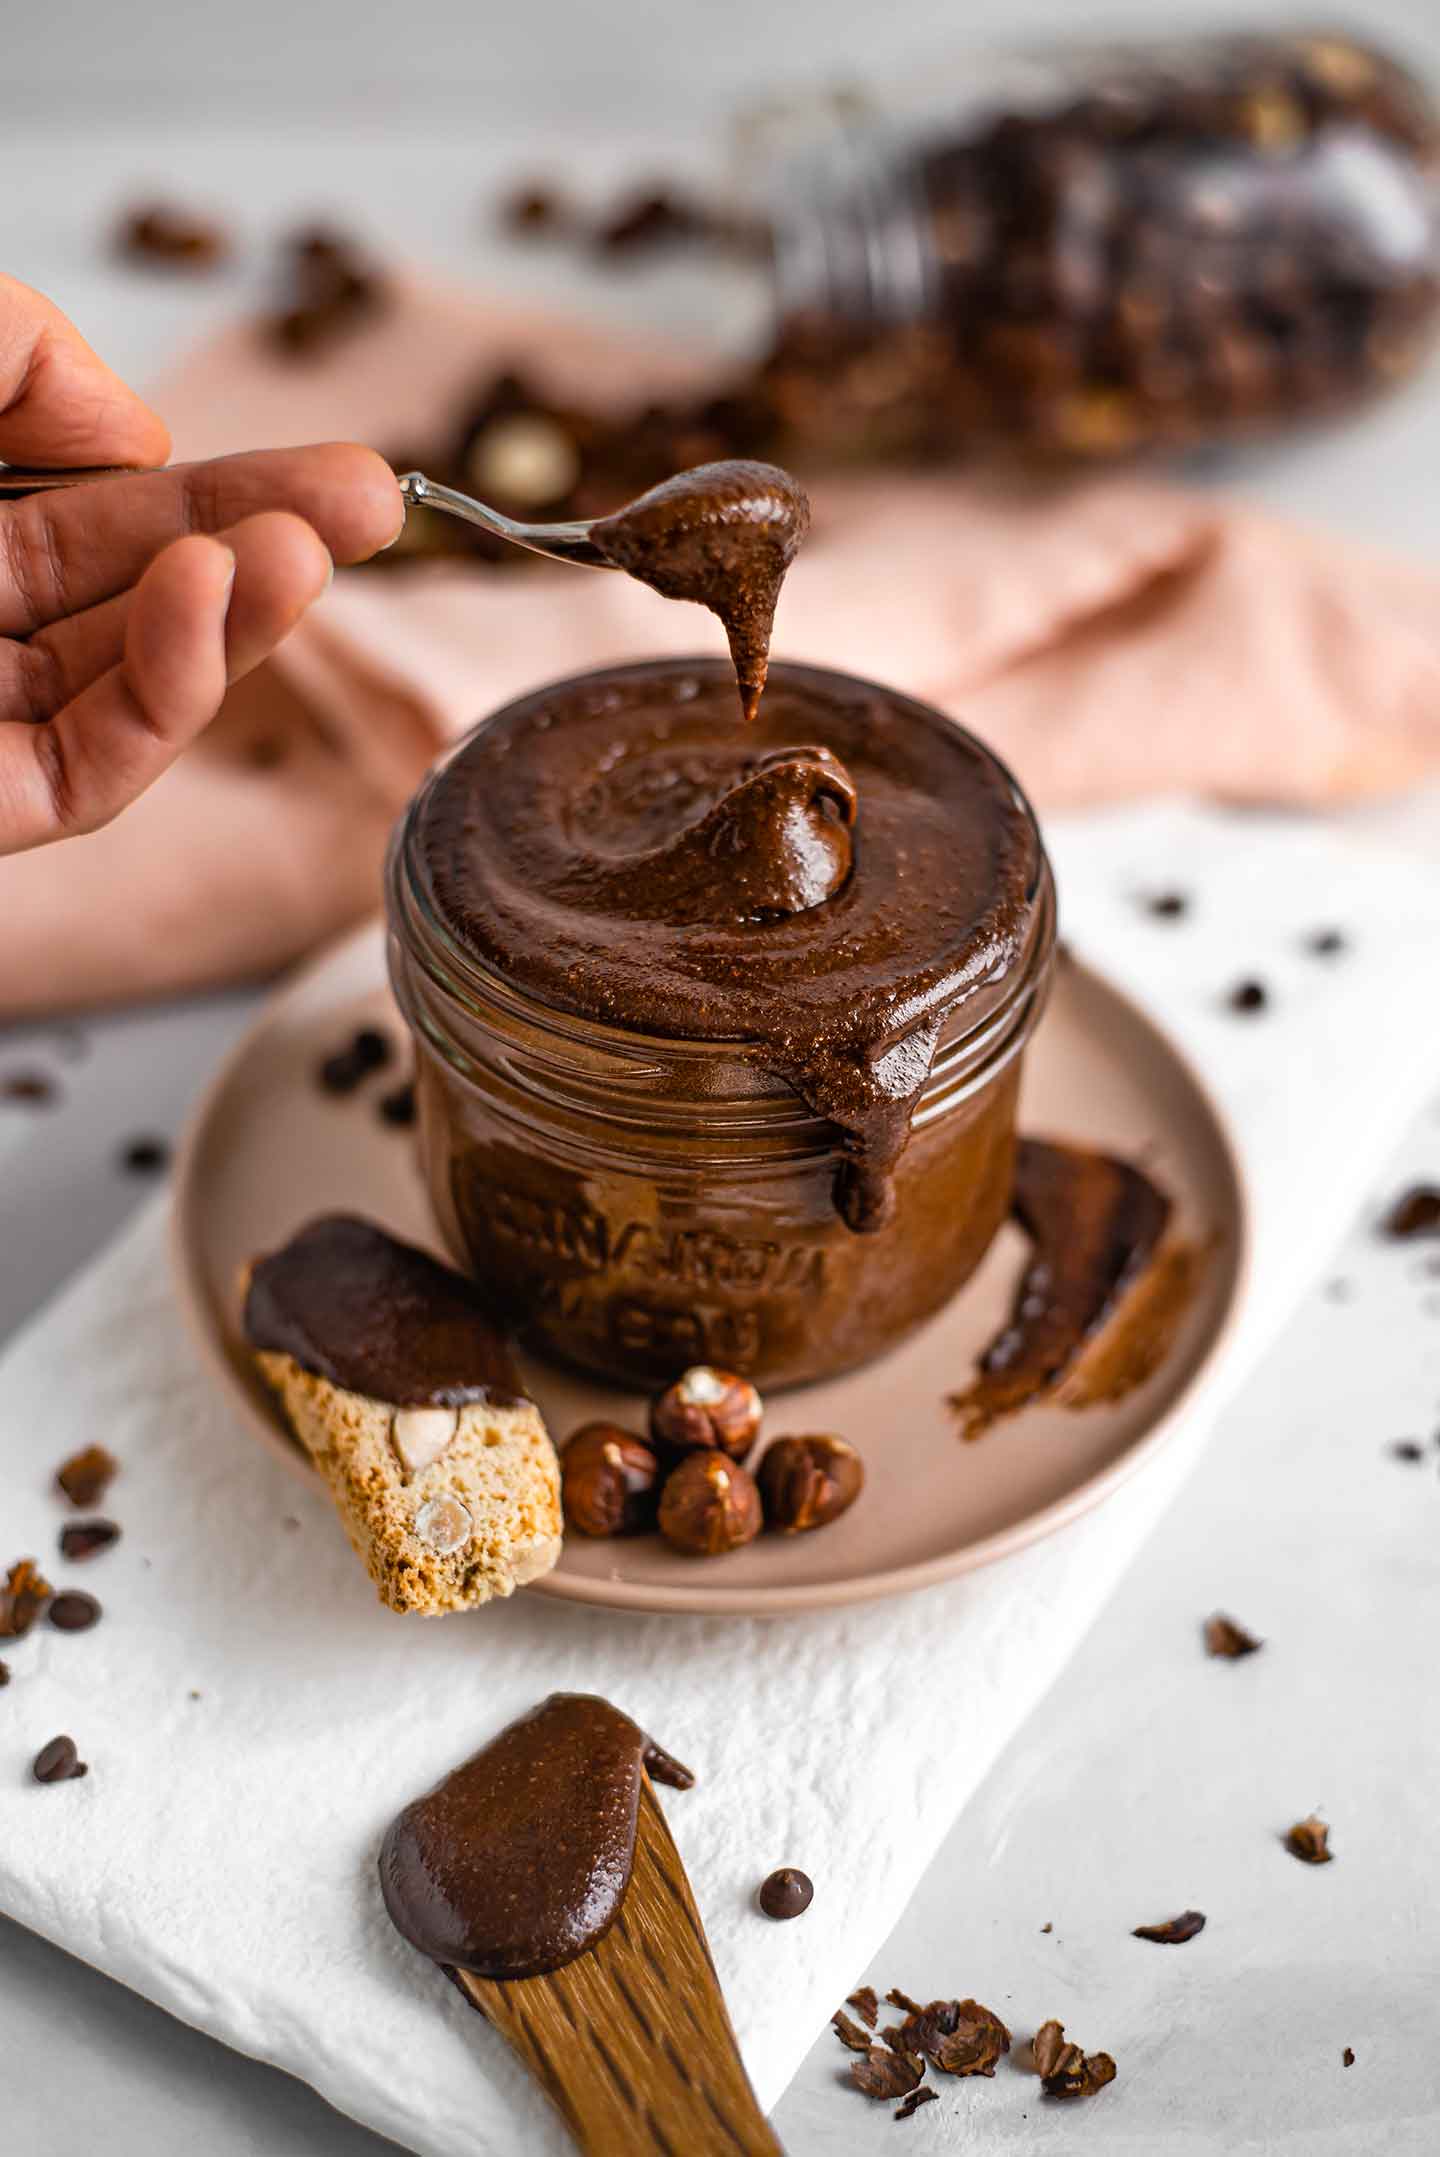
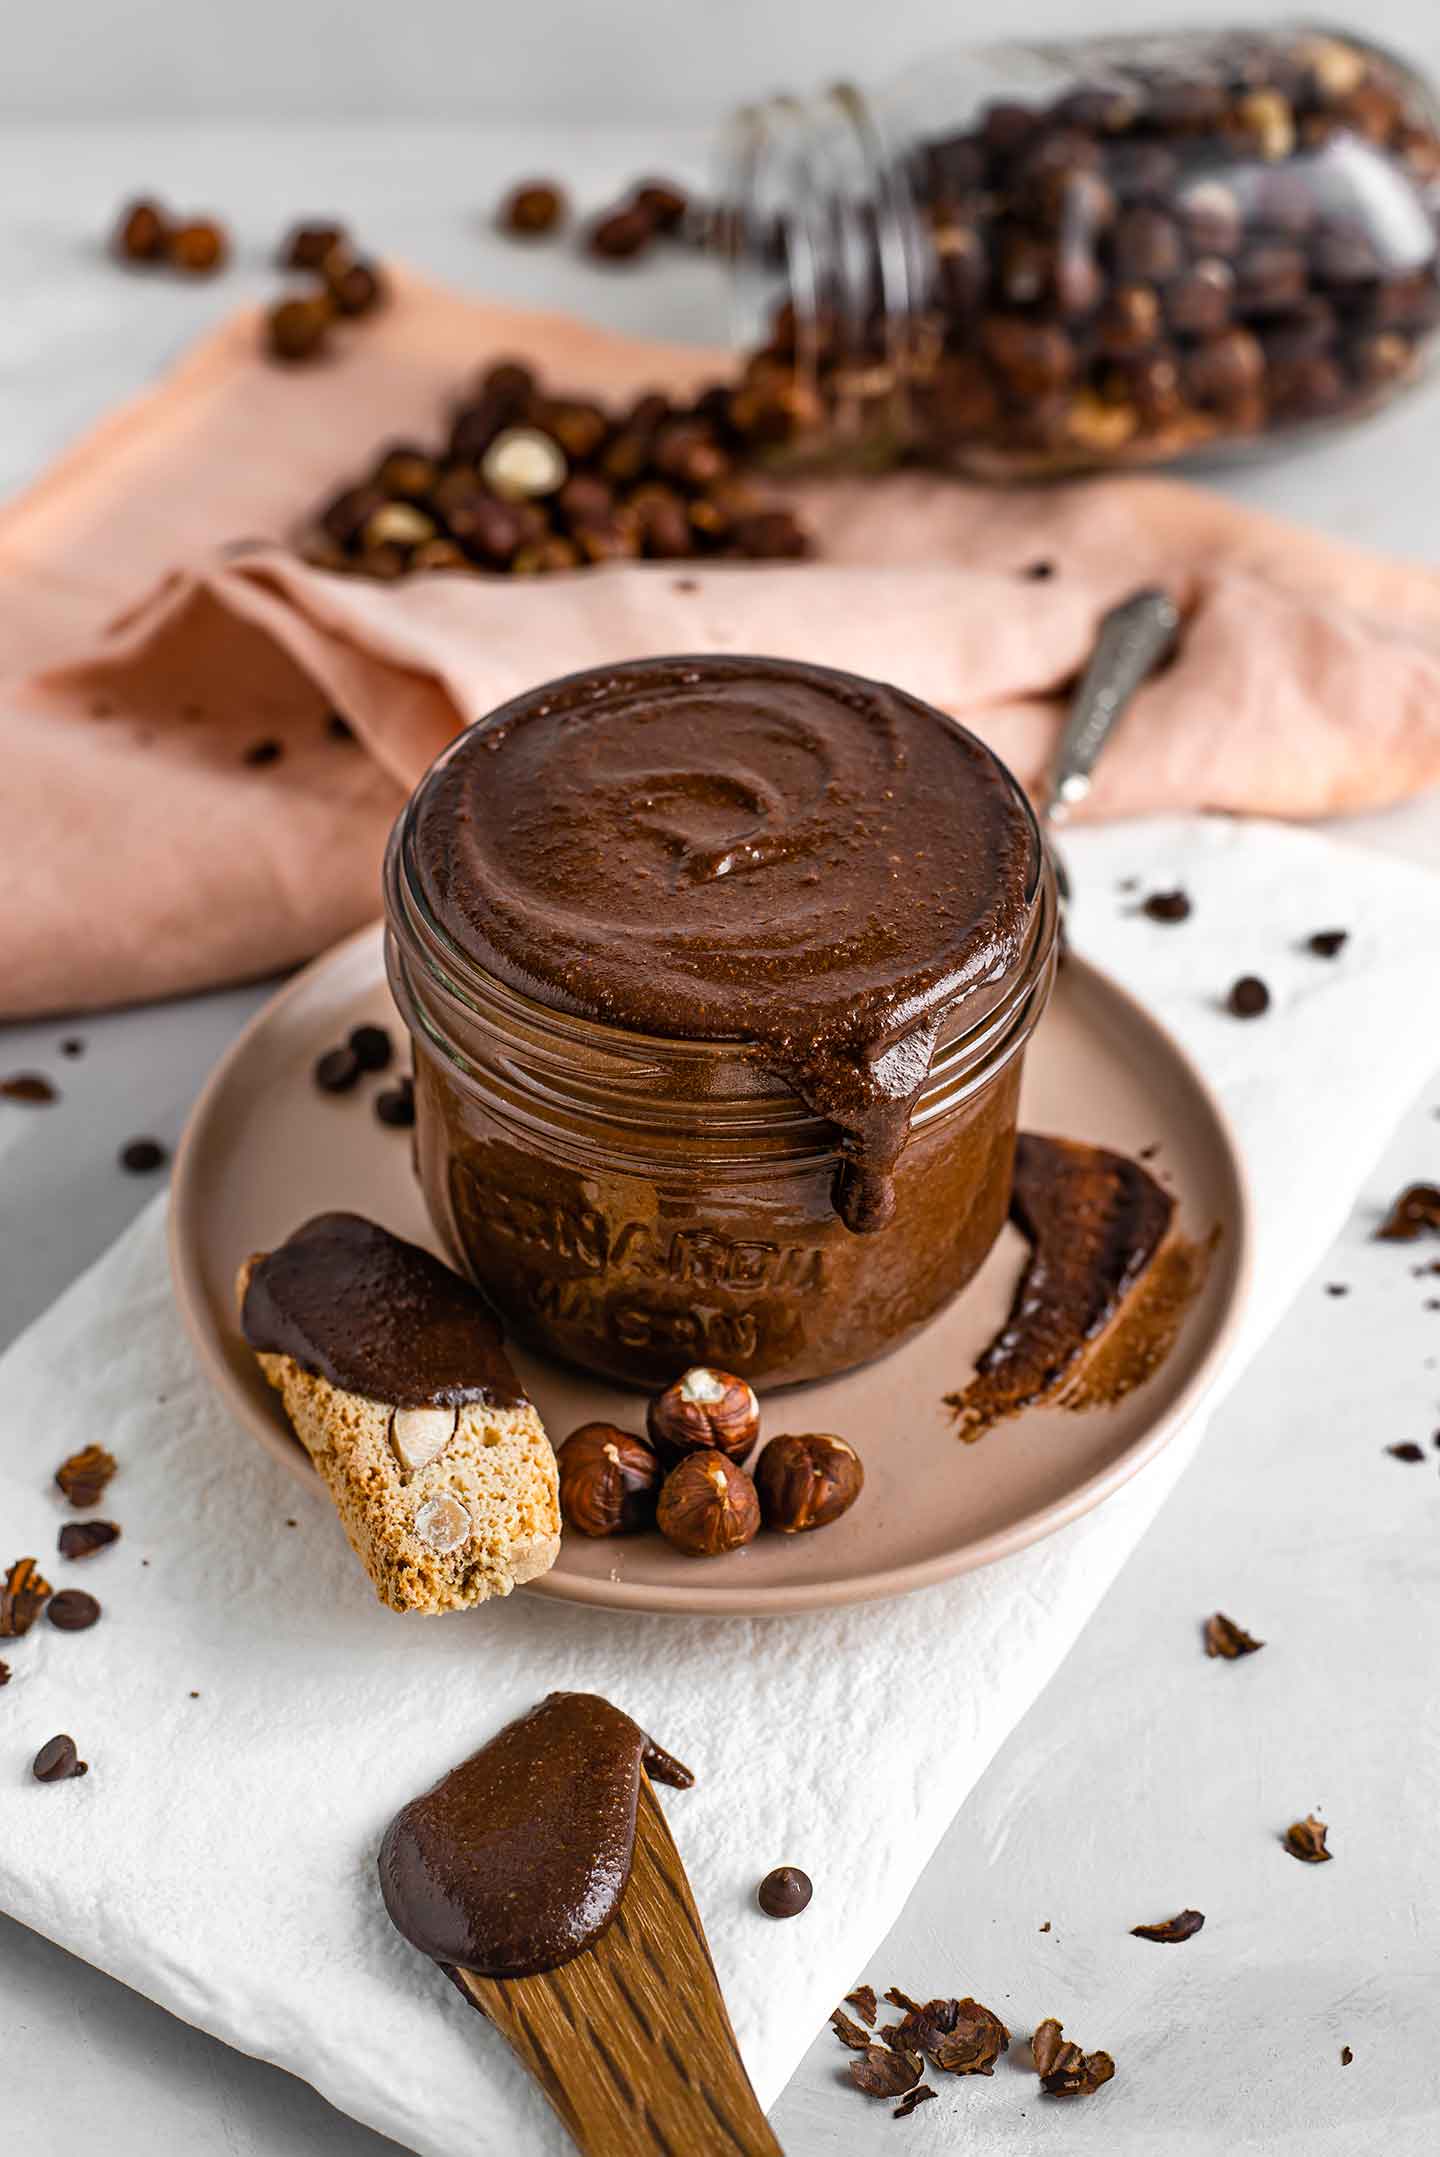
This homemade vegan "Nutella" hazelnut spread has all the roasted hazelnut and chocolate flavour you love from the classic! It's:
Ready In 20 Minutes
Simple Ingredients
Toasty
Nutty
Decadent
Chocolatey
And As Sweet & Creamy As You'd Like!
How To Customize It
A great advantage to making this homemade vegan "Nutella" hazelnut spread is that you can make it exactly as you like it! Easily adjust the sweetness and the amount of plant milk used to create your desired flavour and texture!
We've written this recipe using:
- Roughly ⅛ cup maple syrup as a sweetener.
- And about ¼ plant milk for a thicker, more textured spread.
BUT! As you blend your vegan "Nutella", stop the machine, taste, and add in more maple syrup for extra sweetness if desired AND... slowly add more milk until your desired creaminess is reached!
- We prefer the sweetness on the lighter side and the sauce more textured since we usually thin it out and heat it up to use as a decadent chocolate drizzle for other desserts and sweet breakfasts!
- But, if you prefer your vegan "Nutella" hazelnut spread over toast with peanut butter and bananas (my childhood favourite!) then adding a bit more milk will make a smoother texture! Just add the milk slowly and know that the spread will thicken a bit as it sits in the fridge.
Ingredients For Vegan Nutella Hazelnut Spread
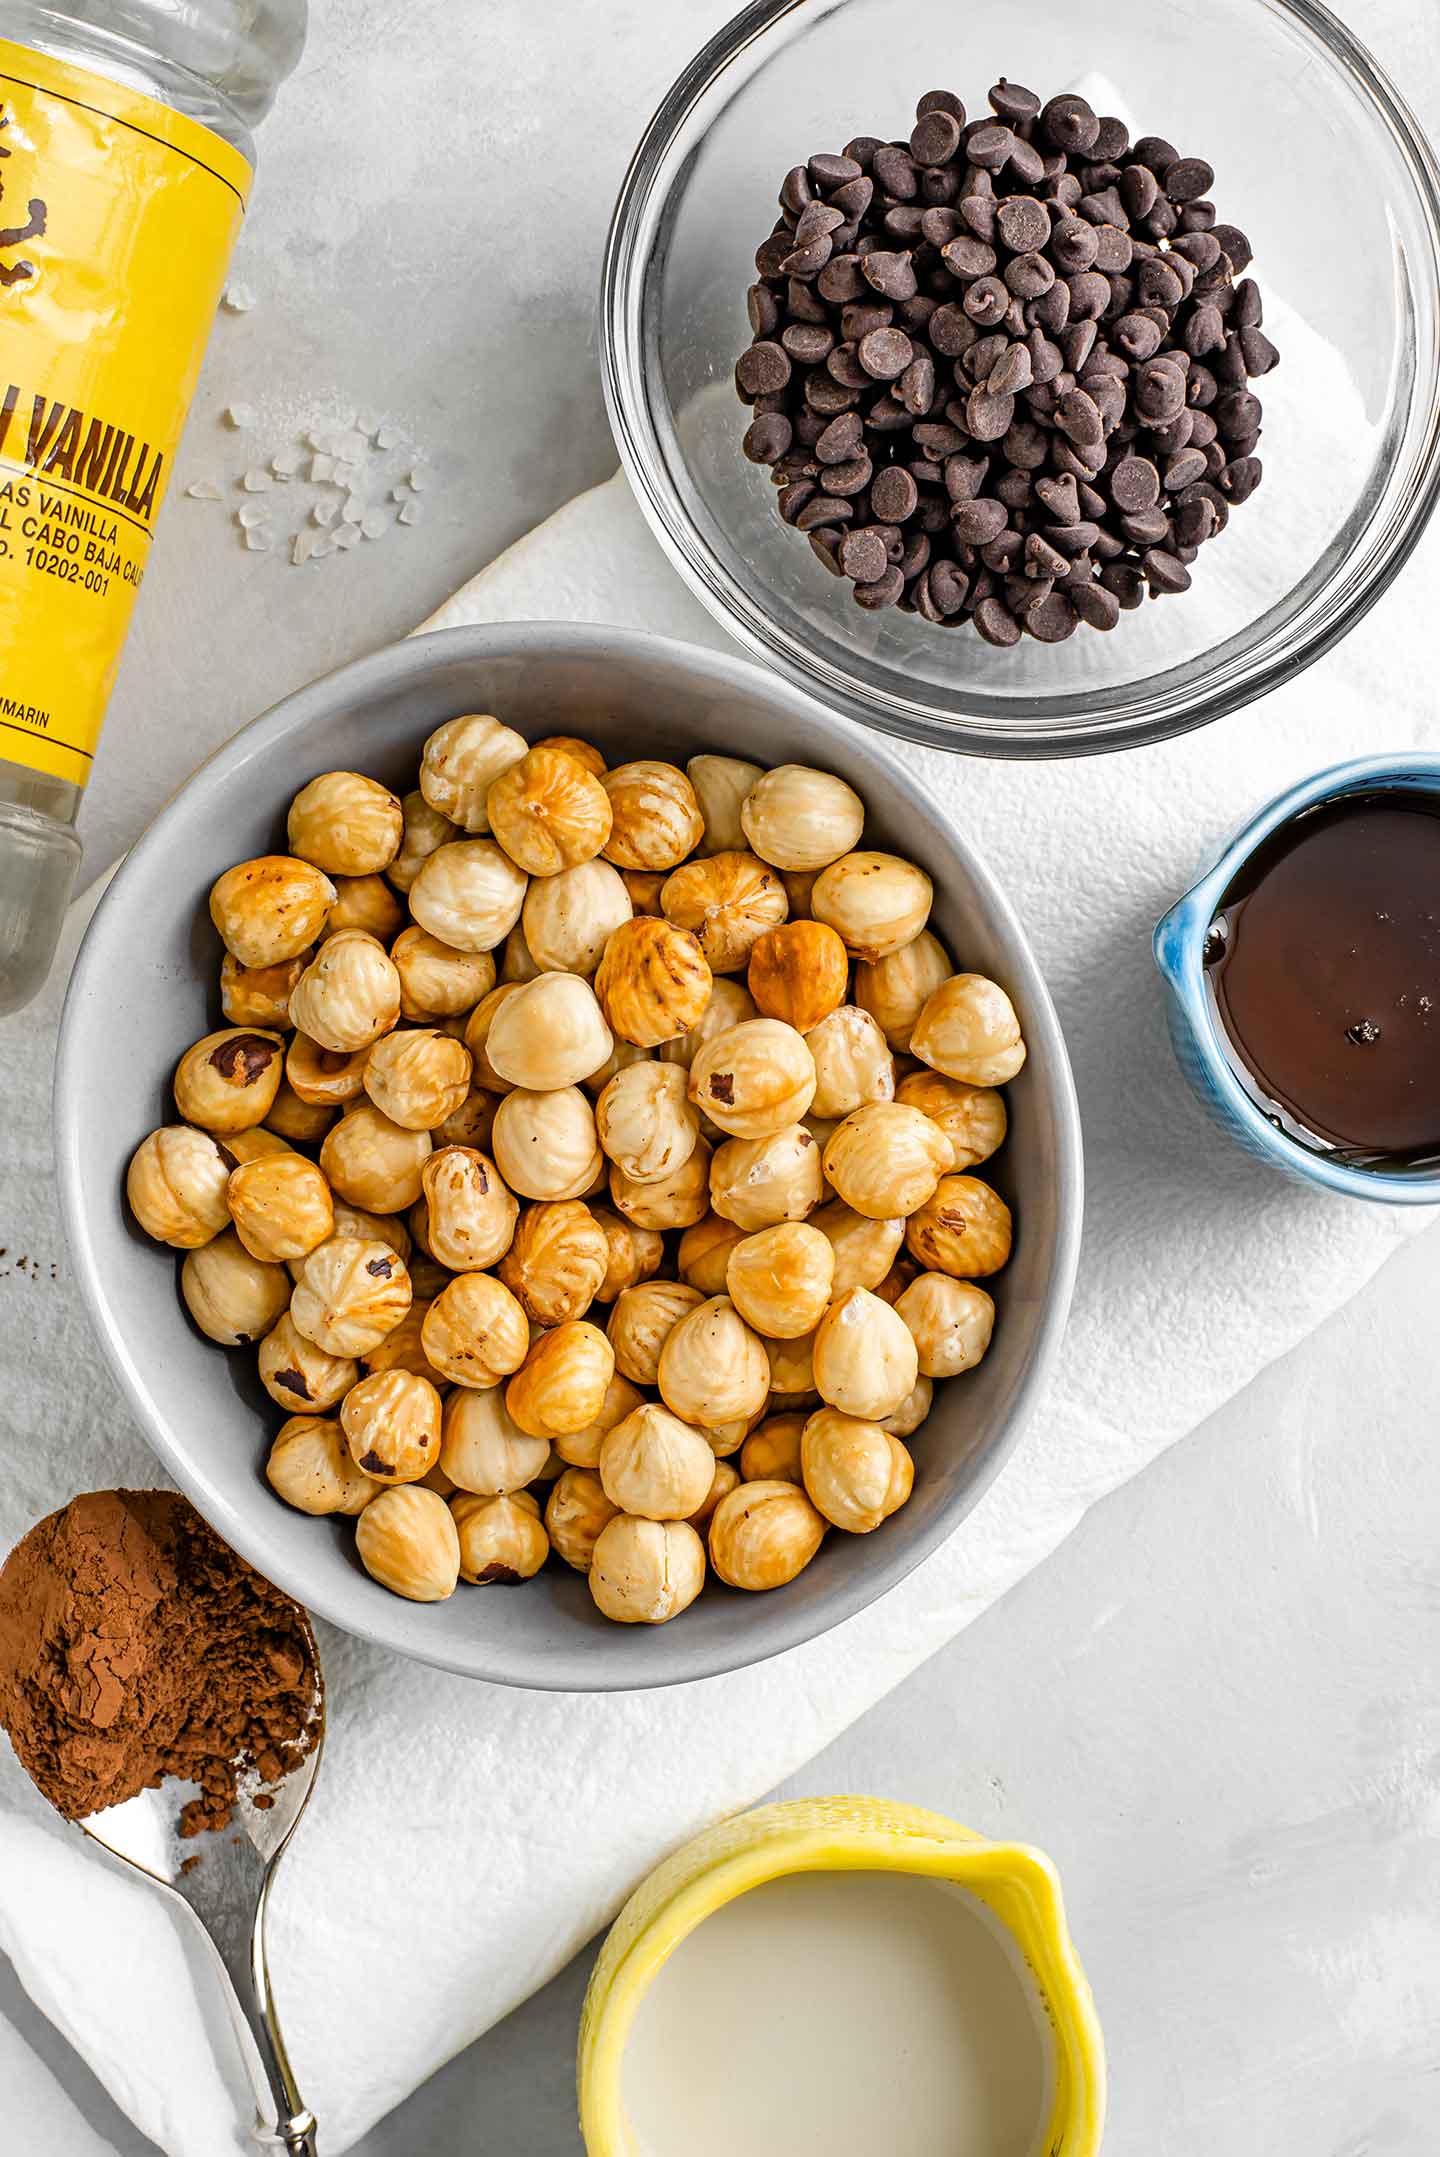
Roasted Hazelnuts
Chocolate Chips
Maple Syrup
Cocoa Powder to Boost The Chocolate
A Bit Of Sea Salt
And Plant Milk To Help It Blend!
How To Make This Chocolate Hazelnut Spread
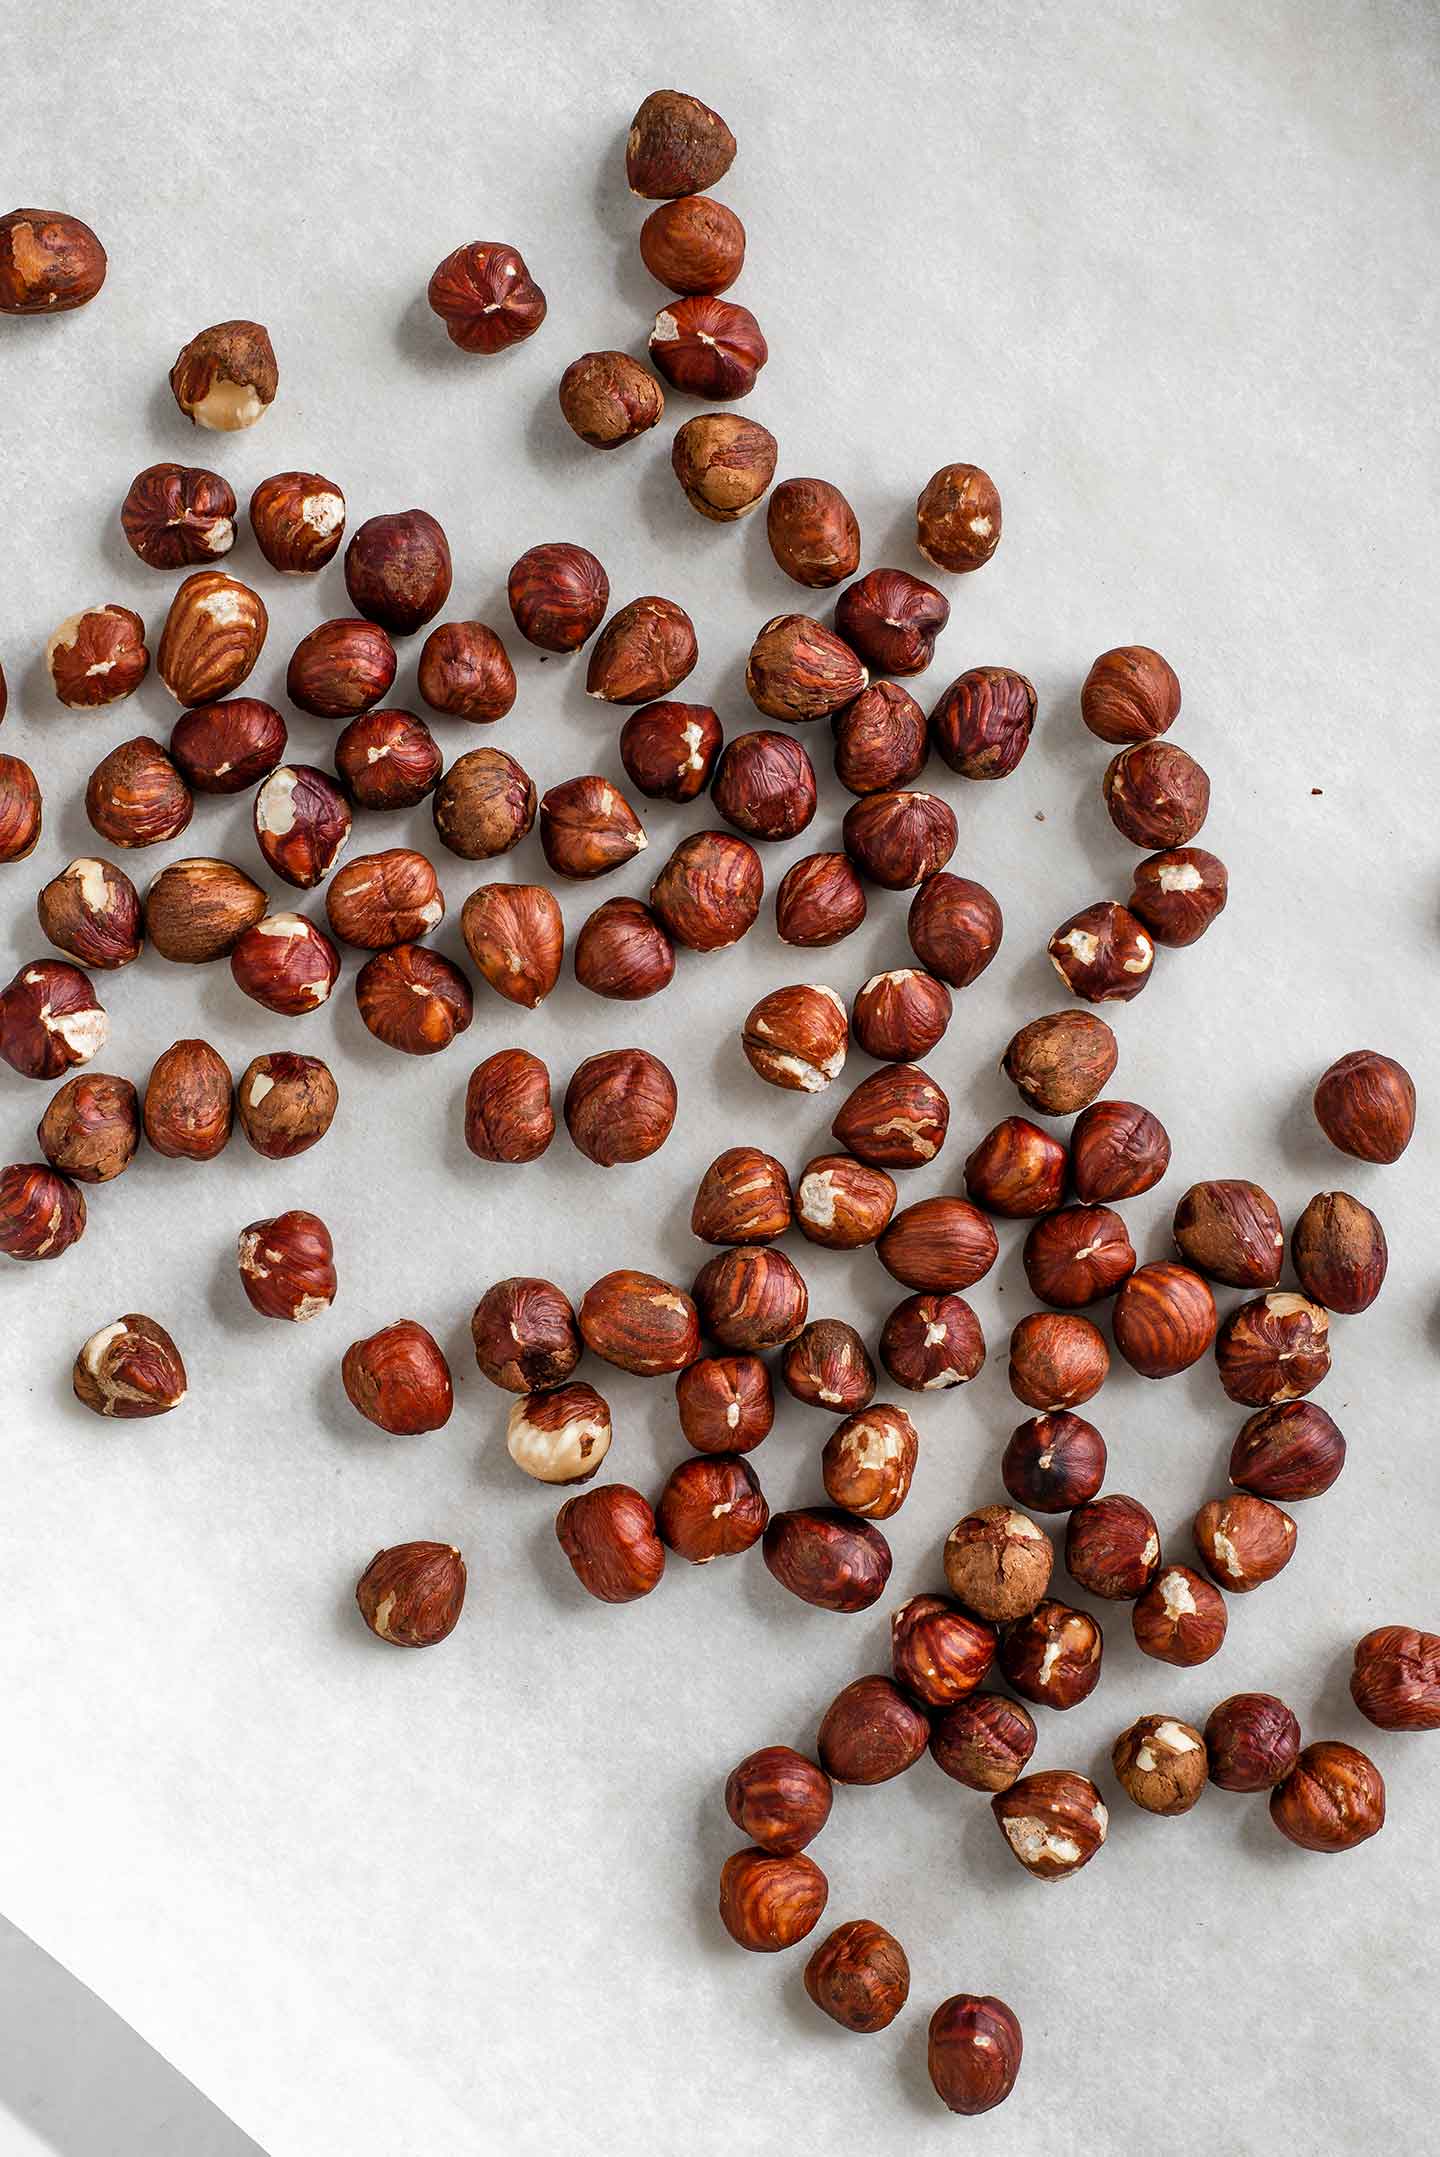
The first step is roasting your hazelnuts! Your house will fill up with the warmest, toastiest, most delightful nutty smell.
- Preheat your oven to 375 degrees F.
- Spread the raw hazelnuts on a baking sheet.
- And roast for 10 Minutes!
They will go from this:
To this:
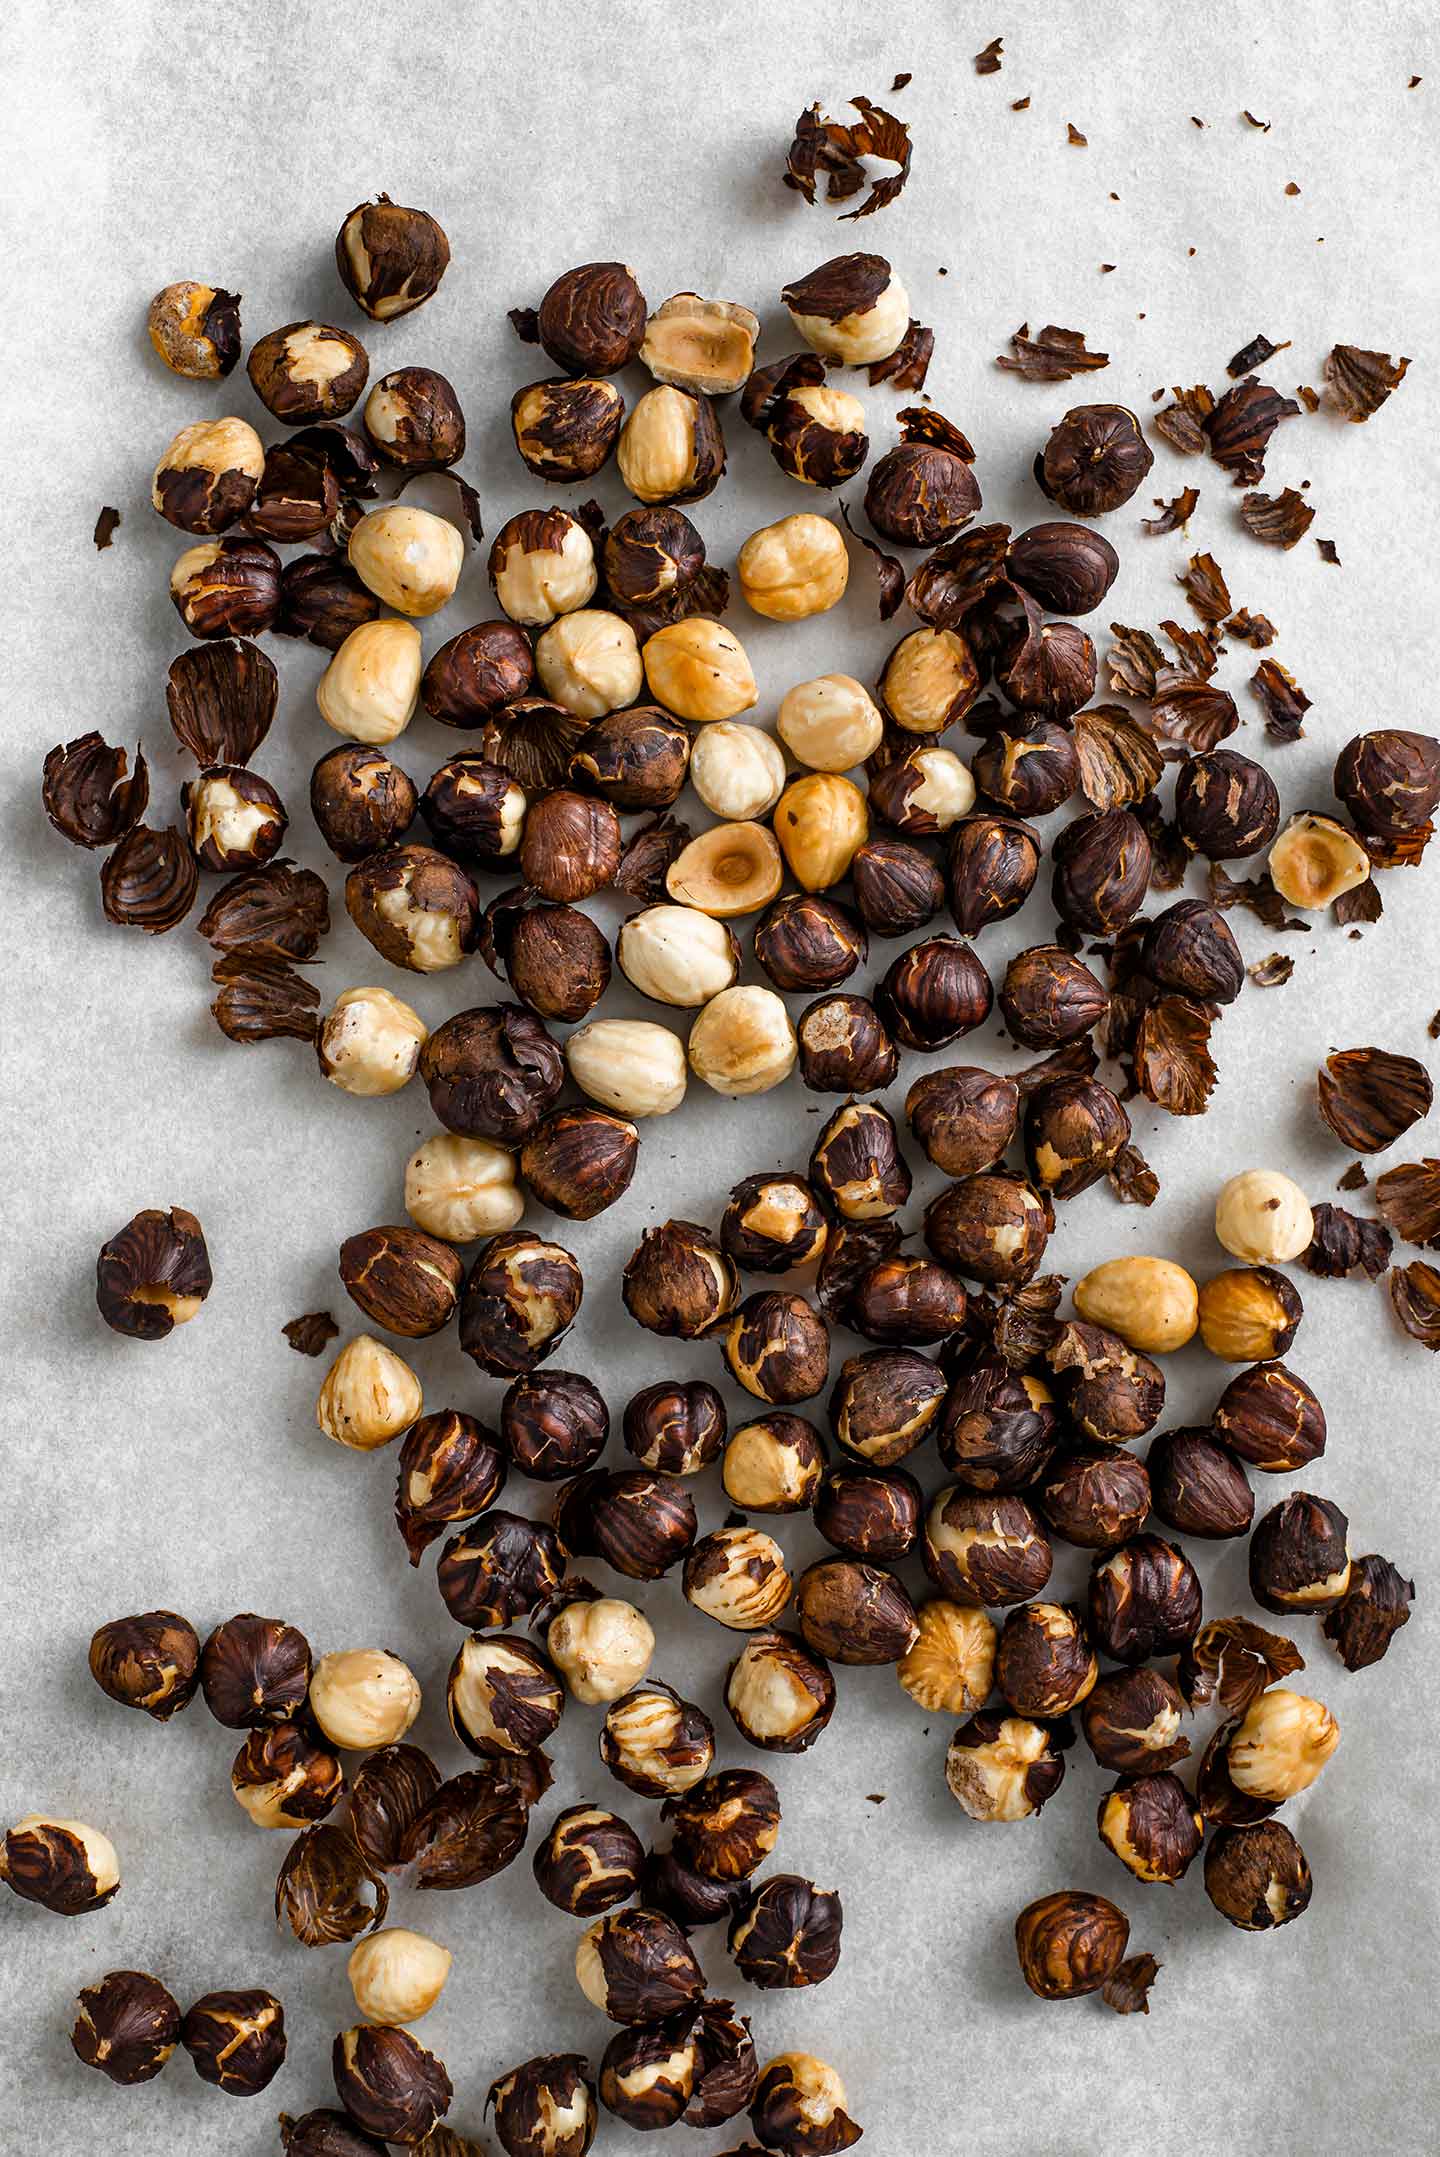
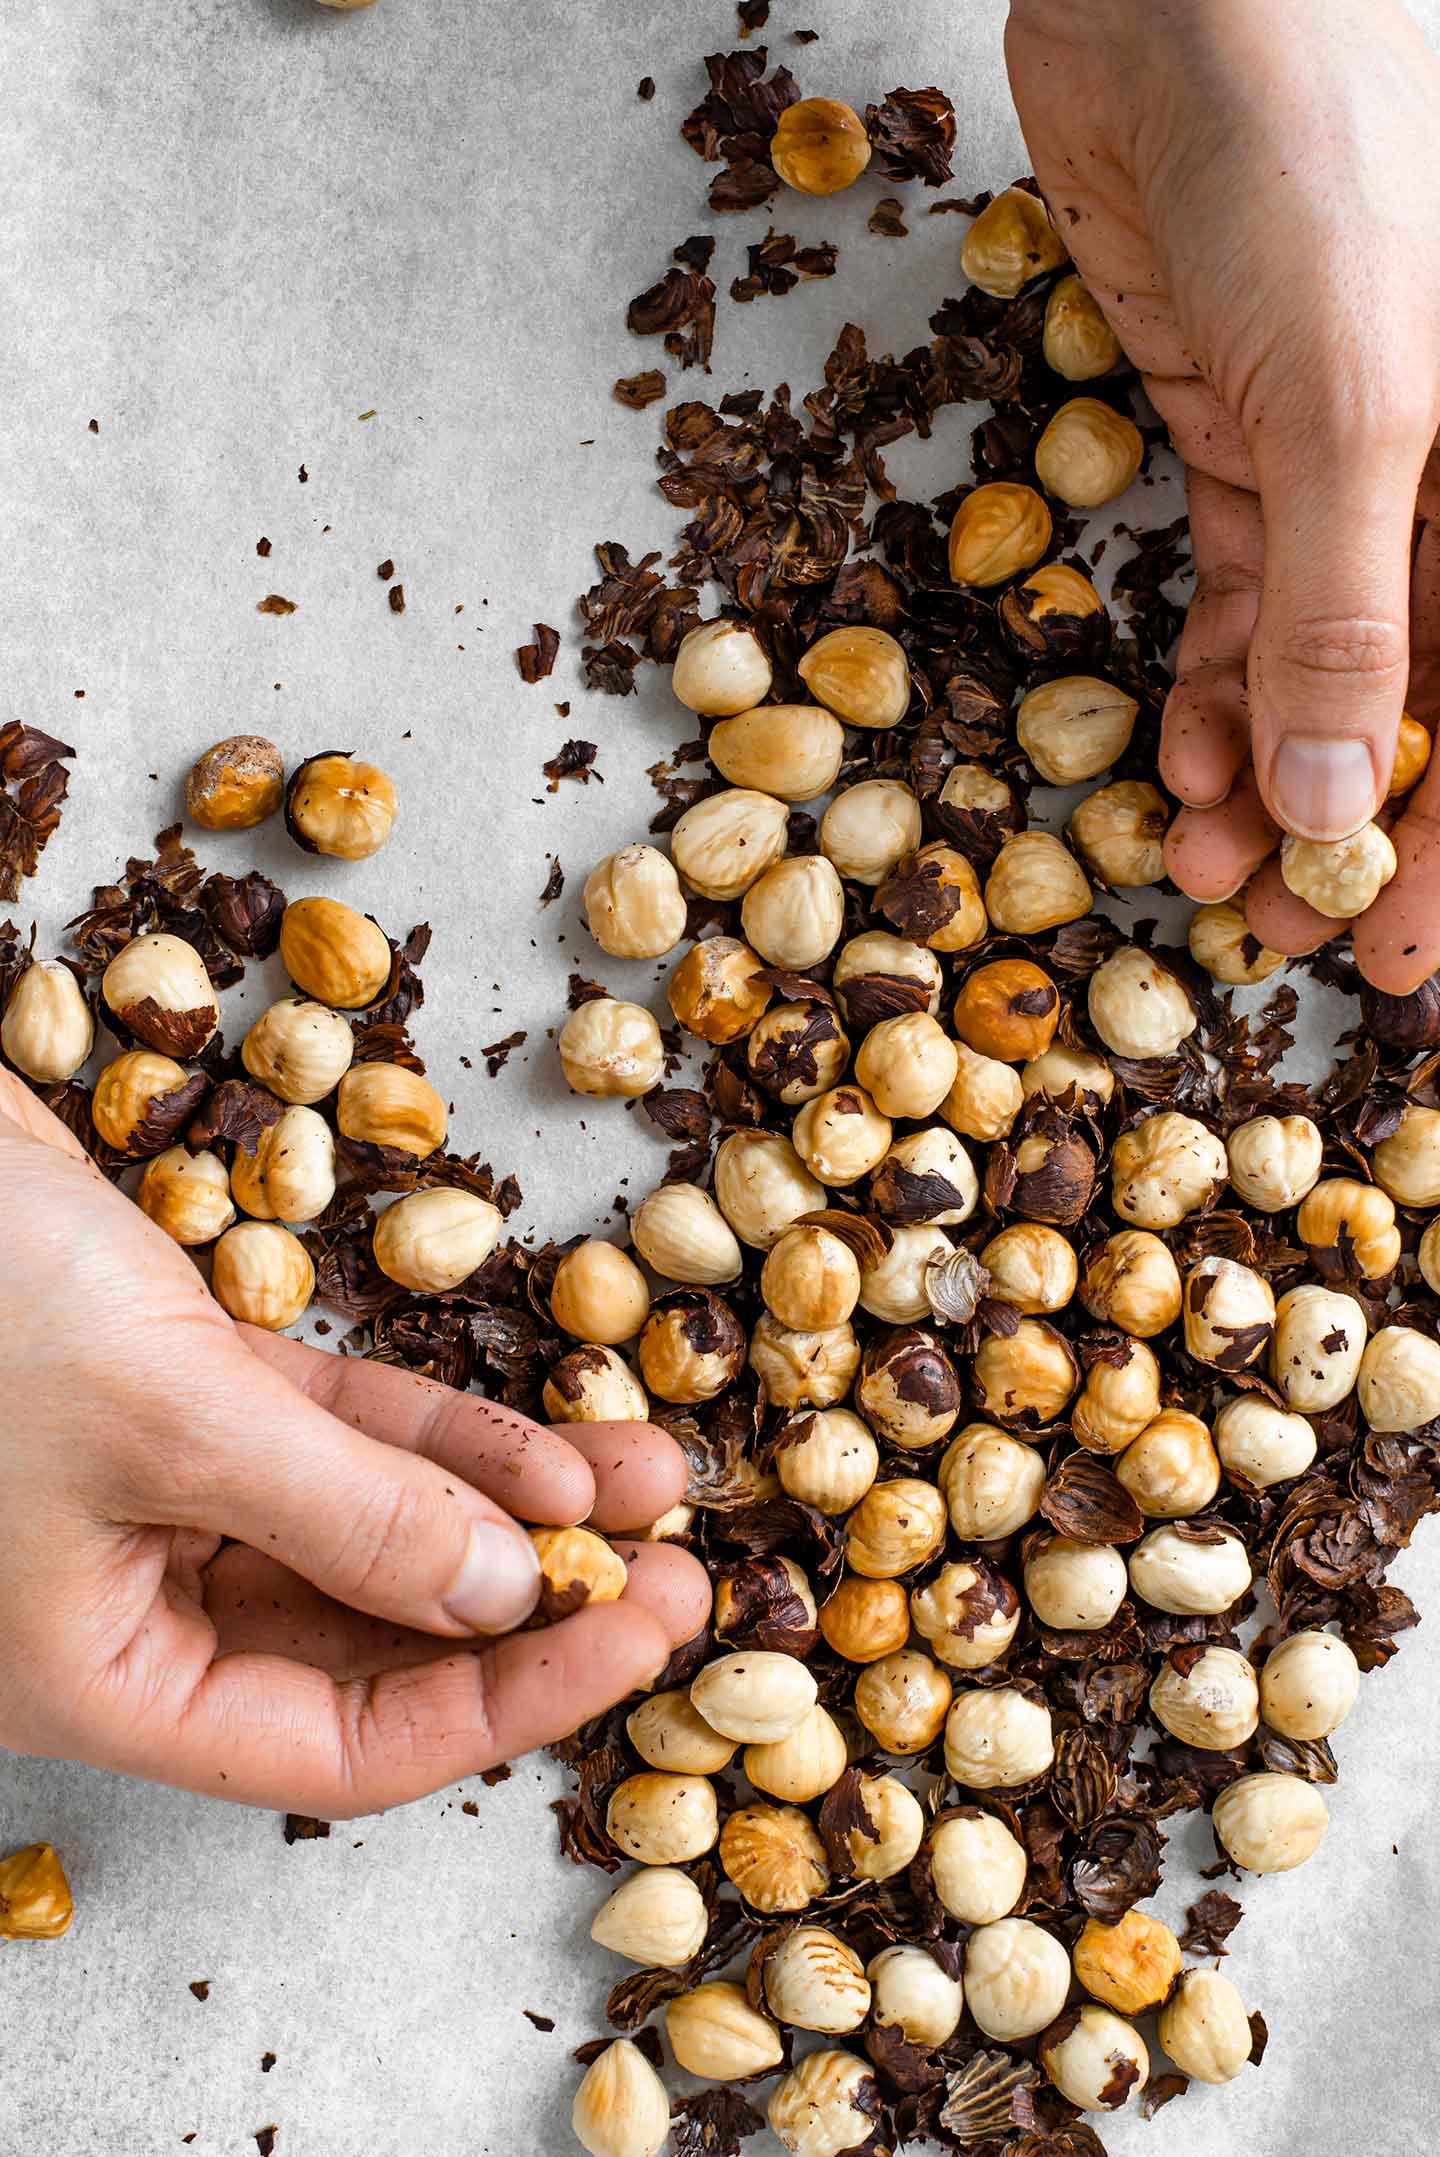
- Allow the nuts to cool so you can handle them.
- Then gently remove the skins. Most of the skins fall off very easily.
- I quickly rub my hands over them and can easily remove the nuts from the flaky toasted skins.
- The skins can have a slightly bitter taste but you can actually reserve them and sprinkle them on a morning oatmeal or a salad for a crispy, toasted topping!
- While you wait for the nuts to cool completely you can melt your chocolate chips with the maple syrup.
- I place the two together in a small dish in the microwave and melt for about 15 seconds.
- Take it out, give it a stir, and the remaining chocolate should melt in the warmed maple syrup.
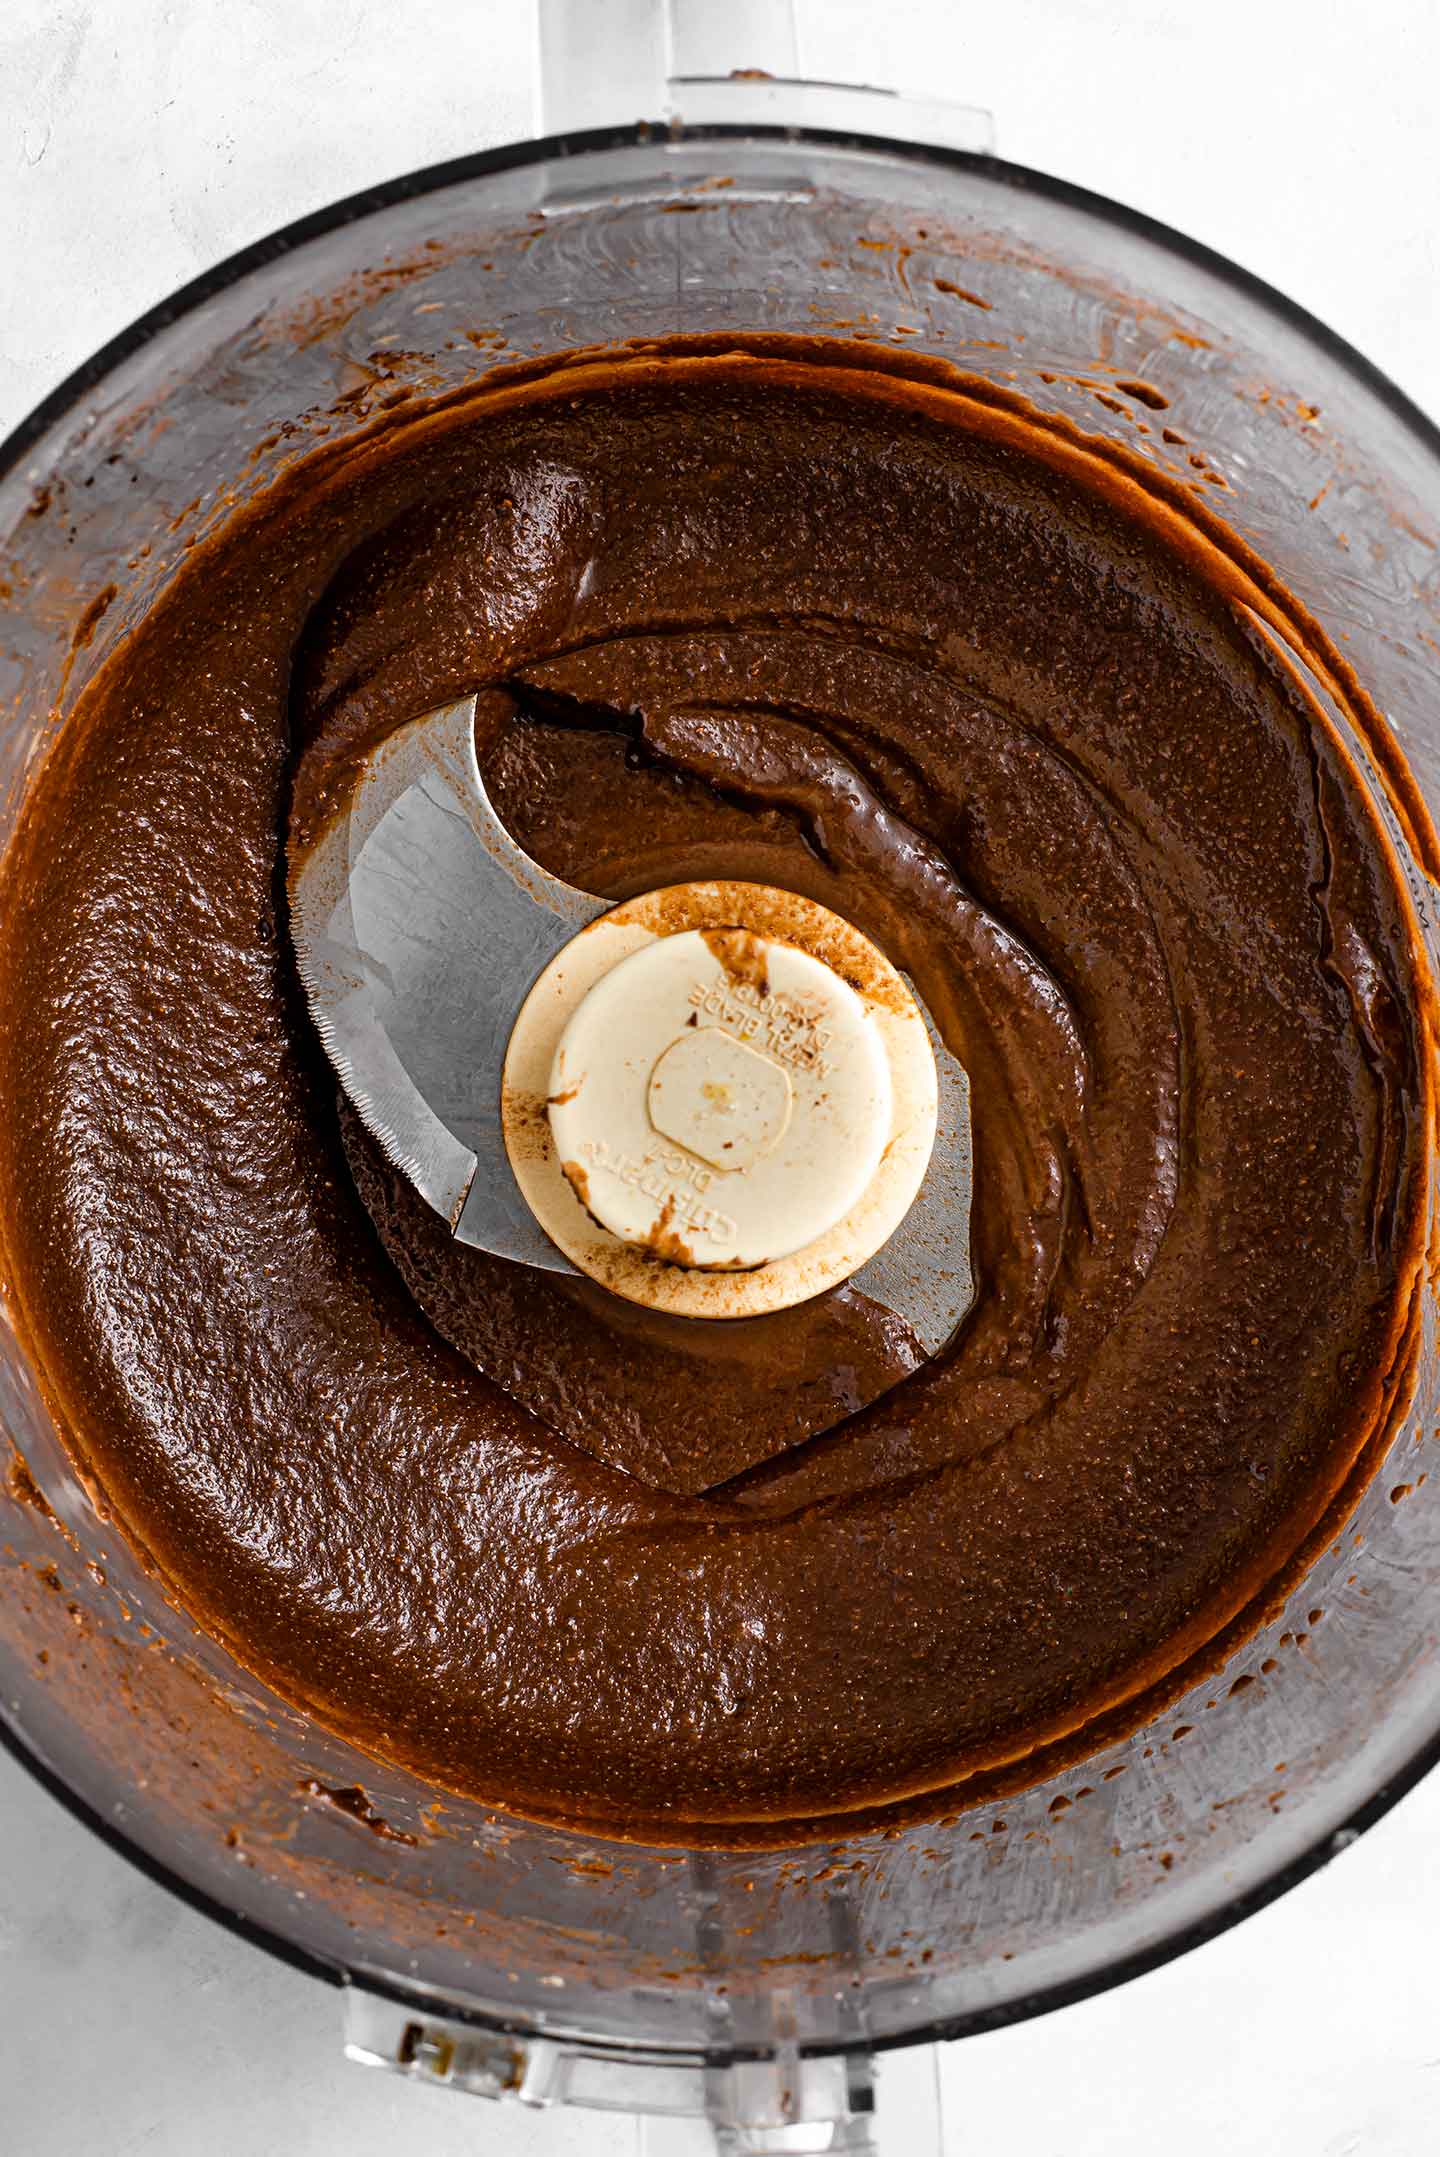
- Then, add your cooled hazelnuts to your food processor and break them down into a meal.
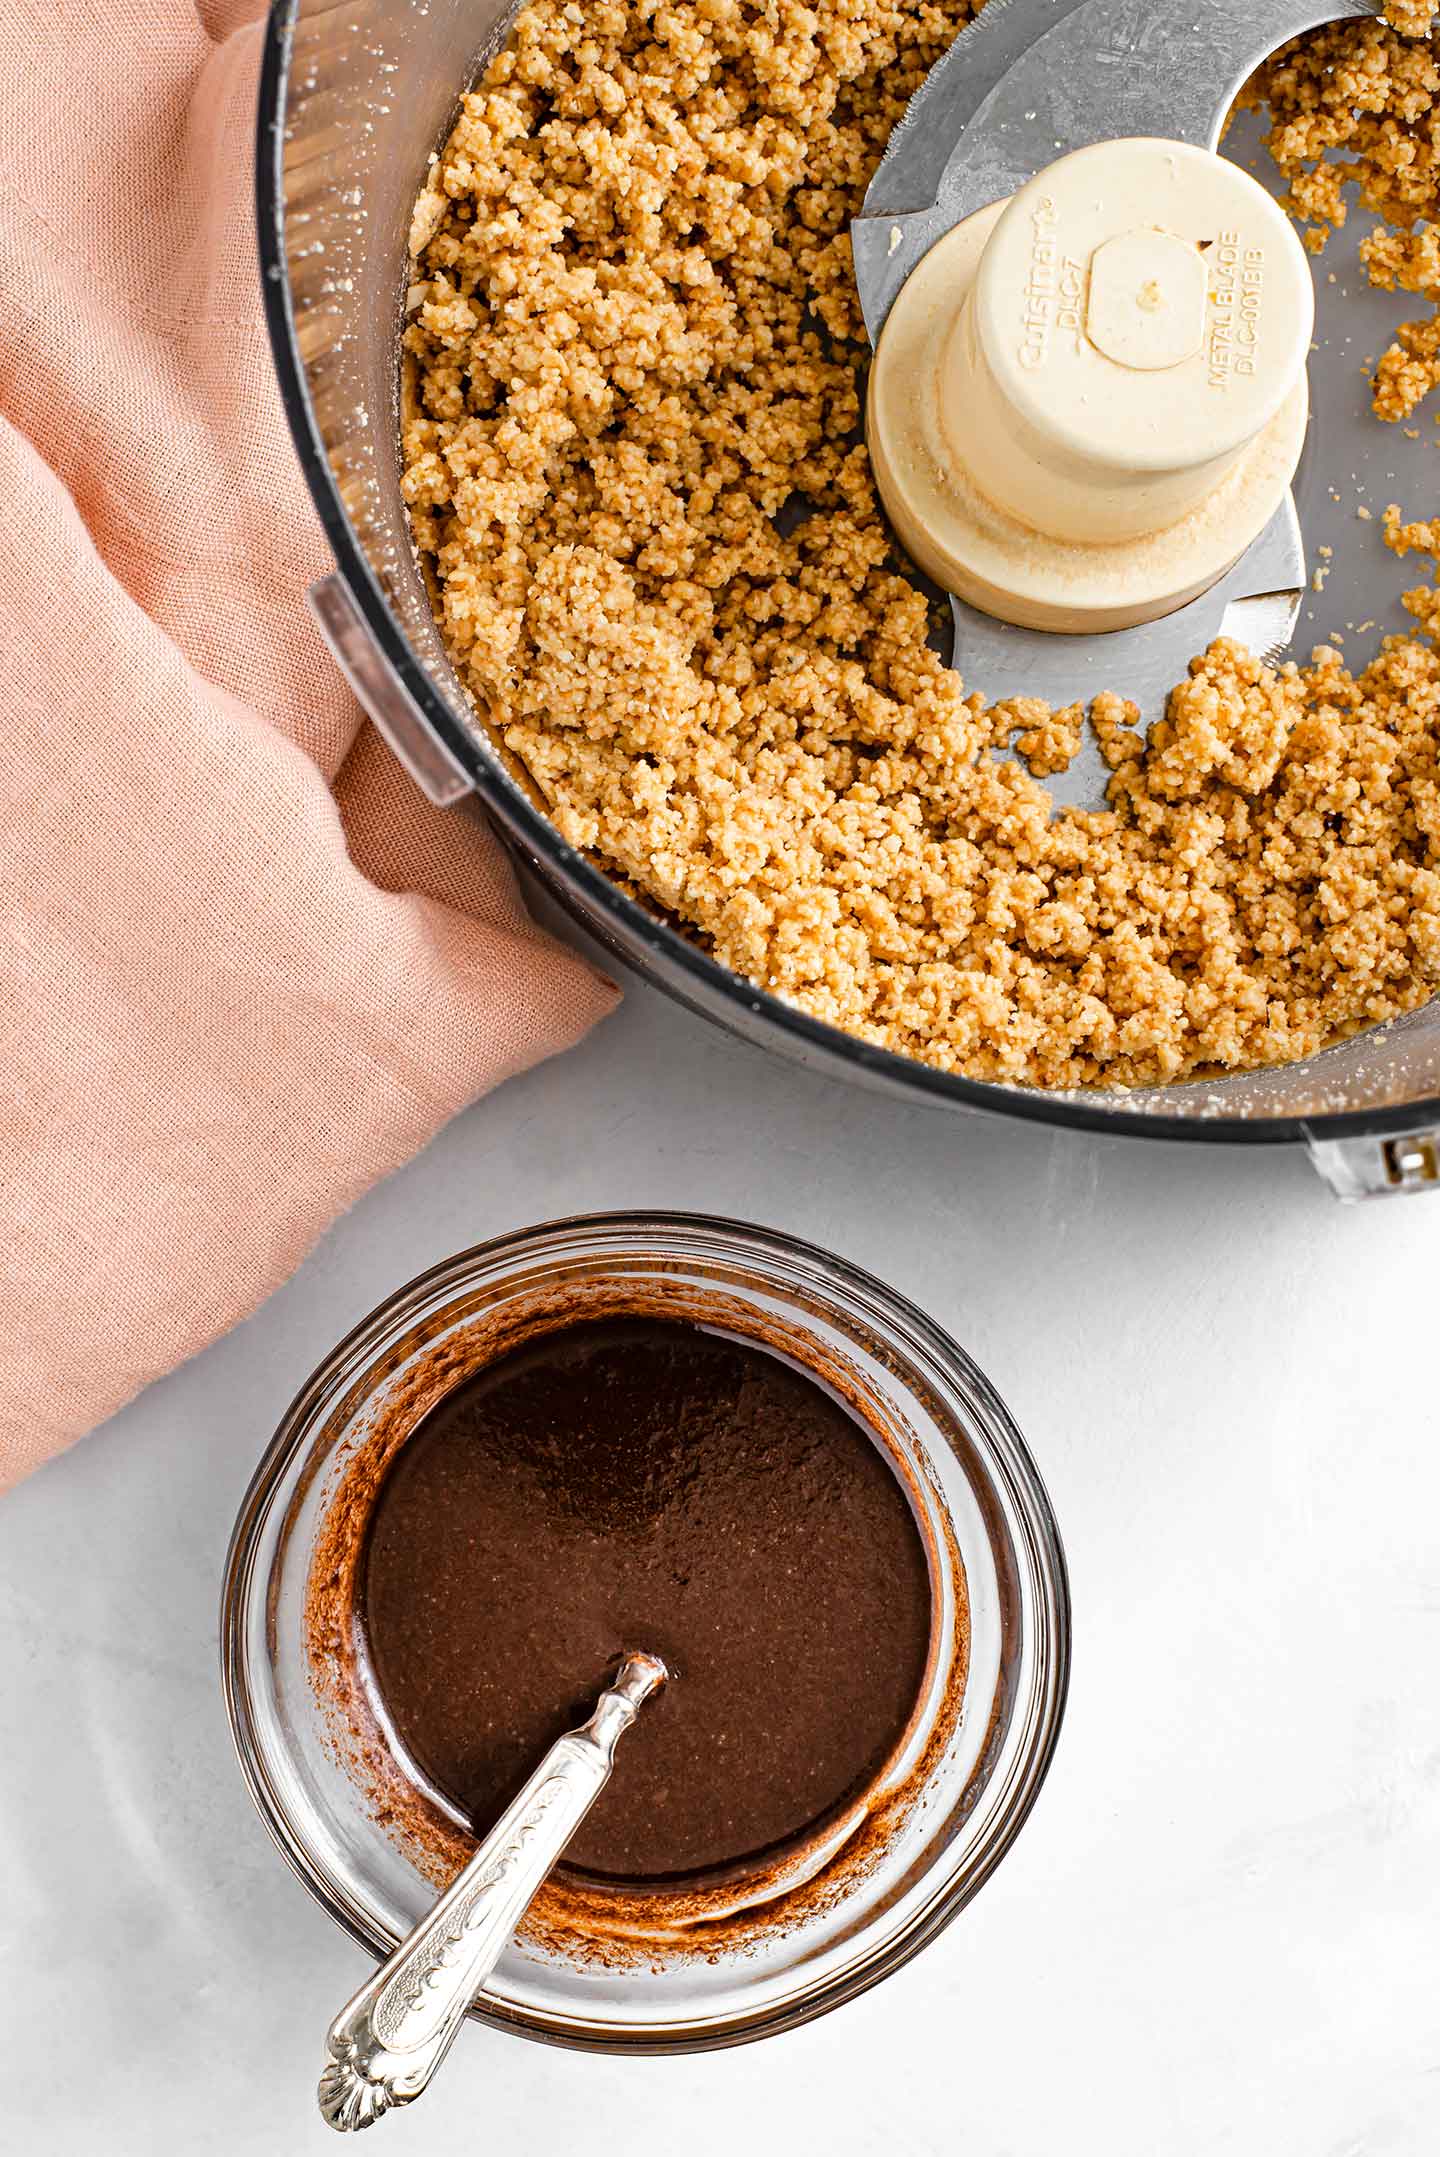
- Add your remaining ingredients to the food processor.
- And blend.
- Stream in milk little by little to reach your desired consistency, and taste to adjust for sweetness!
Recipe Cost For Vegan Nutella Hazelnut Spread
This homemade vegan "Nutella" hazelnut spread costs us approximately: CAD $3.65 for roughly 330 grams.
Compared to the classic Nutella:
- Our version is $1.11/100g
- And Nutella is roughly $1.00/100g
- If you tend to buy a dairy free chocolate spread, they cost us roughly $2.84/100g
I avoided making a homemade version of Nutella for a while because hazelnuts can be pricey at our local grocery store. We find the best price for hazelnuts at our wholesale store. If you have access to a store like Costco in Canada you will likely find the best price there. Otherwise, I suggest watching for a sale at your local bulk store and snatching up your hazelnuts then!
Using hazelnuts purchased from our bulk store at regular price, this recipe would cost us an additional $2.64.
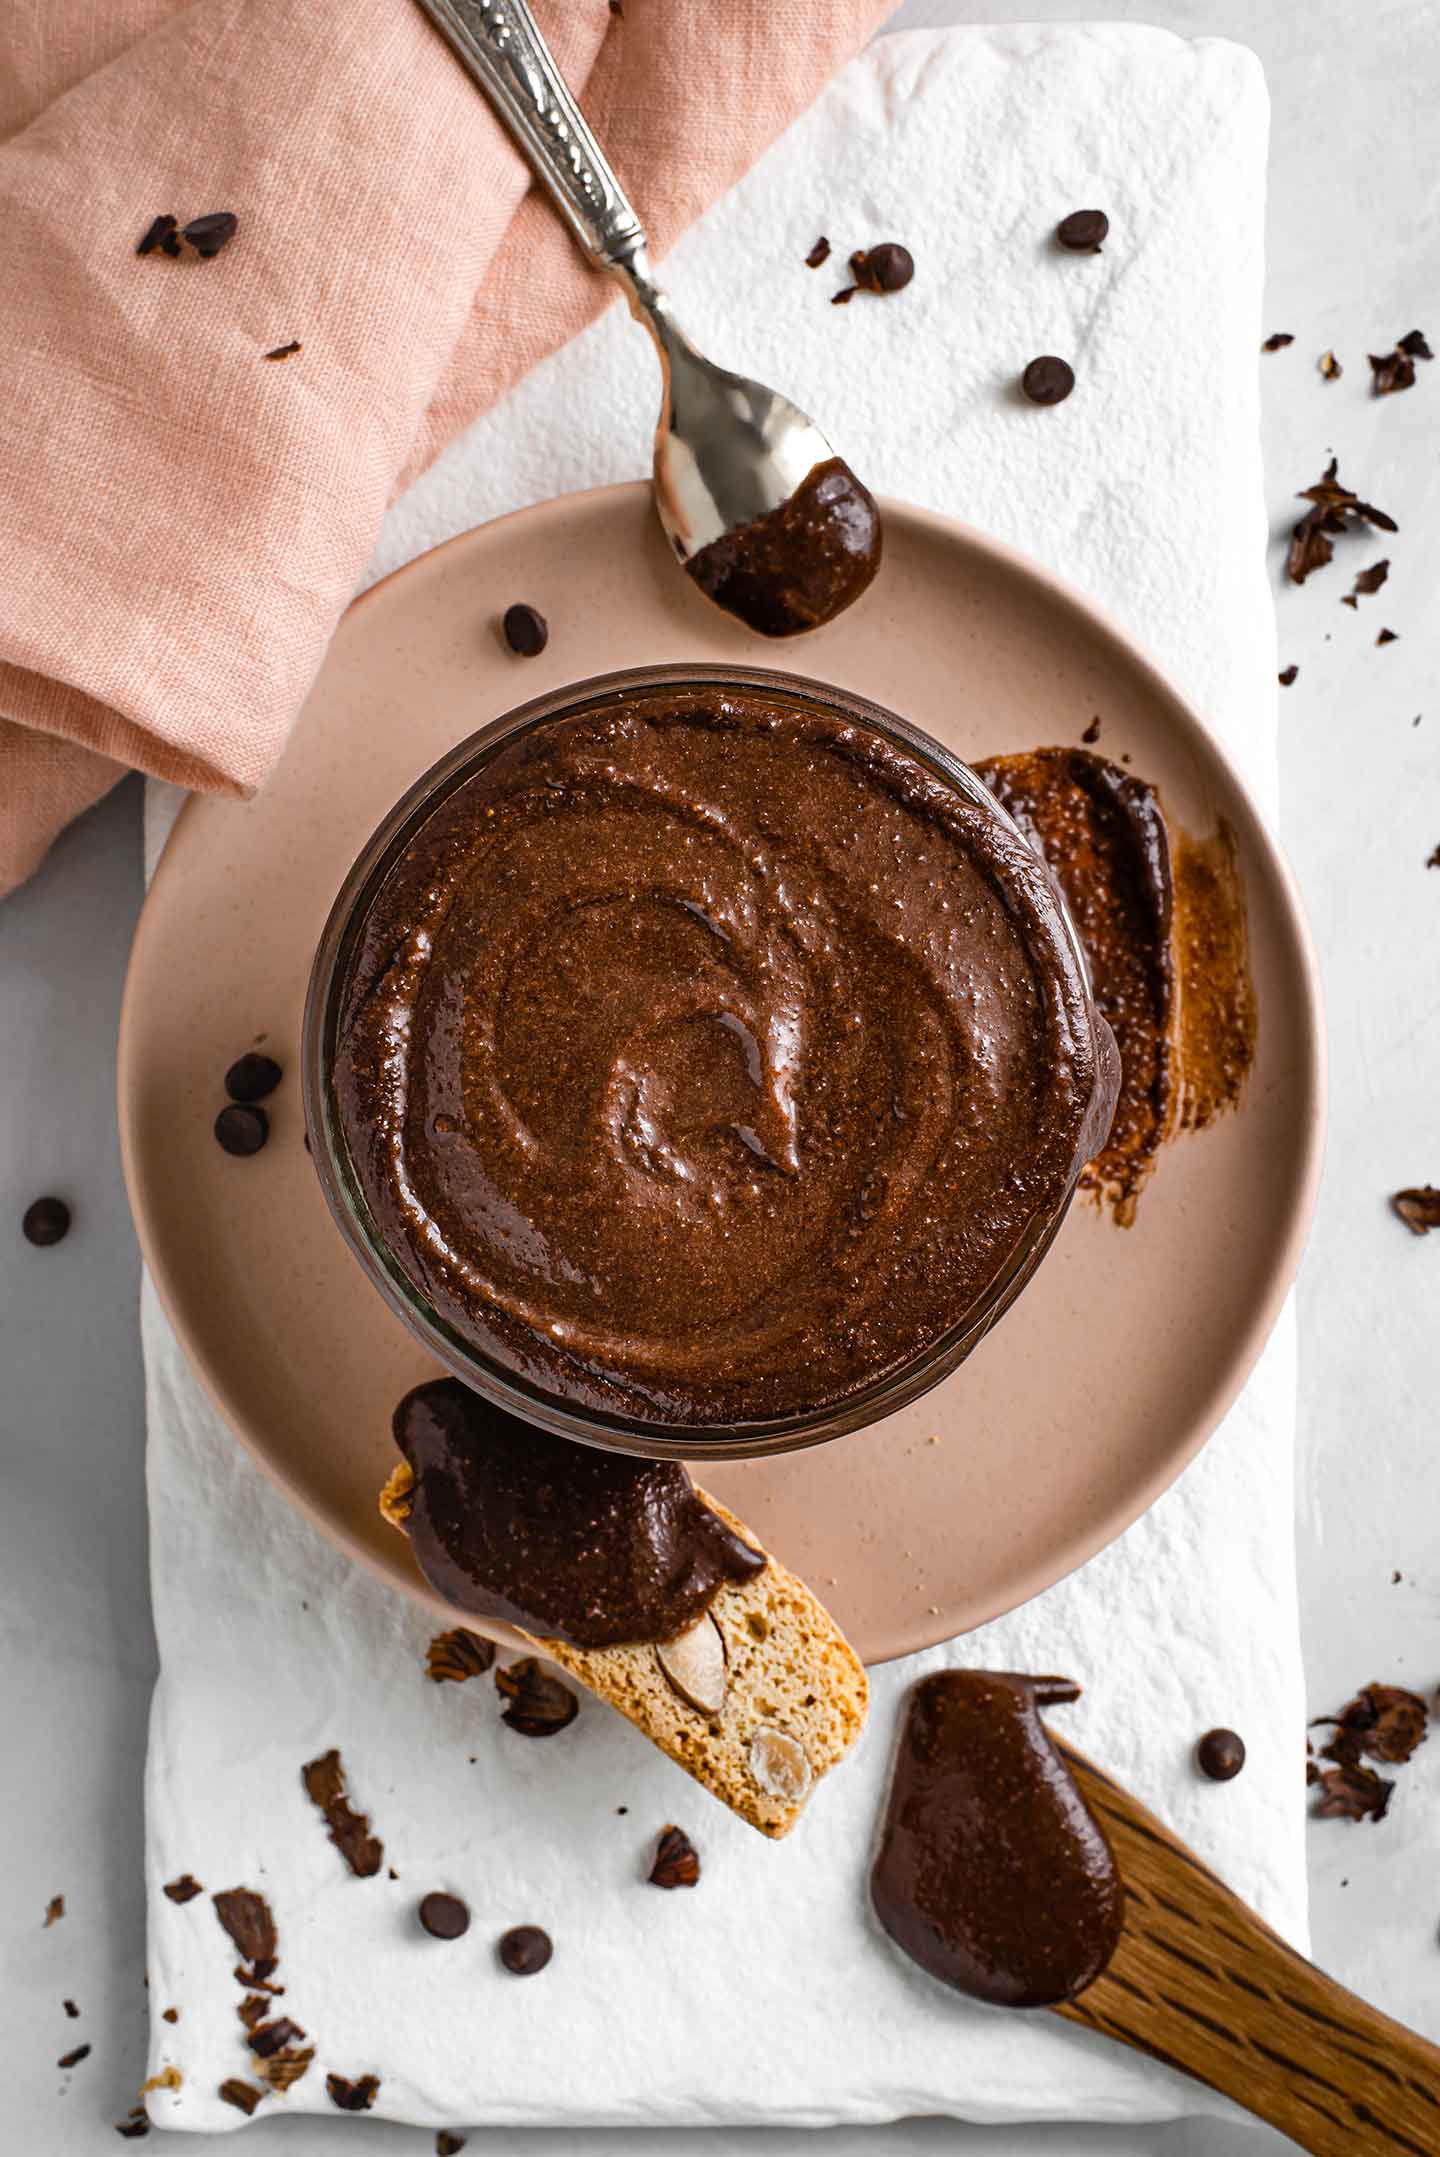
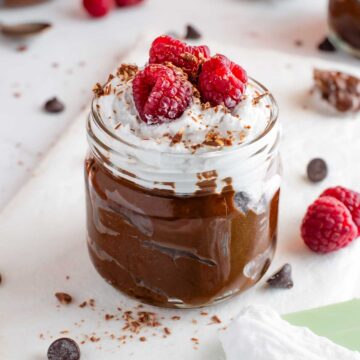
A thrifty benefit of this homemade spread is that we mostly use it for a decadent chocolate drizzle! It manages to stay in our fridge for a couple of months because we scoop out a small amount, add a dash of plant milk, heat it in the microwave for a few seconds, give it a stir, and voila! Toasty melted chocolate for all your decadent breakfast and dessert desires!
Let us know in the comments below if you make this vegan "Nutella" hazelnut spread and if you slather it or drizzle it!
Try taking these Fluffy Chia Chip Pancakes to a whole new level of decadence! And pair it with our 5 minute Fluffy Coconut Whipped Cream for ultimate dessert topping dreaminess!
Print
Amazing Vegan "Nutella" Chocolate Hazelnut Spread
- Total Time: 20 minutes
- Yield: 330 g 1x
- Diet: Vegan
Description
This homemade vegan "Nutella" hazelnut spread has all the hazelnut chocolate flavour you love from the classic! And it's ready in 20 minutes!
Ingredients
- 1 cup raw hazelnuts (if using roasted proceed to step 3)
- ½ tsp vanilla extract
- ¼ tsp sea salt
- ⅛ cup cocoa powder
- ⅛ cup + 1 teaspoon maple syrup (plus more to taste)
- ¼ cup chocolate chips, dairy-free
- ¼ cup oat milk (or other non-dairy milk, add more as needed)
*All the ingredients for this recipe are from our pantry and freezer tips!
Instructions
- Preheat your oven to 375 degrees F. Spread the raw hazelnuts on a baking sheet and roast for 10 minutes.
- Remove the hazelnuts from the oven and allow to cool until you can handle them. Using your hands or a clean towel, gently rub the hazelnuts until the skins fall off (they may not all come off and that’s ok). Reserve the skins as a toasty garnish for oatmeal, salads, risotto, cakes and cupcakes or anything else you can think up!
- In the microwave, or on the stovetop if you prefer, melt the chocolate chips with the maple syrup. (Using the microwave, melt for 15 seconds or so, take it out, and stir until fully melted. Continue in increments of only a few seconds if extra time is needed to melt the chips completely).
- Add the cooled hazelnuts to your food processor and pulse for about 30 seconds to break them down. Blend for another 30 seconds until they are finely ground.
- To the food processor, add the vanilla, salt, cocoa powder and melted chocolate chips and maple syrup mixture. Blend until smooth and creamy. I slowly added just over ¼ cup of oat milk plus a bit more maple syrup to help the mixture get nice and creamy. You can stop the machine periodically to give the spread a stir and a taste. Add more maple syrup for a sweeter spread and continue adding milk a little at a time to reach your desired texture! Keep in mind the spread will thicken in the fridge as it sits.
- Definitely enjoy some immediately! But transfer to a jar and keep in the refrigerator for 2-3 weeks or more (ours has lasted a few months). If less milk is used it will firm up in the fridge but scoop out what you need and heat it for a few seconds in the microwave to make it warm and spreadable again! I love to heat some up with a dash of milk to make a creamy runny sauce to pour over pancakes, crepes, or these caramelized cinnamon plantains!
Notes
Cost Comparison: approximately CAD $3.65 (makes at least 330g for $1.11/100g) vs. Nutella at roughly $1.00/100g. If buying dairy-free chocolate spread the cost rises to roughly CAD $2.84/100g resulting in definite savings.
If you have access to a wholesale store that is where you will likely find hazelnuts at the lowest price. Hazelnuts from our bulk store at the regular price are still more cost effective than buying a dairy free chocolate spread but the overall recipe cost does rise by about $2.64. Look for sales at your bulk store!
We have not tried this recipe in a blender. You may need to add extra milk to help the mixture blend but that should result in a nice and creamy texture.
If you find your mixture is runnier than you hoped, place it in the fridge for a few hours and see if it firms up to a more desirable thickness. If still too runny, it makes a fantastic chocolate sauce! But you can try adding a touch of ground almonds or oats to thicken it.
- Prep Time: 10 Min.
- Category: Dessert
- Method: Roasted, Food Processor
- Cuisine: American

Christina
Soooooooooo decadent and rich and delicious!!! Made this for a birthday party last weekend and it was a hit! Everyone LOVED it!!
Kathryn Alexandre
It is so decadent isn't it! I'm so glad it was a hit. Thank you for letting me know and for the lovely star rating!
Katerina
This... is... AMAZING!!! Oh my god it tastes so good! I tasted it right out of the food processor and had to contain myself. You just made my day 🙂
Kathryn Alexandre
haha awesome! I'm so glad you love it! It definitely makes my day too and you made my day for trying this recipe and leaving a lovely star rating. Thank you so much and ENJOY!
Brenna
GIRL this is SO GOOD!!!
Kathryn Alexandre
haha thank you Brenna! So glad you love it. Thank you for trying it and for the star rating. Enjoy!
Dolores
As someone who is newly dairy-free (and dipping my toes into begin entirely vegan) this is a total life-changer! Thank you, Kathryn!!!
Kathryn Alexandre
Oh yay! I'm so glad you still get to enjoy the flavour you love! I'm so glad you found my recipe and thank you for letting me know it's a life-changer for you!