
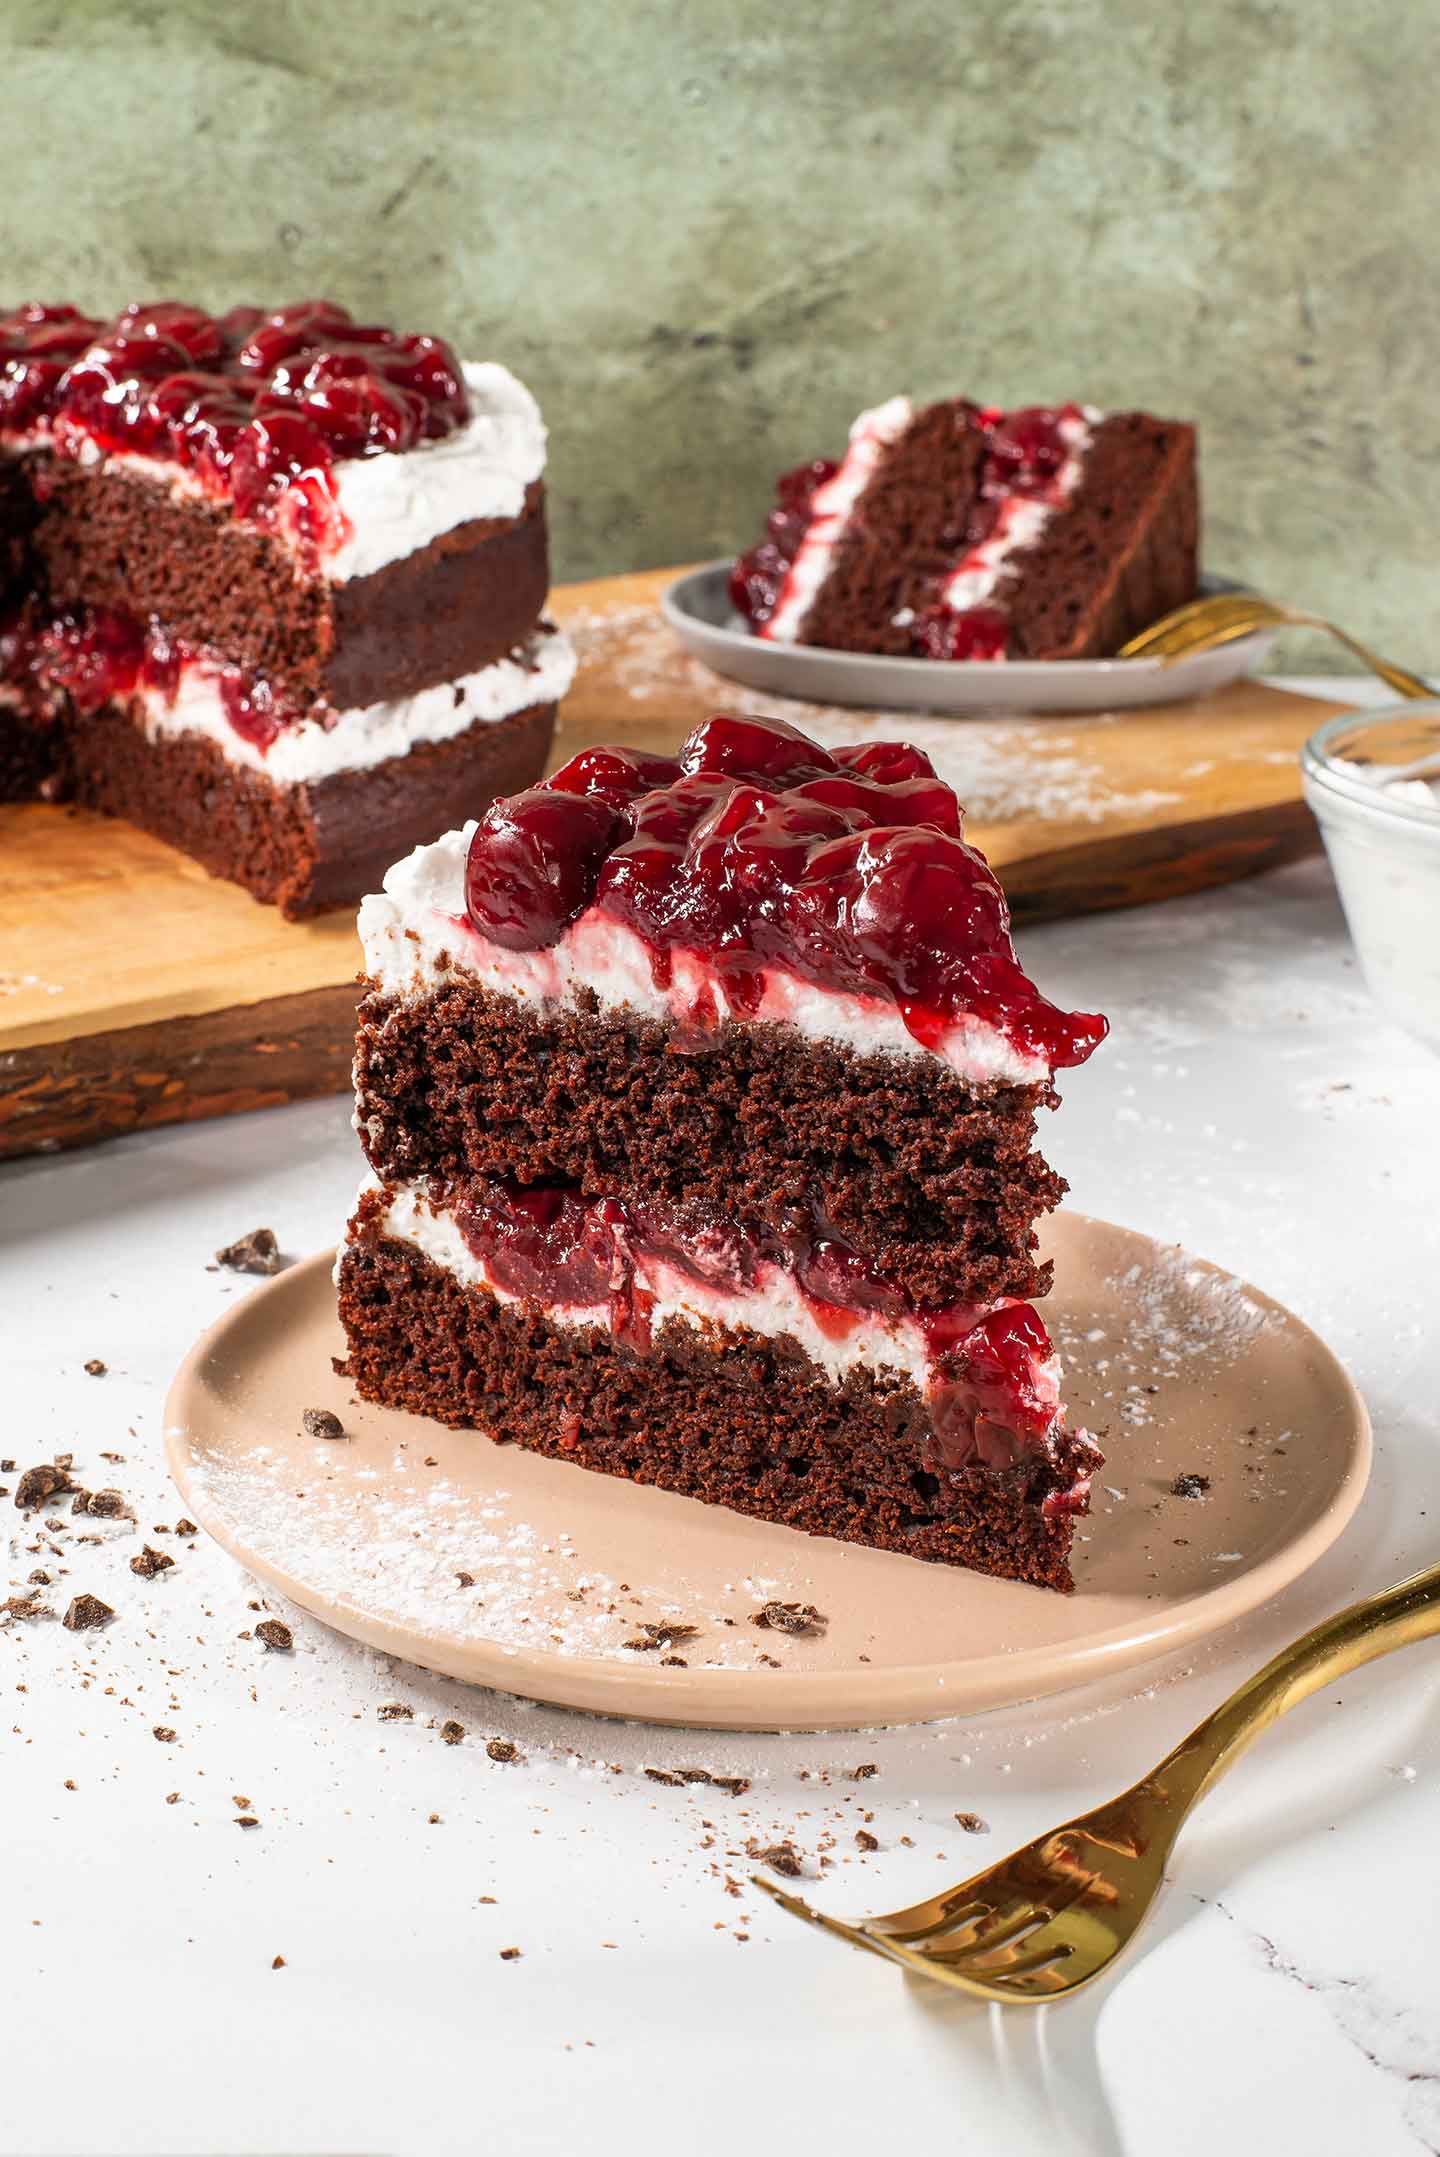
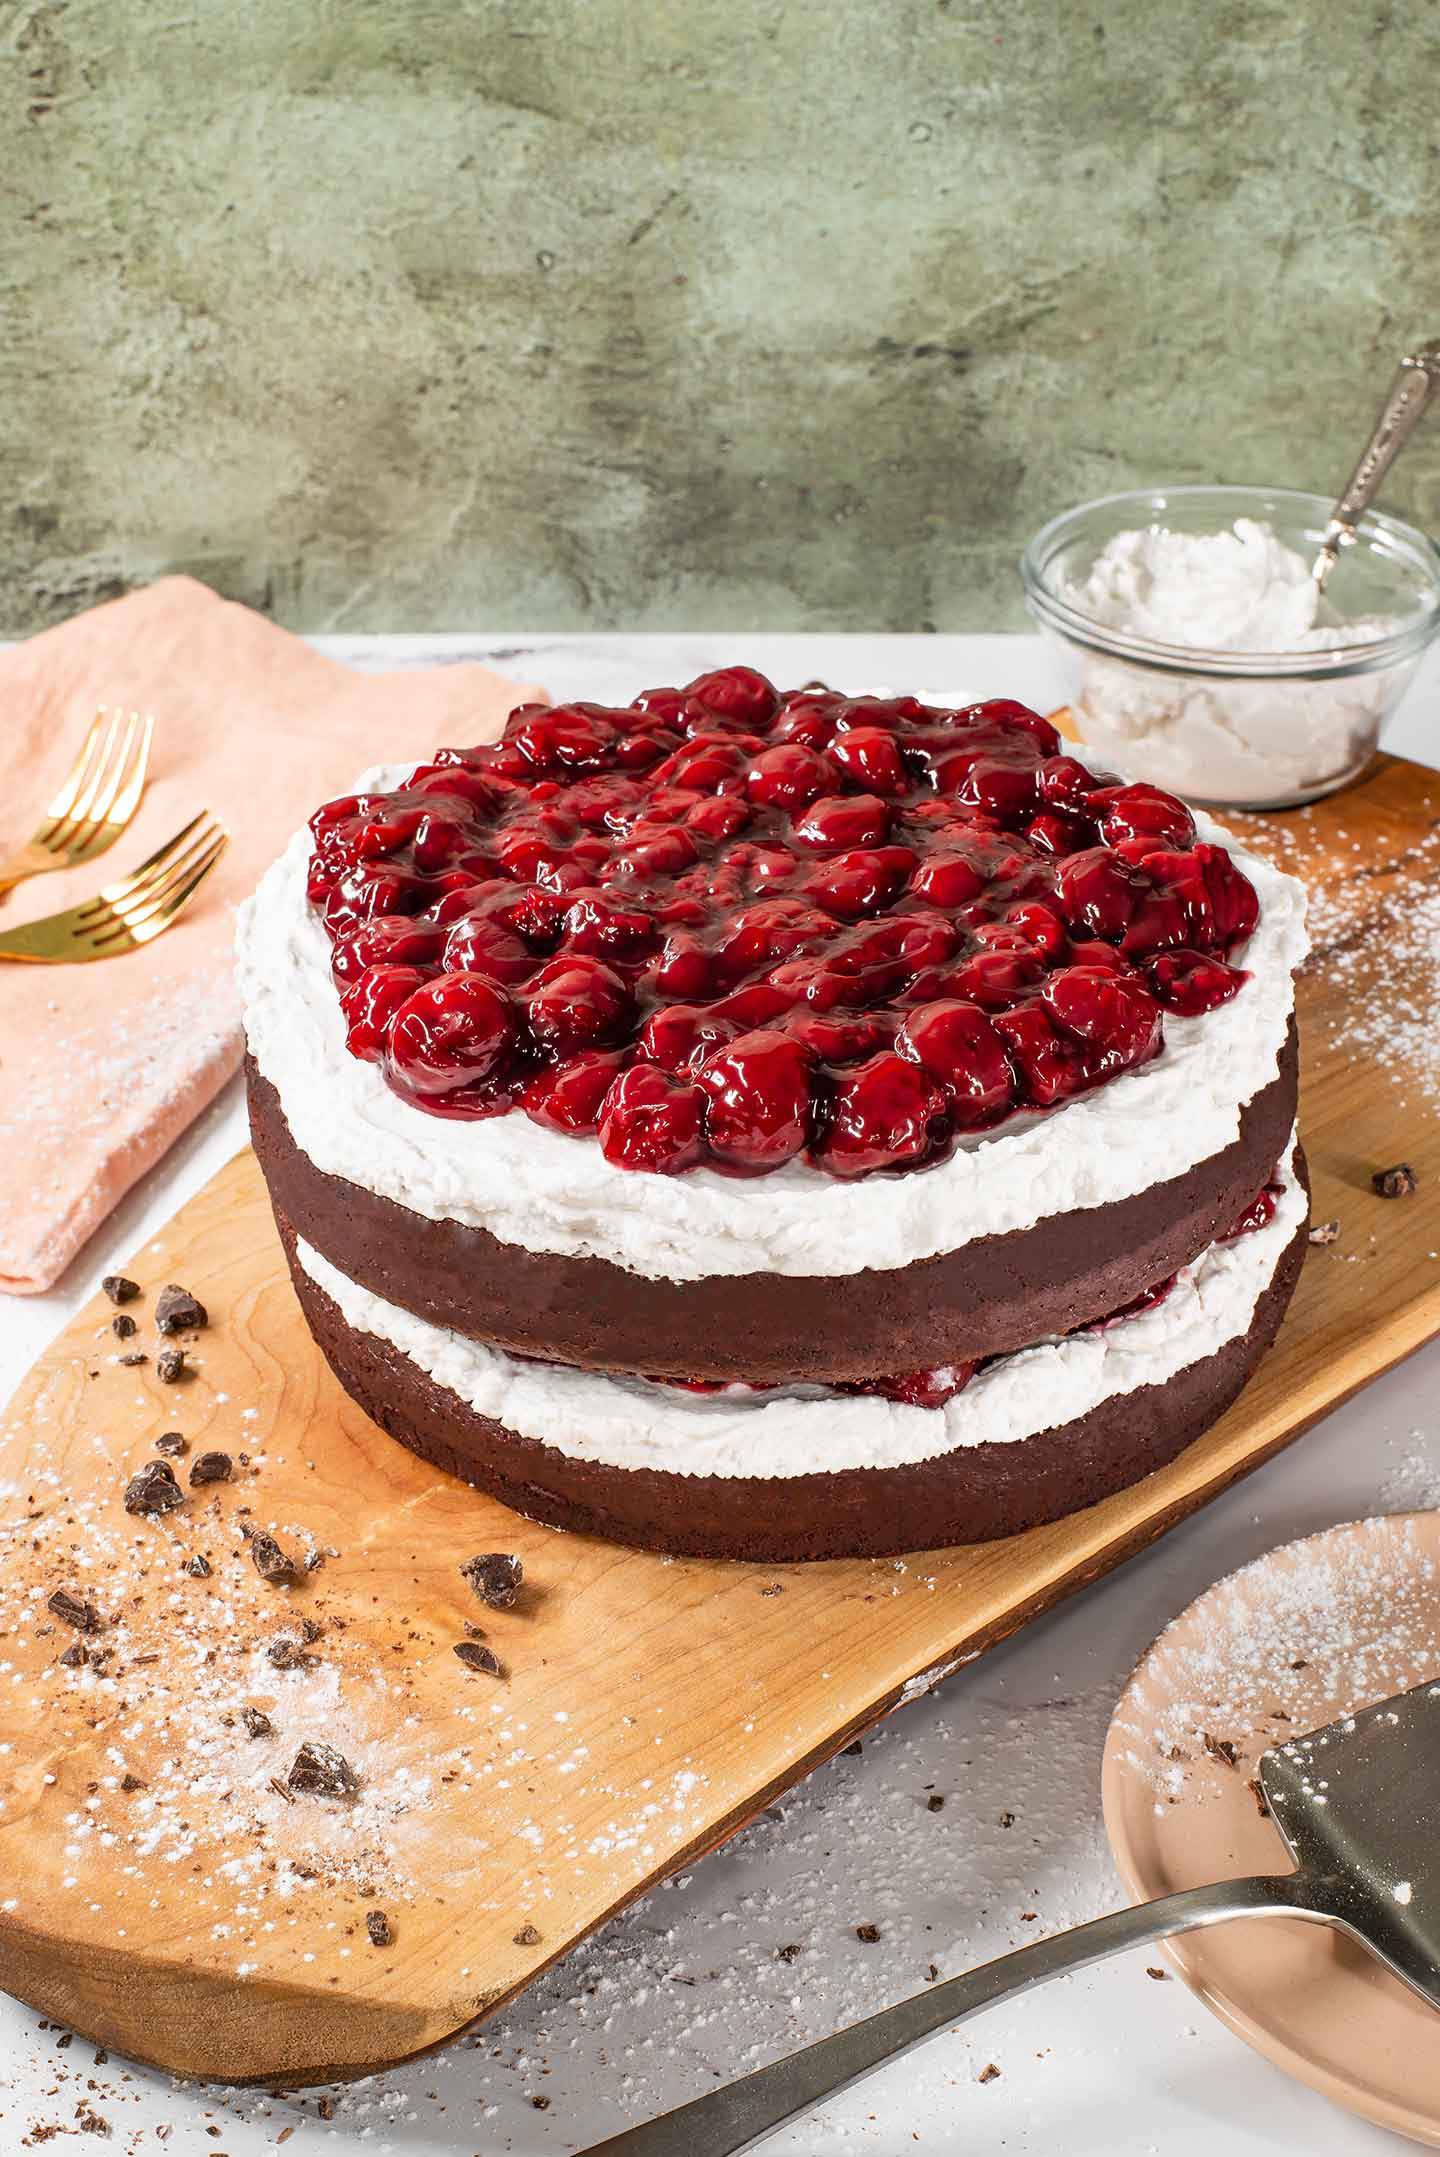
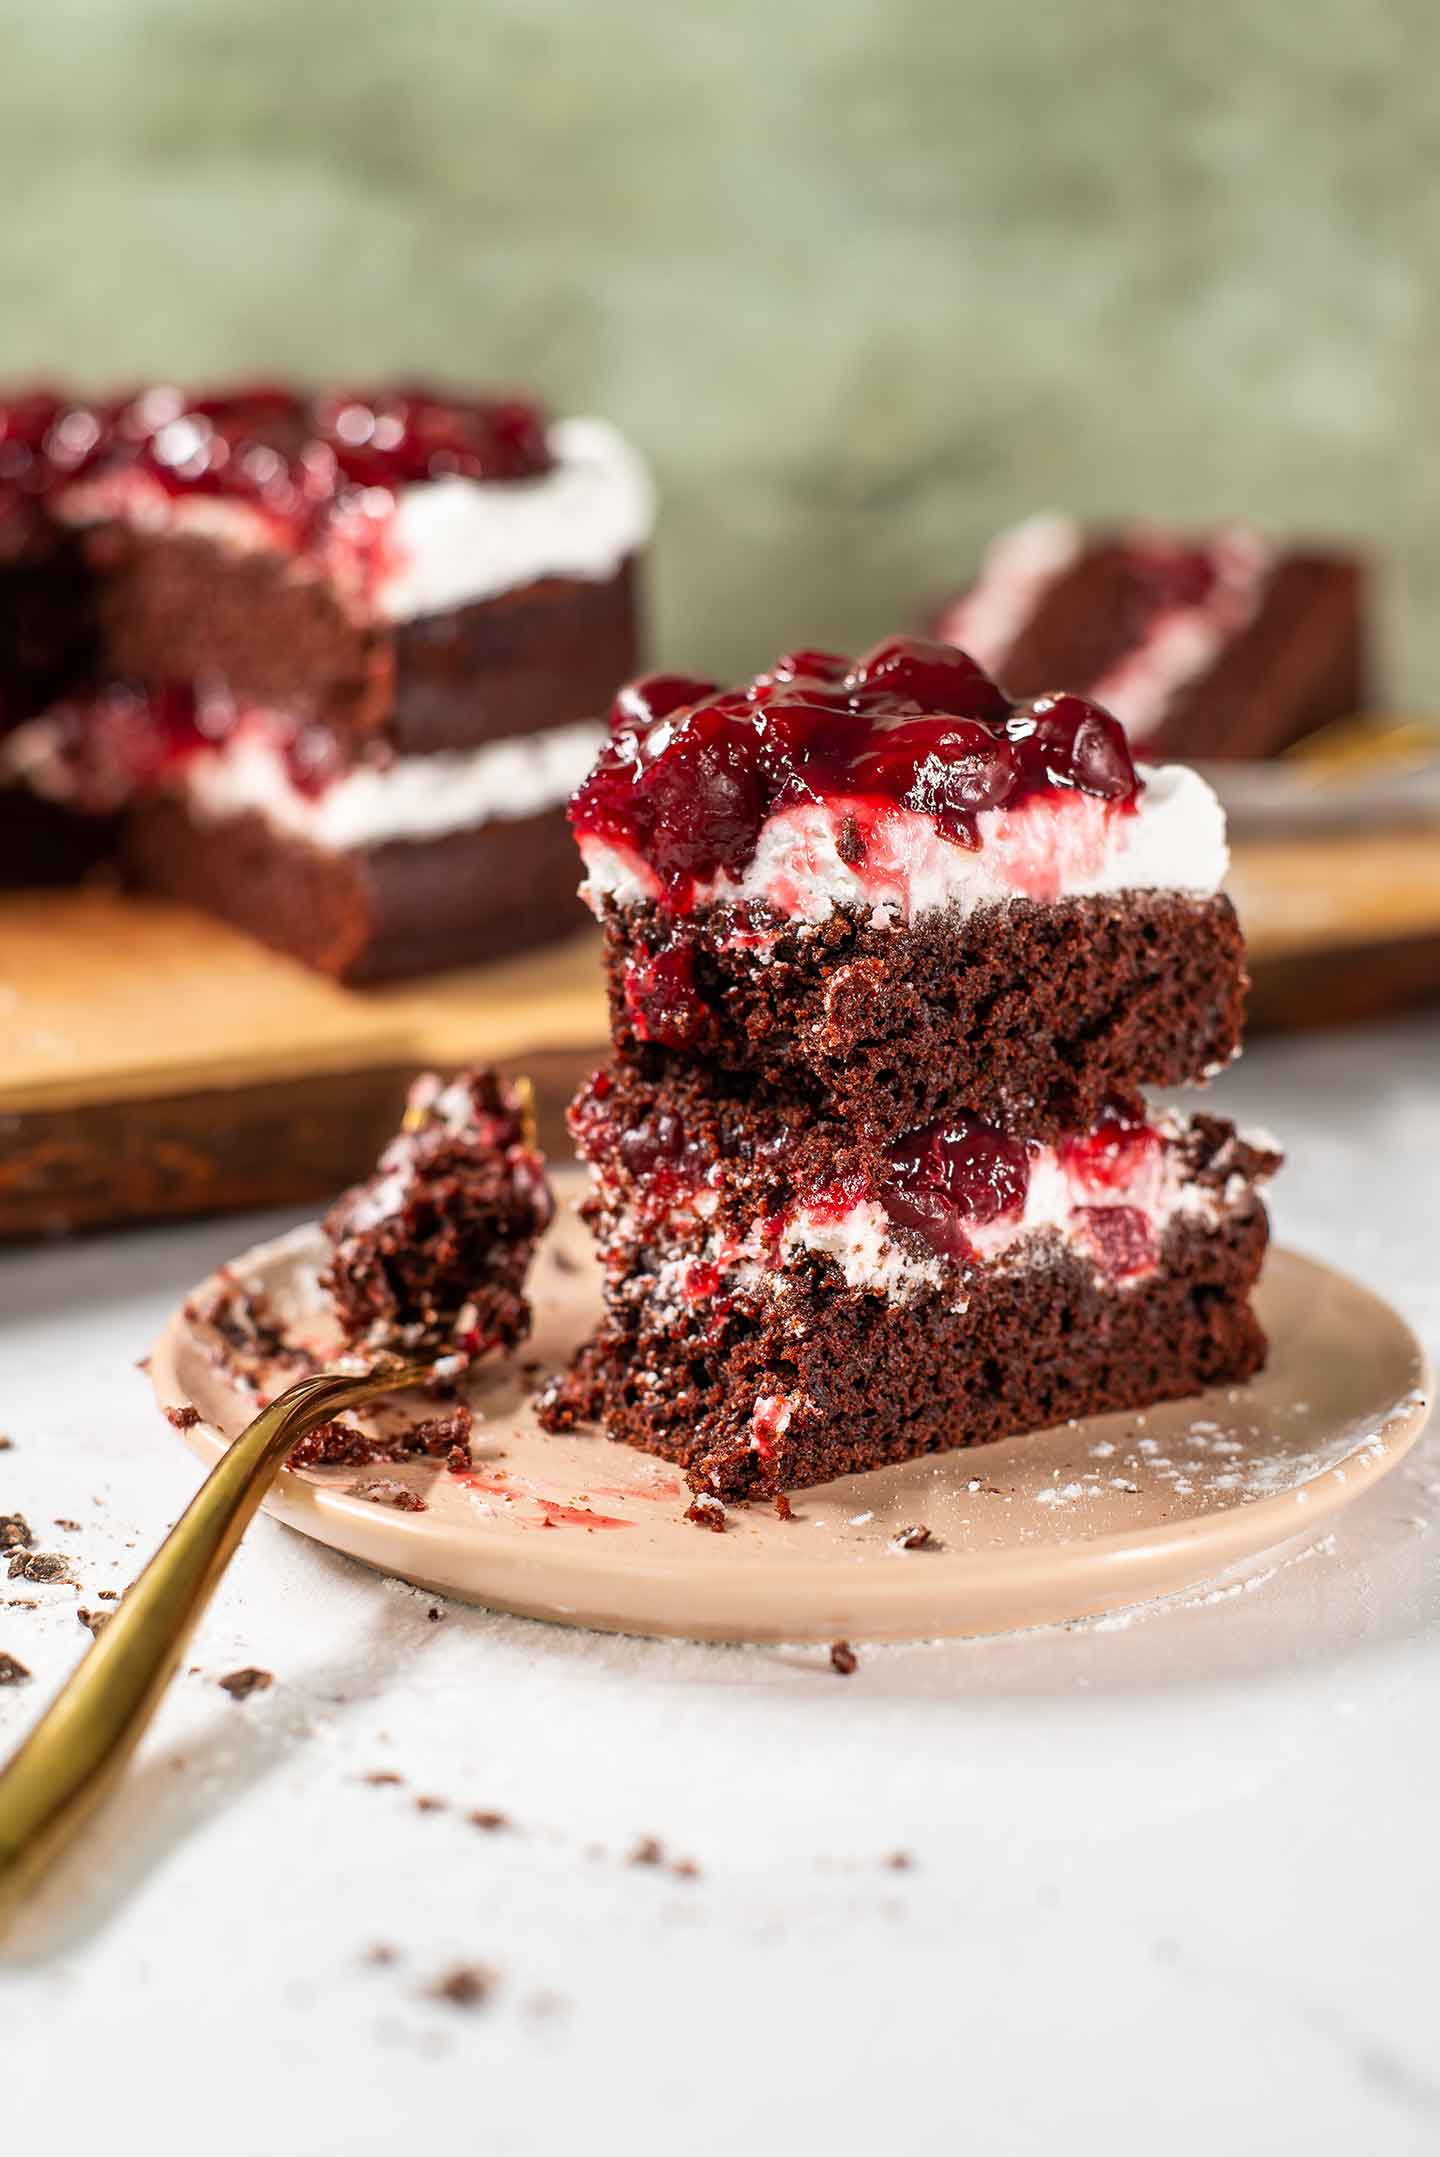
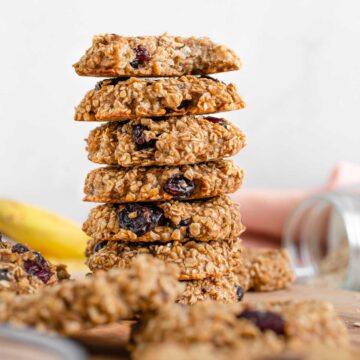
I like to think of this vegan black forest cake as a second installment in my "cakes no one will know are vegan" series. You have loved my Simple Vegan Carrot Cake and this classic combination of chocolate cake, cherry filling, and light whipped cream frosting is another show-stopper.
Two layers of moist chocolate cake
A cherry filling with the perfect sweet and tart balance
Light coconut whipped cream frosting
And it's sure to impress vegans and non-vegans alike
Make Ahead Friendly
I do not consider baking to be one of my great skills so I like to think that if I can make this recipe, you can certainly make this recipe!
One thing I love about this vegan black forest cake is that it's possible to make all the components ahead of time. If you want to spread out the preparation and make the cakes and cherry filling one day, then make the frosting and compile it all the next day... you can.
Altogether, this cake takes me about 1 hour to prepare and when I spread out that preparation with cooling time in between, it's a pretty simple and enjoyable process!
Another benefit to baking a vegan cake is that the chocolate cake layers come together without the need of a mixer!
The Cake Layers
Grab two cake pans, two bowls, a whisk, and a spoon. That's about all you need to make these rich and moist cake layers.
I bake this vegan black forest cake in 8" round cake pans. If your pans are a little larger than mine, make sure to keep that in mind and adjust the recipe as needed.
First, prepare your cake pans. A couple minutes of preparation here will take out any stress and frustration that a stuck cake layer can cause. In order to prevent the cake layers from sticking:
- Spread a really thin layer of vegan butter all over the inside of your cake pans.
- Sprinkle a layer of cocoa powder on top of the butter.
- You can use flour but a bit of flour will be visible on the bottom of the finished cakes. Cocoa powder won't show!
- And to be extra safe, place a circle of parchment paper the same size as your cake pan on top of the cocoa powder layer.
- This isn't absolutely necessary but if you want to mitigate any chance for sticking... this is your best bet.
With your cake pans prepared.
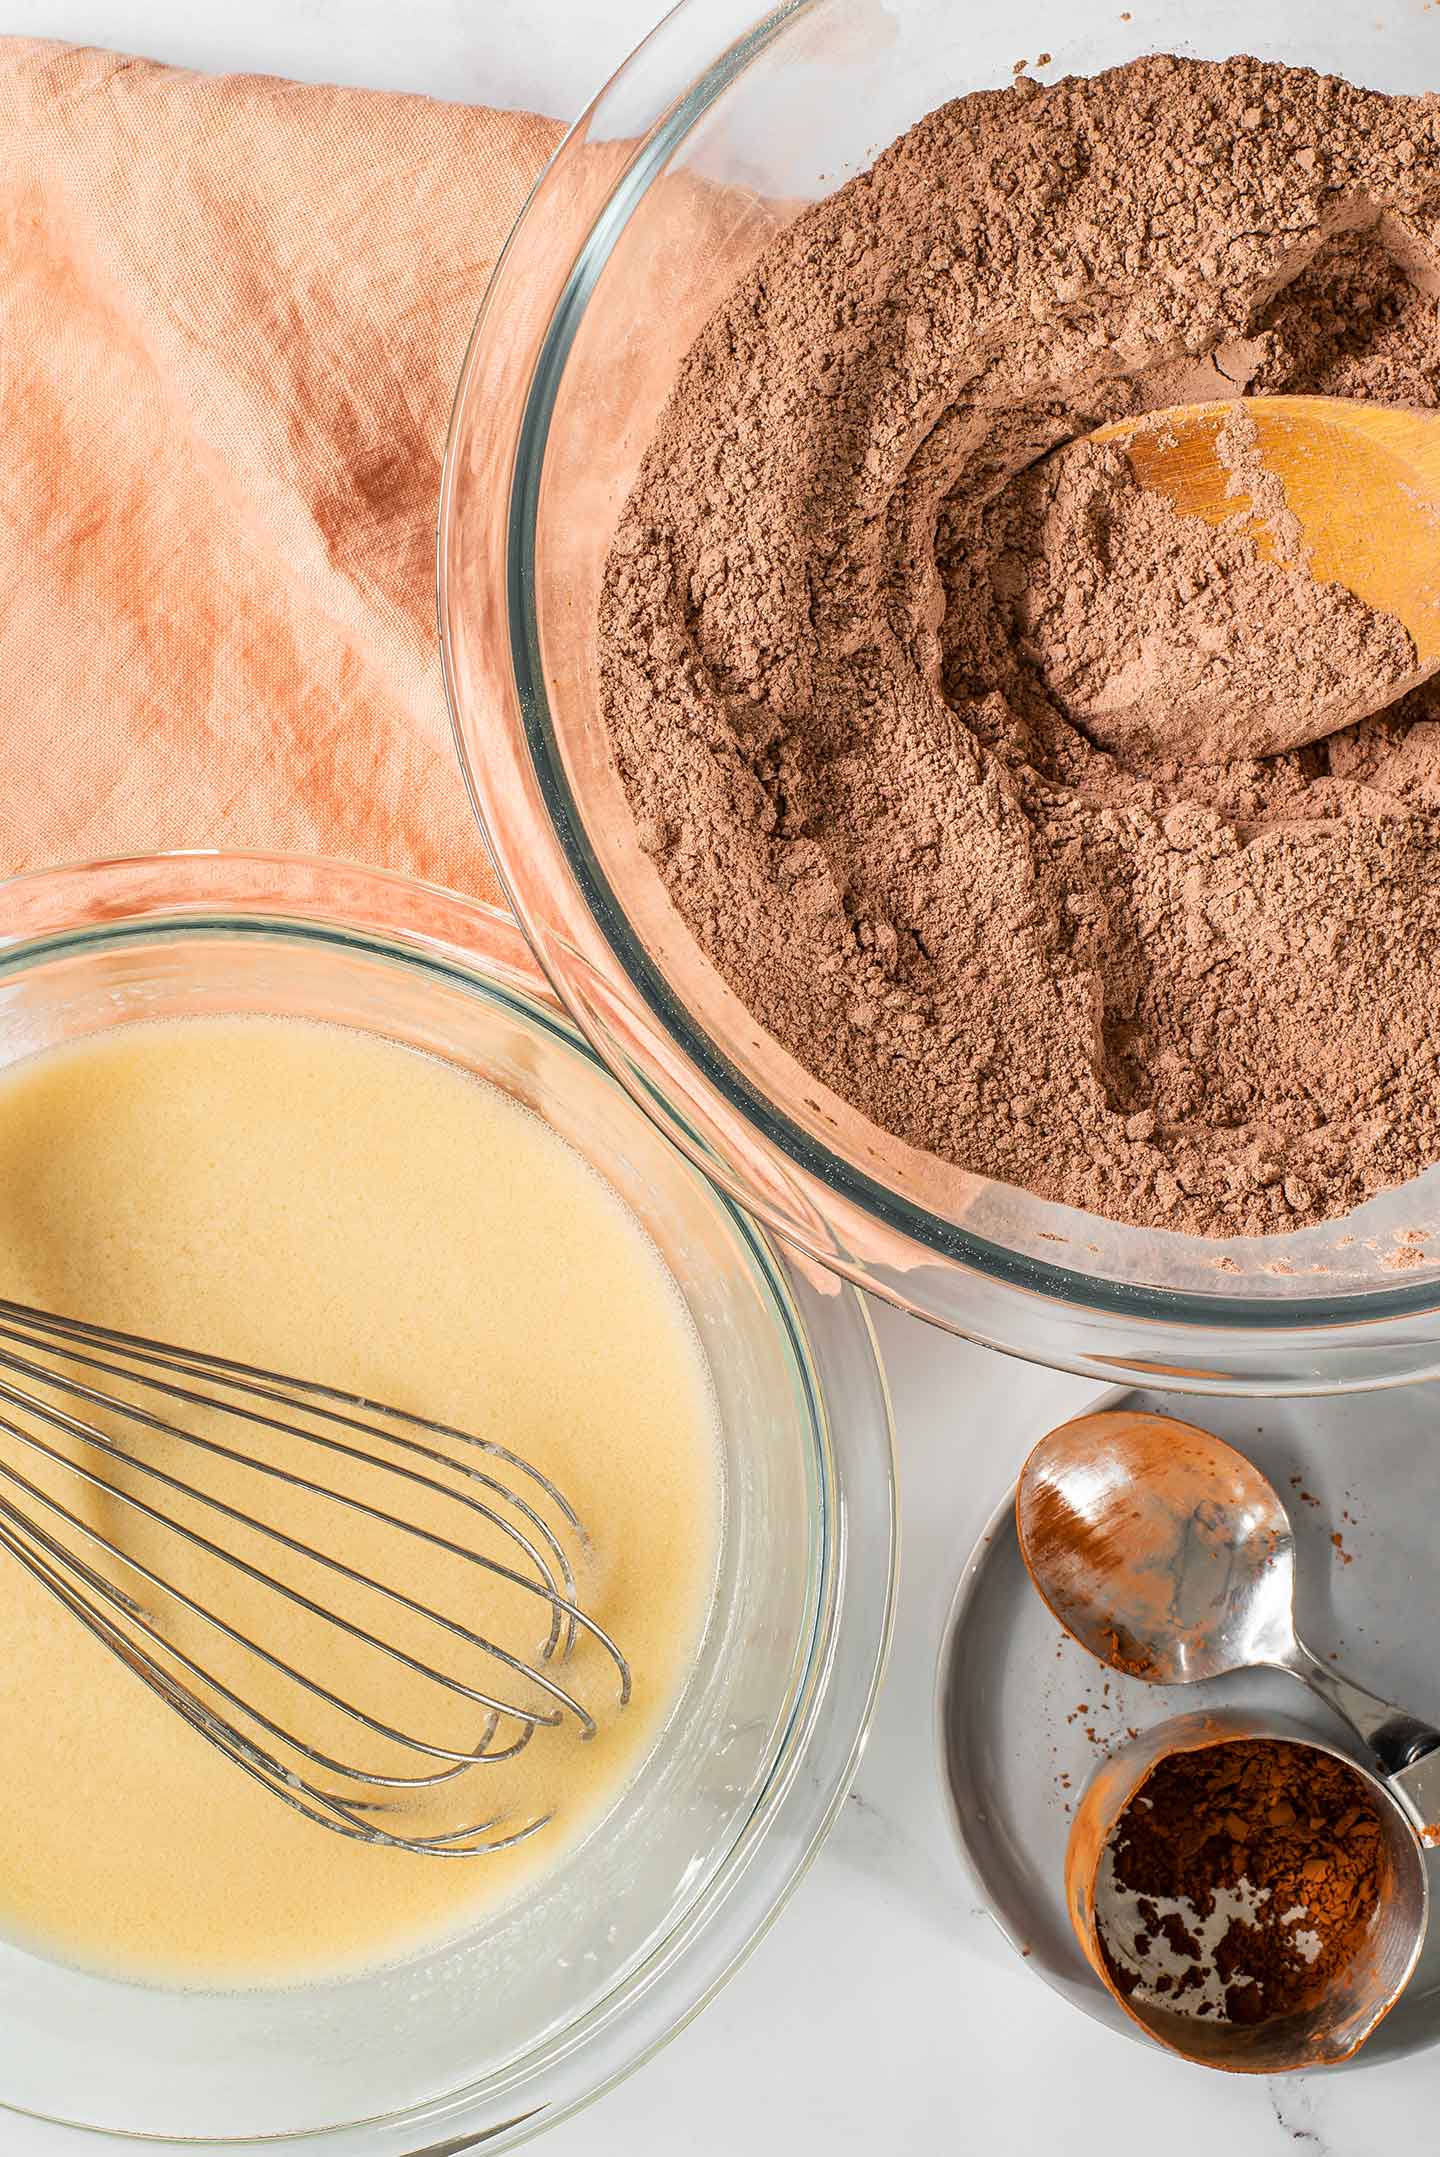
- Mix the dry ingredients in one bowl.
- Whisk the wet ingredients in the second bowl.
- Add the wet ingredients to the dry.
- Stir until fully combined.
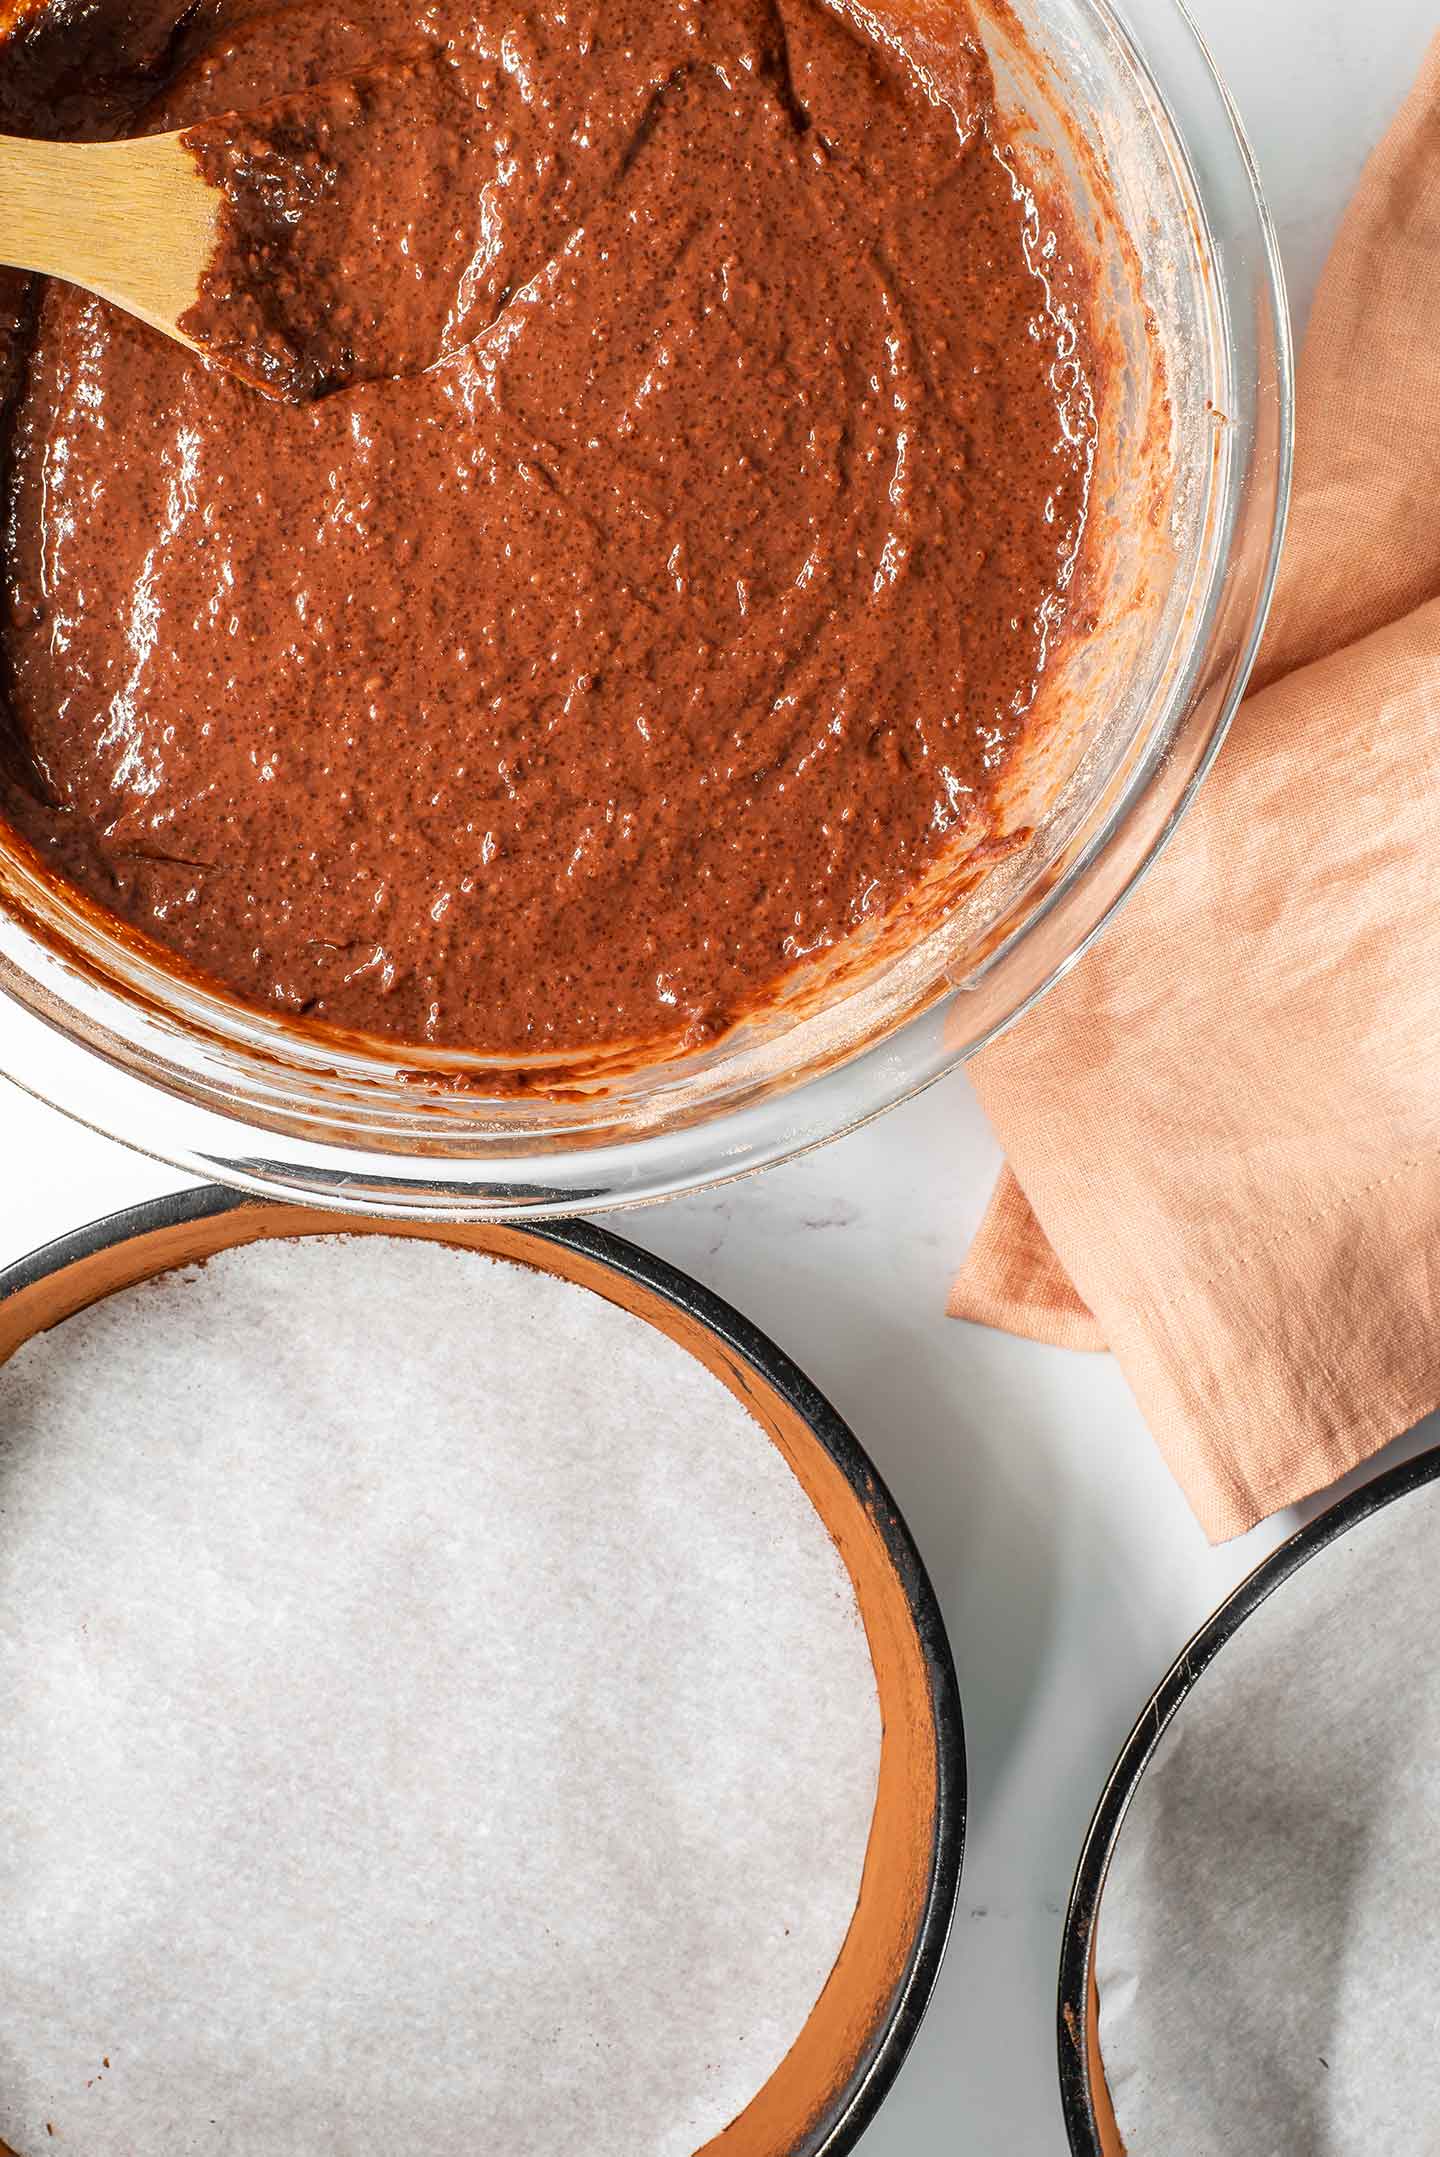
- And pour evenly into your cake pans.
Bake your cake layers at 350 degrees F for roughly 28 - 30 minutes. When your cake is done, let it cool in the pans for 10 minutes and then turn them out onto a wire rack to cool completely. Once cool, you can refrigerate your cake layers until you are ready to assemble!
The Cherry Filling
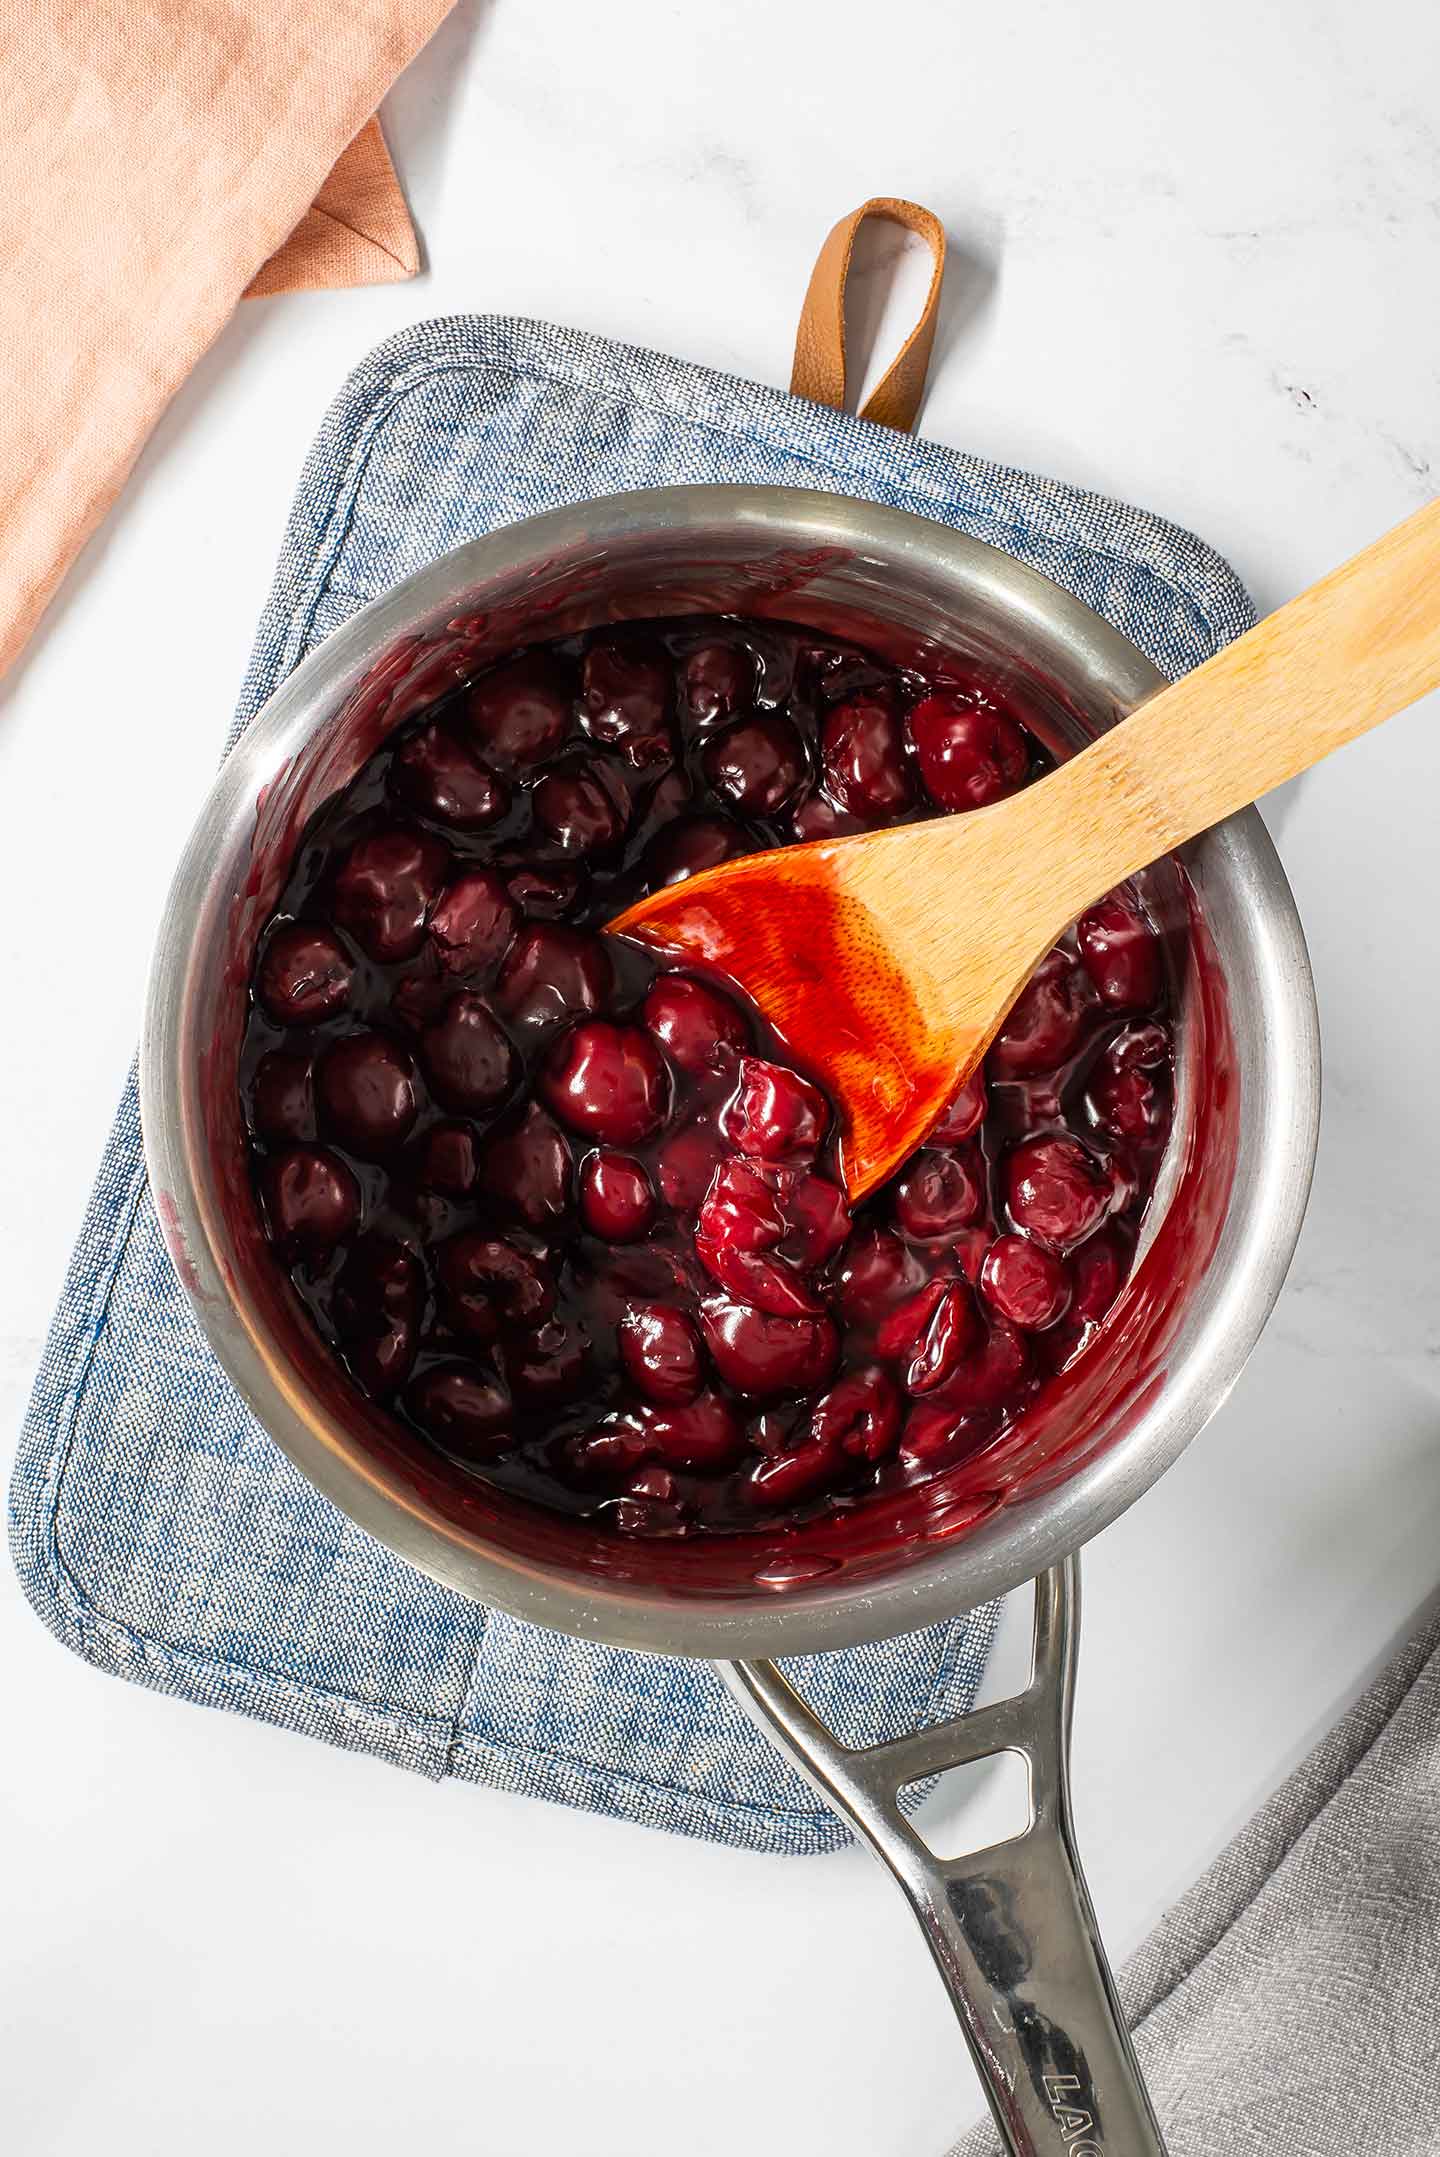
While your cake layers are baking is a great time to make the quick cherry filling.
I find that a 19oz jar of sour pitted cherries provides just the right amount of cherries for this recipe. If you use two smaller cans you can probably fit some more cherries on the cake and if you have any leftovers they won't go to waste. Try adding them to an oatmeal the next morning!

- Drain the cherries from their liquid but make sure to reserve that syrup!
- Add the cherries, ¼ cup of the reserved syrup and some sugar to a small pot.
- Bring to a low simmer.
- Add a cornstarch slurry to turn the liquid into a thick sauce.
- Add a dash of vanilla to make the flavours pop and remove from the heat.
Let your cherry filling cool completely and store in the fridge until you're ready to assemble the cake.
The Frosting
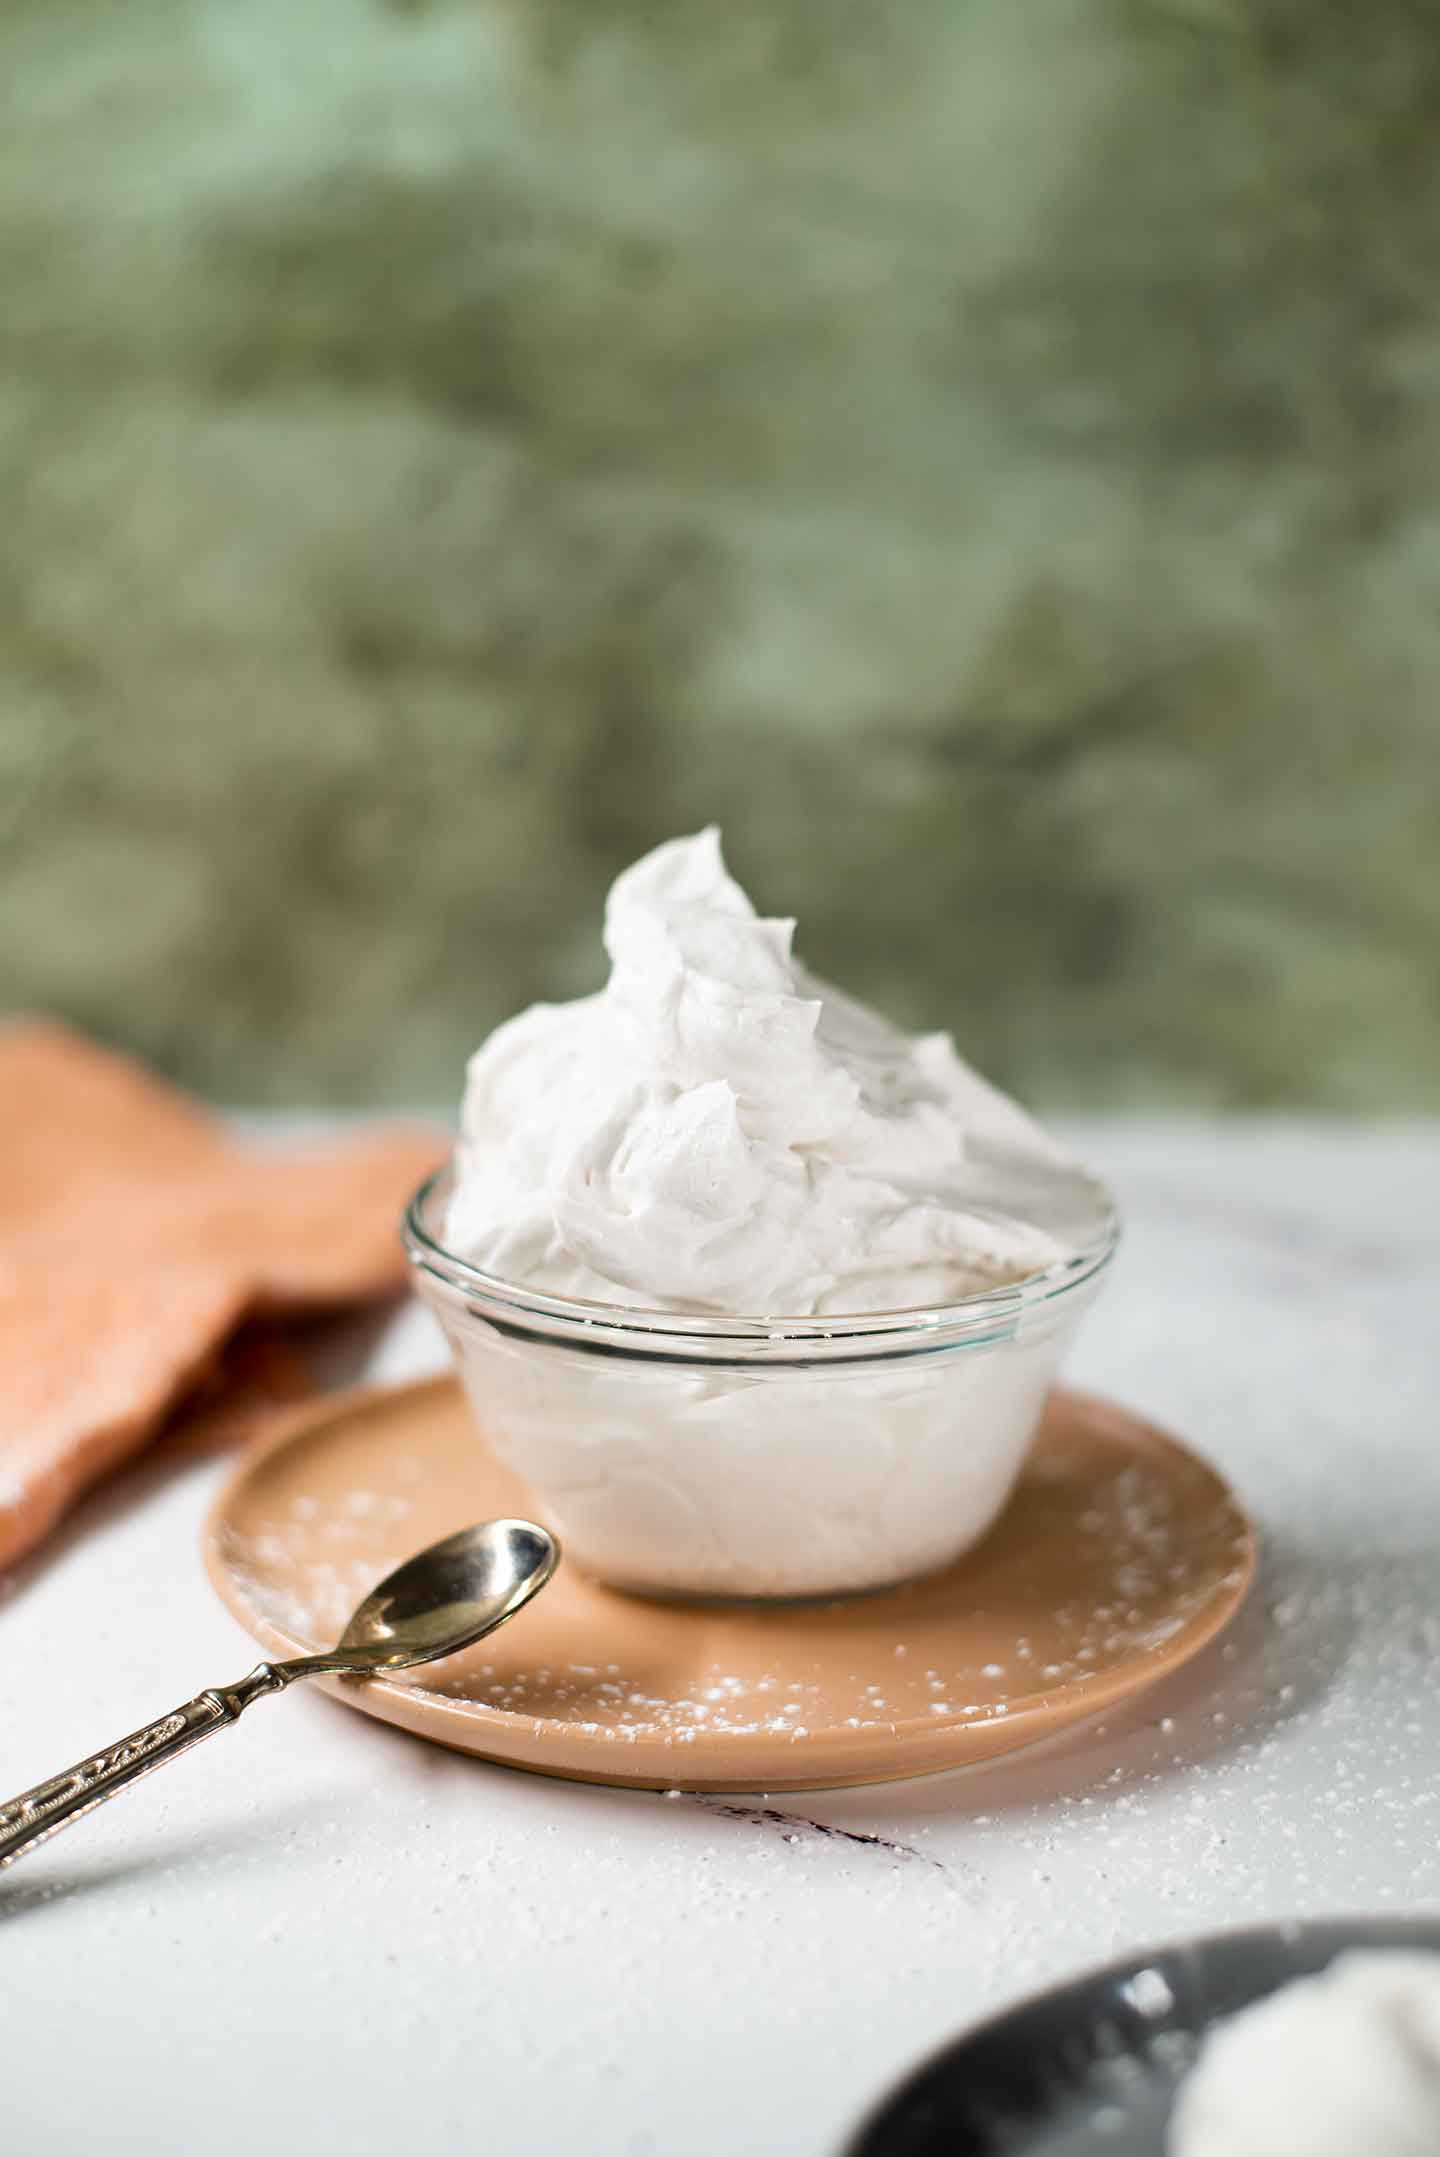
If you have made my Coconut Whipped Cream recipe, this light, fluffy, and not too sweet whipped cream frosting is essentially the same.
I was never a big fan of whipped cream as a kid but making my own coconut whipped cream has changed the whipped cream game for me! It is so easy, so much thicker, and so much more flavourful than store-bought whip.
The only difference to my original recipe is that I strongly encourage you to use canned coconut cream instead of regular full fat canned coconut milk. I tend to find coconut cream in larger cans (560ml) and coconut cream has a higher concentration of the full fat cream necessary to make a good whip. Two 400ml cans of full fat coconut milk will give you enough whipped cream to frost this cake but if you can find just one 560ml can of coconut cream, that is all you will need.
To make the whipped cream frosting:
- Refrigerate your can(s) of coconut cream or full fat coconut milk for at least 24 hours!
- This is absolutely necessary. When a coconut cream/full fat milk is refrigerated, the heavy cream rises to the top of the can and solidifies. The coconut water sinks to the bottom.
- Put the mixing bowl and whisk attachment for your mixer in the freezer for at least 30 minutes prior to making the whipped cream. Having everything as cold as possible will give your cream the best chance of whipping.
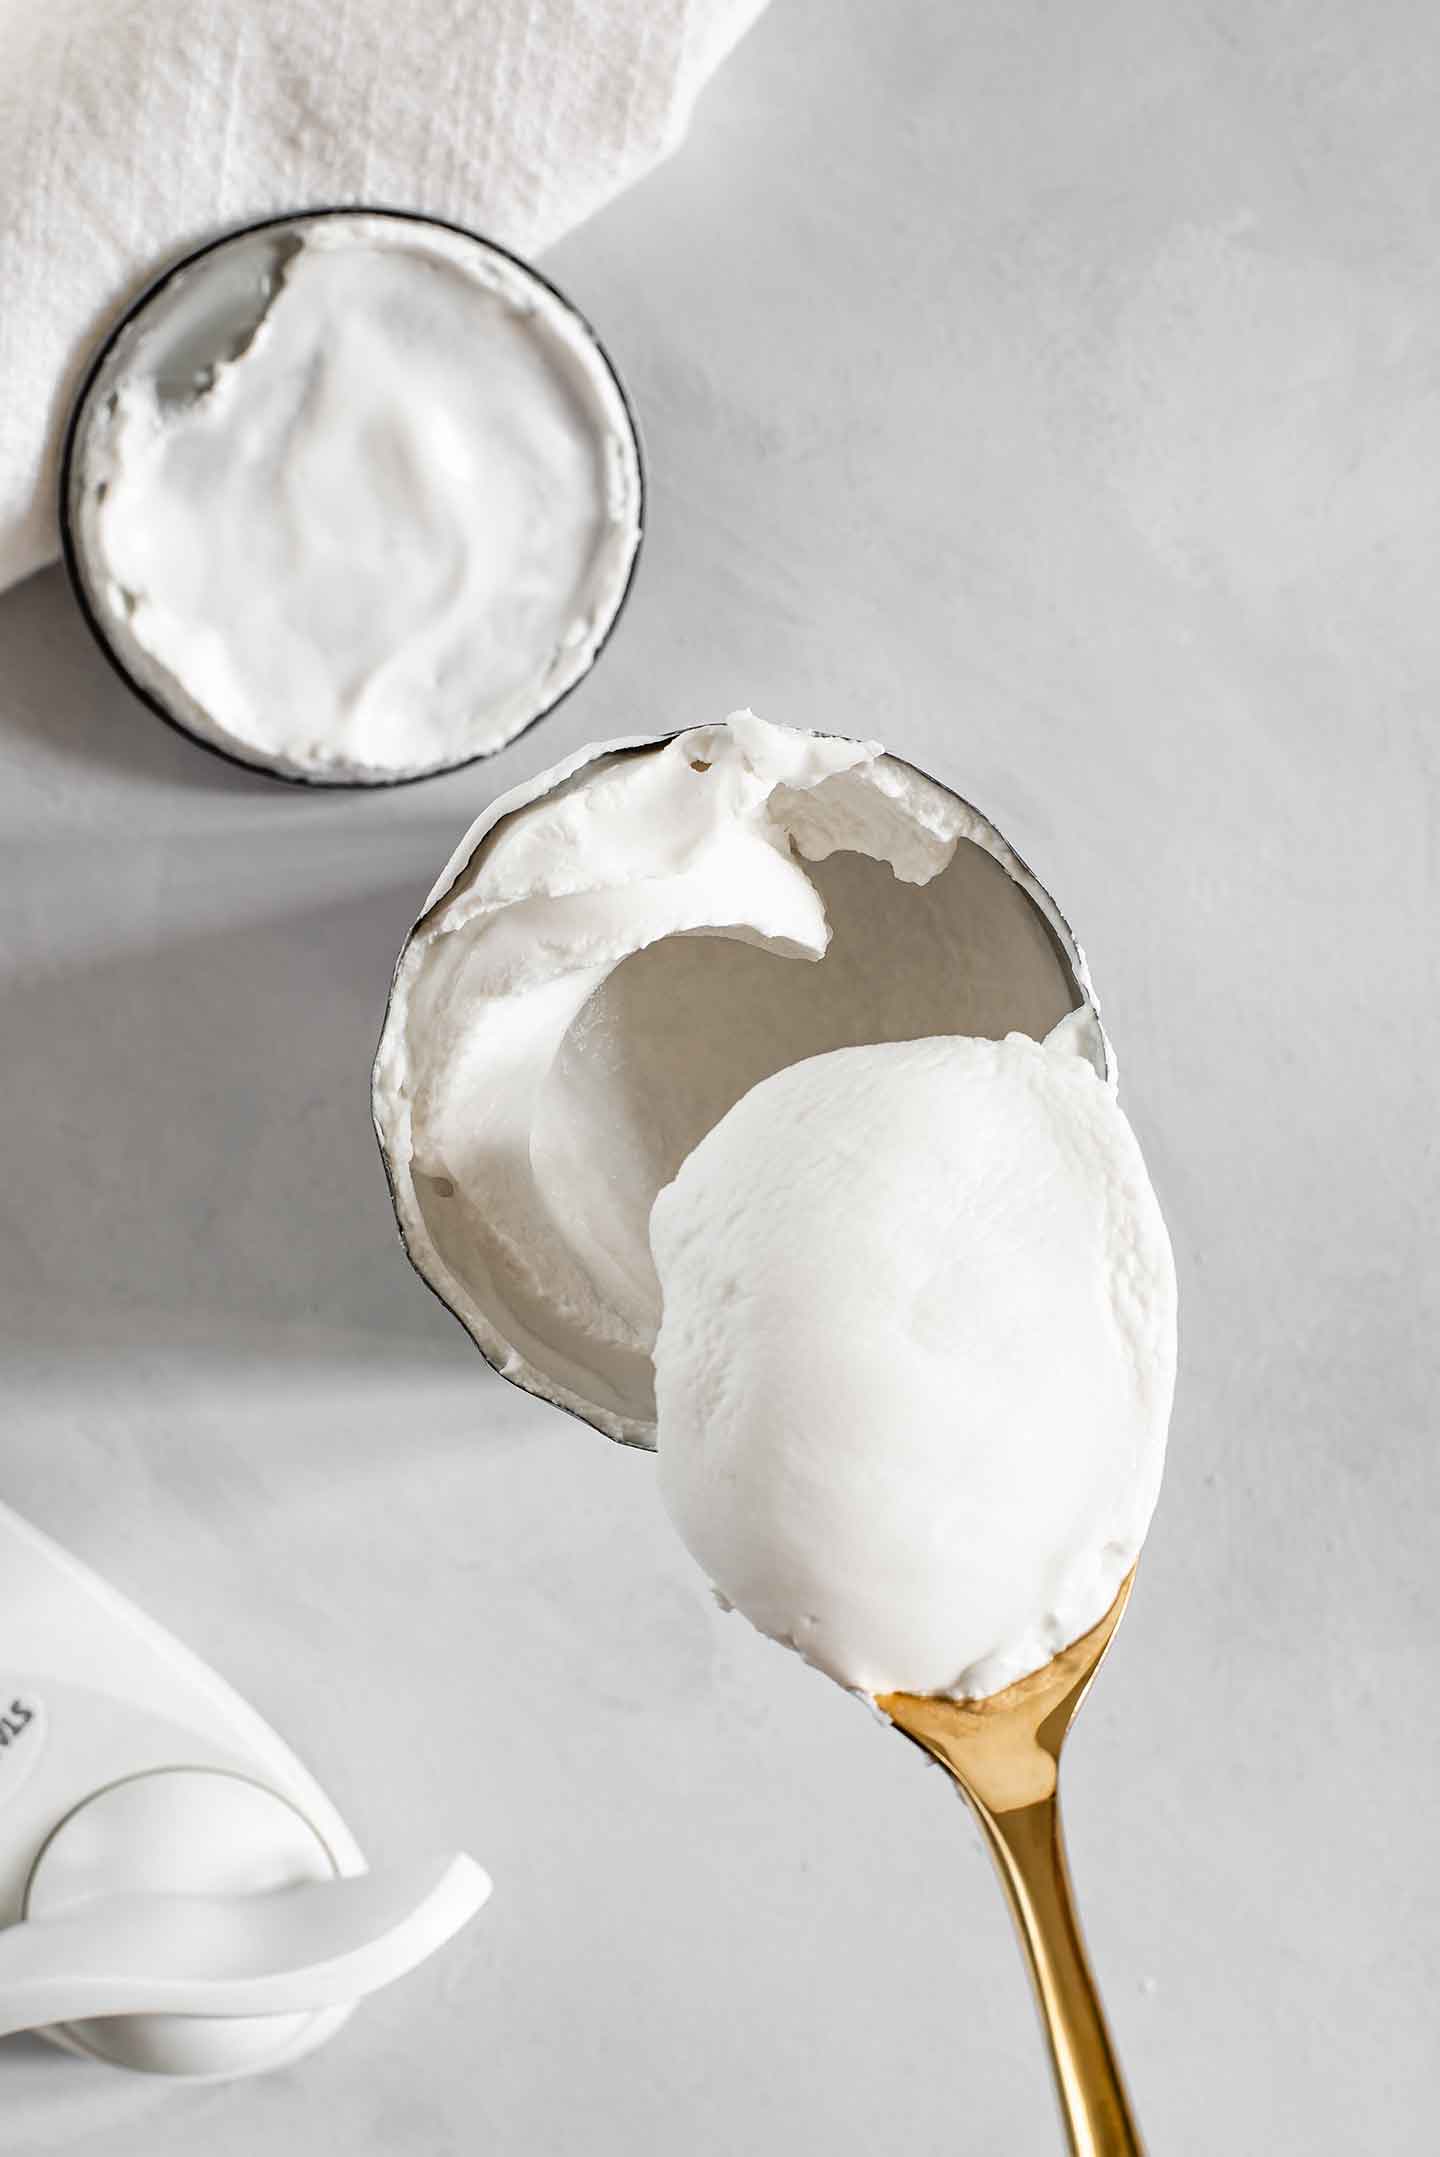
- When ready, remove your can(s) from the fridge without tipping or shaking it.
- Scoop just the hardened cream from the top of the can into your cold mixing bowl. Leave the water behind and use it in another recipe (I add it to smoothies or oatmeal).
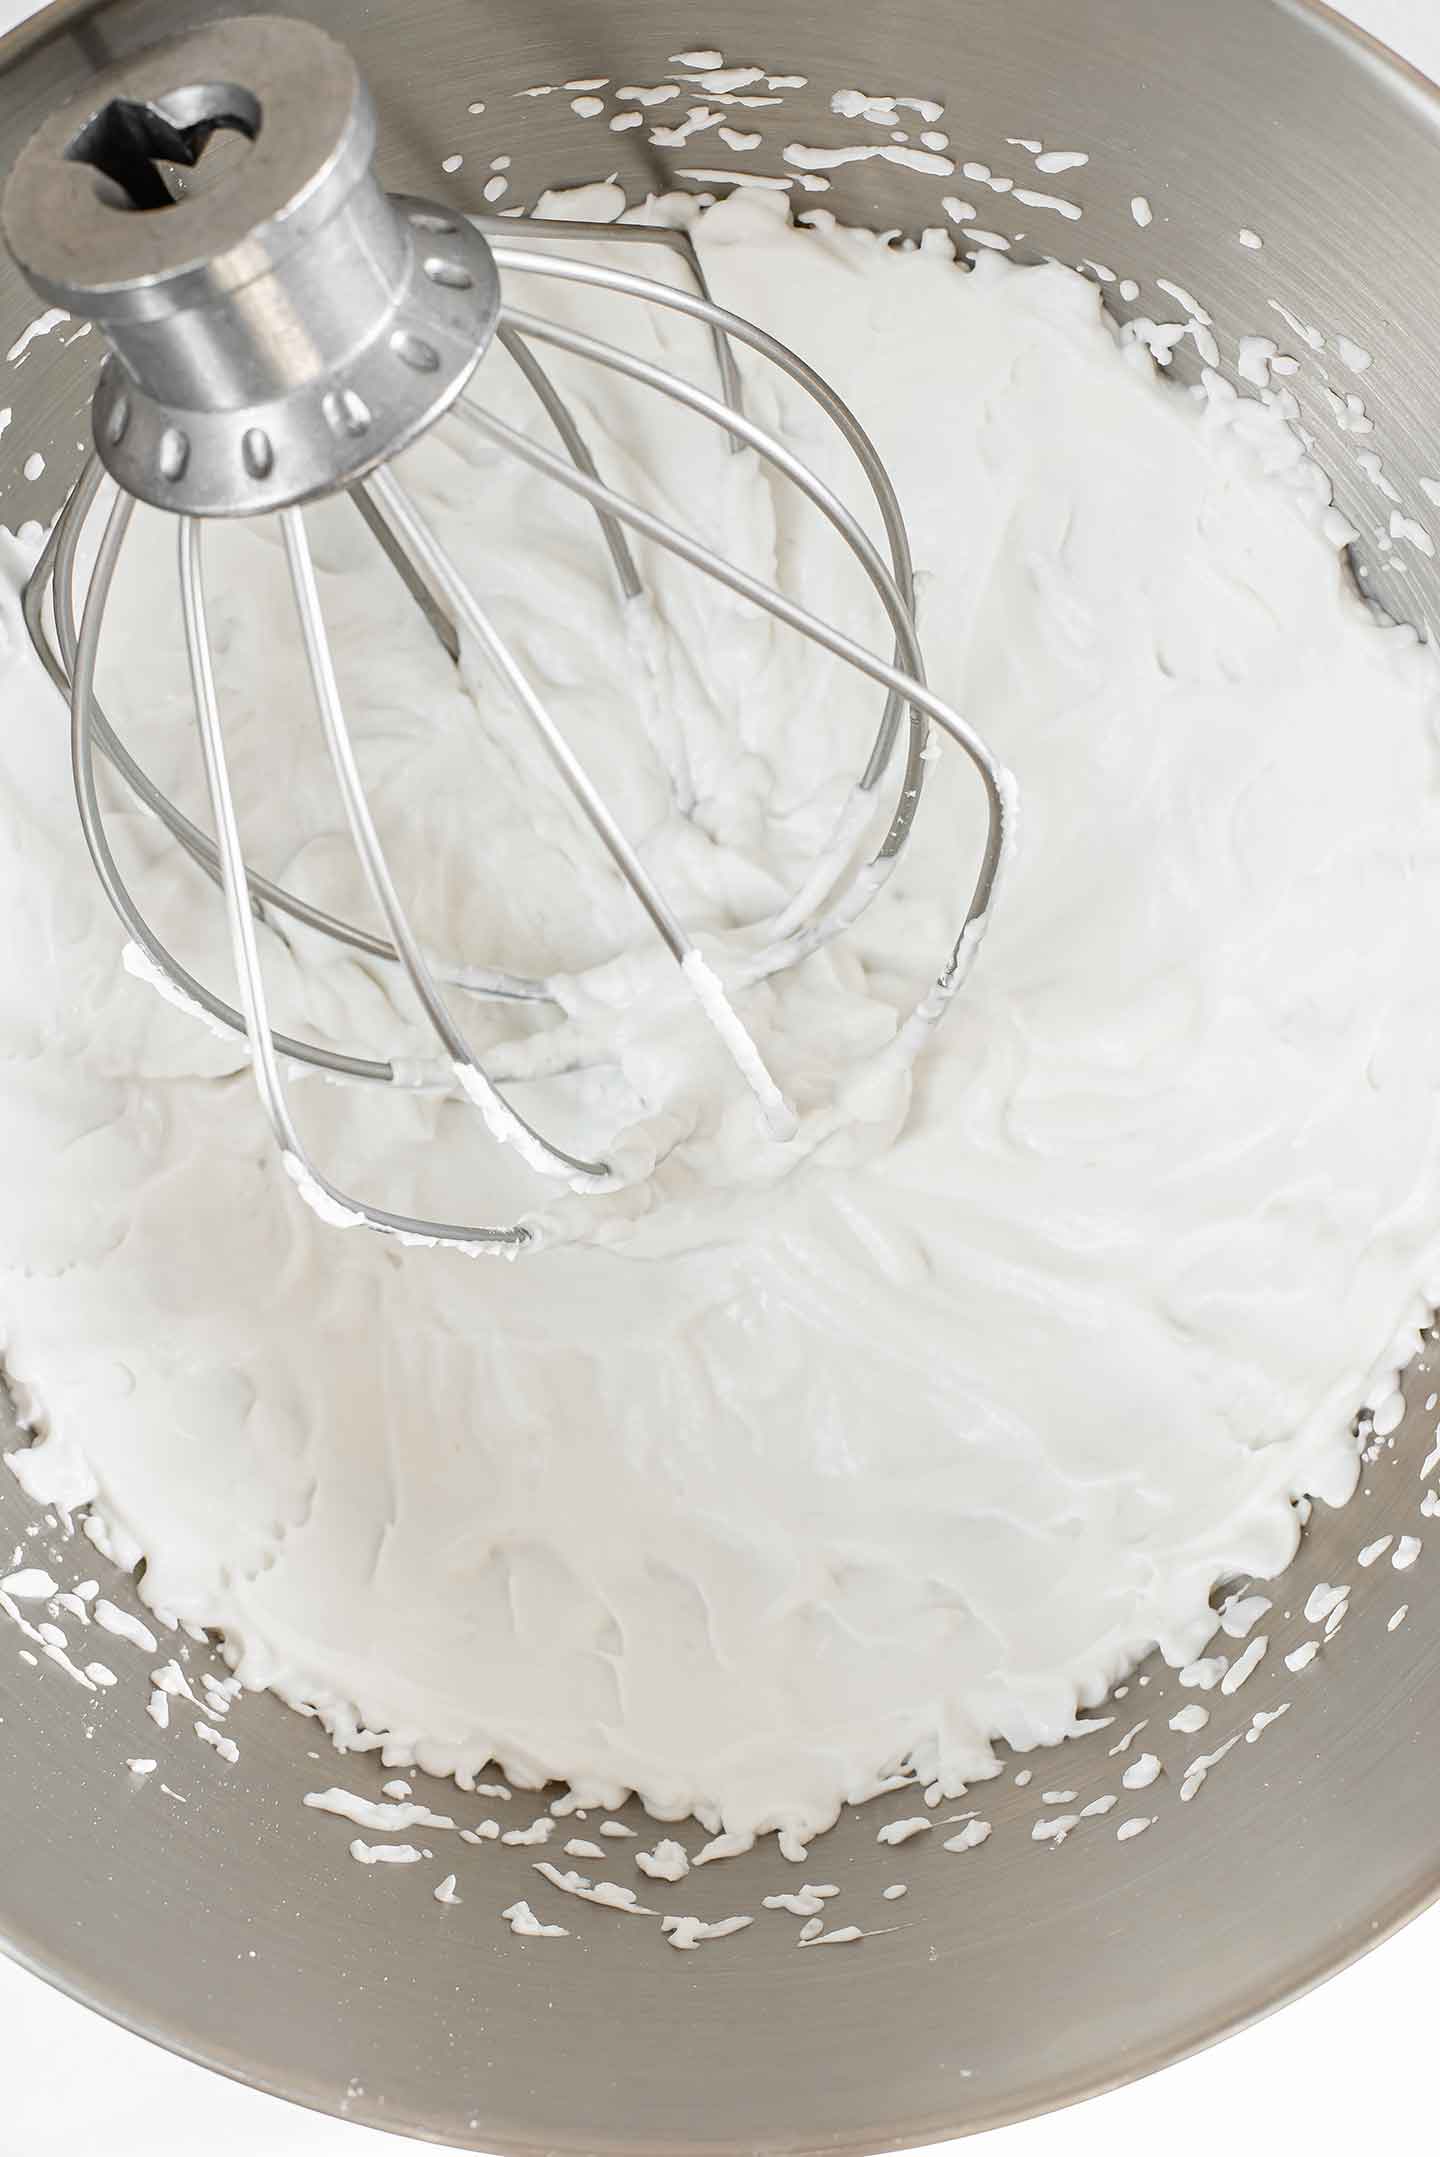
- Whip the coconut cream on medium for about 1 minute until it is fluffy.
- Add the powdered sugar and a dash of vanilla. Continue whipping for another 2-3 minutes until the whipped cream is light and fluffy.
- Either frost your cake right away or refrigerate your whipped cream frosting until ready to assemble.
Coconut Whip Tips
9 times out of 10 this method for making homemade whipped cream works PERFECTLY. On occasion, I have had a can of coconut milk that has been in the fridge for a few days but for some reason the cream hasn't hardened enough on the top and no amount of whipping makes it fluffy.
This is why I suggest using coconut cream. I have had cans of coconut cream that don't harden perfectly in the fridge BUT because of the higher fat content there is more usable cream and even if the whip isn't quite as strong and thick, it does still whip enough that it is usable and delicious.

Adding cream of tartar, cornstarch, or tapioca starch are tricks that are suggested to help whipped cream stiffen. However, if my coconut milk didn't harden enough and is quite liquid and droopy in my mixing bowl, I haven't found that adding a bit of these ingredients rescues it. These can also change the flavour of the whip but... if you're desperate your desperate and you can give it a try.
One back up plan for creating a strong whipped topping could be to have some vegan cream cheese on hand. I haven't tried this method but Erin McDowell uses this method for her Strawberry Not-So-Shortcake recipe on Food52. The cream cheese stabilizes the whipped cream and although the flavour will be different, you can avoid a droopy whipped cream.
*During one test of this recipe my whipped cream didn't whip so I ran out and bought a tub of coconut whip topping from the store. Although still tasty, this store-bought whip was still quite droopy. So if you are nervous about the whipped cream not working it might not be a bad idea to either have a few cans of coconut milk in the fridge (possibly different brands as fat percentages can vary by brand) OR have some back up vegan cream cheese.
All this said, most of you will not have any problem making this delicious whipped cream in just 5 minutes!!
Recipe Cost
This vegan black forest cake costs me about: $18 CAD to make.
The chocolate cake layers cost about $7.82, the cherry filling $7.60, and the frosting $2.68.
Other than decreasing the amounts of sugar and oil used in this recipe, the only changes I have made from a traditional black forest cake are:
Applesauce $0.82 vs. 2 eggs $0.98
Coconut cream $2.49 vs. 2 cups heavy whipping cream $2.98
So this vegan black forest cake doesn't cost me any more than making a traditional cake. It might even save a few dollars.
Let me know in the comments below if you make this vegan black forest cake and make sure to send photos of your creations to us on social media. Use #tastythriftytimely on Instagram!
And if you love chocolate and cherries you have to take a look at my Chocolate Mousse Terrarium Dessert! It's a stunner and so so delicious!
Print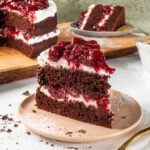
Vegan Black Forest Cake To Impress
- Total Time: 1 hour (plus cooling time)
- Yield: serves 8
- Diet: Vegan
Description
A vegan black forest cake to impress! Moist chocolate cake with a decadent cherry filling and a light coconut whipped cream.
Ingredients
For The Cake:
- 2 ¼ cups all-purpose flour (spooned & leveled)
- 1 cup cane sugar (sifted)
- ¾ cup cocoa powder (sifted)
- 1 ½ tsp baking powder
- ¾ tsp baking soda
- ½ tsp salt
- ¾ cup unsweetened applesauce
- 1 cup oat milk (or plant milk of choice)
- ½ cup vegetable oil
- 1 tbsp pure vanilla extract
For The Cherry Filling:
- 19oz canned pitted sour cherries in syrup*
- ¼ cup cherry syrup (reserved from the can)
- ¼ cup cane sugar
- 2 tbsp cornstarch
- 1 tsp pure vanilla extract
For The Whipped Cream Frosting:
- 19oz can coconut cream (refrigerated for 24 hours, use hardened cream only)
- ⅓ cup icing sugar
- ¼ tsp pure vanilla extract
*Ingredients you need that are not part of our pantry and freezer tips.
Instructions
For The Cake:
- Preheat the oven to 350 degrees F. Prepare two 8 inch cake pans by wiping a thin layer of vegan butter on the bottom and sides of each. Dust the butter with cocoa powder (or flour but cocoa powder will not show on the baked cakes like flour will). Finally, line the bottom with a circle of parchment paper to be extra safe.
- Mix the dry ingredients in a large bowl. Make sure you spoon your flour into your measuring cups! If you scoop the flour you will be using more than you need and the cake will turn out more dry. I sift my cane sugar and cocoa powder to ensure there are no large clumps that end up in the batter. With all the dry ingredients added, stir everything together until evenly combined.
- In a separate bowl, whisk the wet ingredients until fully combined.
- Make a well in the dry ingredients, add the wet ingredients and stir together until fully combined. Make sure to scrape all the way to the bottom and around the sides to make sure there are no pockets of dry ingredients that haven’t been incorporated.
- Pour the cake batter into the prepared cake tins and bake for 28-30 minutes or until fragrant, the cake is dry on top, the sides have pulled away from the tin, and a toothpick inserted in the centre comes out clean.
- Allow to cool in the tins for 10 minutes, then turn out onto a wire rack and cool completely before attempting to layer and frost the cake.
For The Cherry Filling:
- Reserving the syrupy liquid in the can or jar, drain the cherries. Add the drained cherries, ¼ cup of the reserved cherry juice and the cane sugar to a small pot over medium low heat. Bring the mixture to a low simmer.
- In the meantime, mix the cornstarch in a small bowl with a bit more reserved cherry juice or water. Make a slurry by using just enough liquid to dissolve the starch and make a pourable mixture.
- When the cherry mixture has come to a very low simmer, add the cornstarch slurry and stir immediately. The liquid should quite quickly turn into a thick sauce.
- Stir in the vanilla extract and when the sauce has thickened to your liking, remove the cherry filling from the heat and allow to fully cool. *You can make this a day or two in advance of putting the cake together.
For The Whipped Cream Frosting:
*A 19oz can of coconut cream works best for this frosting but you can also use two cans of full fat coconut milk. With either coconut cream or coconut milk, make sure that you place the can(s) in the refrigerator for at least 24 hours prior to making the frosting. When refrigerated, the full fat coconut cream will rise to the top of the can and harden. That hardened cream is what you will use in this recipe.
- For best results, place the bowl and whisk attachment of your mixer in the freezer for at least 30 minutes before making this whipped cream. If everything is really cold the cream will whip up better.
- When ready, remove your coconut cream from the fridge being careful to not tip or shake the can. Open the can and scoop out just the hardened cream from the top. There will be coconut water at the bottom of the can that you can reserve for another recipe (I toss it in a smoothie or oatmeal the next morning).
- Using the whisk attachment for your stand mixer, whisk the cream on medium high until it starts to fluff up, about 1 minute.
- Add the icing sugar and vanilla and continue to whisk for 2-3 more minutes until the sugar is fully incorporated and the whipped cream is fluffy. (If you are having trouble whipping the cream, see the notes below this recipe).
- Either frost the cake right away or refrigerate the whipped cream until you are ready to use it on the cake. If it has hardened too much in the fridge, leave it on the counter for a few minutes until it softens enough that you can spread it.
To Assemble The Cake:
*Sometimes cake layers dome a little on the top. If your layers have domed, you can slice a bit off the top to even the cake layers out and prevent the cherry filling from sliding.
*If you have reserved cherry juice leftover you can brush some into the cake layers for extra cherry flavour if desired.
- Place the first layer of cake on a tray. Spread whipped cream frosting across the top of the cake layer making sure to push it all the way to the edges. If you will keep the sides of the cake bare, use half the frosting for this layer and half for the top. Make sure to reserve a bit of frosting for the sides if you want to cover those. (See photos in blog post for reference).
- Carefully spoon half the cherry filling on top of the whipped cream.
- Lay the second cake layer on top (if you cut the top of the cake to level it, place the cut side down to avoid any crumbs in your frosting).
- Spread whipped cream frosting on the top of the cake, spoon the remaining cherries on the very top, and finish decorating as desired. Spread any excess whipped cream on the sides of the cake, add some shaved chocolate on top or leave your cake creation as is!
- Refrigerate the cake until ready to serve. Leftovers keep well in the fridge for up to 3 days. You can also freeze leftover slices if need be.
Notes
- Approximate Cost: for the cake: $7.82 CAD, $7.60 for the cherries, $2.68 for the whipped cream frosting. $18.10 total which is about comparable to buying a grocery store cake. Vegan cakes from a specialty bakery will likely cost a bit more. This cake is also comparable in cost, if not less expensive, than making a traditional black forest cake. Substituting both applesauce for eggs and coconut cream for heavy whipping cream save us a few dollars.
- Whipped Cream Frosting Tips: Using canned coconut cream instead of full fat coconut milk provides a higher content of full fat cream which can increase your chances of getting a firm whip topping. If using a coconut whipping cream make sure to read the instructions on your can because some instructions for use will vary between brands. If you are having a really hard time whipping the cream you can add some cream of tartar, cornstarch or tapioca starch about ½ teaspoon at a time to help it firm up. You can also try having some dairy free cream cheese on hand and adding some in to stabilize and thicken the whip (this will change the flavour but should be tasty!).
- Prep Time: 25 minutes
- Cook Time: 35 minutes
- Category: Dessert
- Method: Baked
- Cuisine: German

Erin
Easily one of the best cakes I have ever eaten (vegan or otherwise). I haven't had a chocolate cake since going plant-based a few years ago and this was absolutely delicious!
The coconut whip was super easy to make and had me licking the bowl LOL
Kathryn Alexandre
hahaha I love that. Have to get every last bit for sure! I'm so glad you got to enjoy a chocolate cake after so long. Thank you so much for letting me know how much you loved it and for the star rating!
Susan
I made this cake for my husband and I for Valentine’s day and it is a big hit with us. The cake is so delicious, moist and has a lovely crumbly texture (I followed your instructions and made the cake the day before).I bought a canned coconut whipped cream to use, but next time will do the whipped coconut cream from scratch as the canned one did not hold up well. I will definitely make this again and it would be most impressive to serve to company.
Kathryn Alexandre
Happy Valentine's Day! It's so nice to hear that you two loved this cake and enjoyed it together for Valentine's Day! I know what you mean about the canned coconut whipped cream. I used a coconut cool whip kind of product once when I was testing this and it did get a little droopy on me (the "cool whip" option might be even a little more firm than an aerosol whip). I hope you like the coconut whip from scratch if you do try that next time and share it with company! (You'll have to update me on how that one turns out)!
Brigitte B.
This cake is the bomb !!!!!!! So freaking moist and good , I used 3/4 cup of sugar because my apple sauce wasn’t unsweetened, I don’t like overly sweet cake but the 1 cup of sugar would have been perfect . I will save this recipe for any kind of occasion , thank you for the perfect cake .
Kathryn Alexandre
Haha amazing! I'm so glad you love it. Thank you so much for giving it a try. The star review and lovely feedback means so much! Enjoy any leftovers if you have some!
Judy
I made this vegan Black Forest cake for the first time and served it for my brother’s birthday at a “sibling weekend” It got rave reviews!!
The recipe was easy to follow and I was pleased with how well the cake went together and the amazing taste!!! I will certainly make this cake again!!
Kathryn Alexandre
Thank you so much for trying it! I'm so glad it was a hit and it was easy for you to bake and assemble. Thank you for letting me know that you will come back to this recipe again!
joe grech
What can I do instead of the cherries? Tks.
Kathryn Alexandre
hmm you could use another syrup packed fruit like peaches or mangoes if you'd like! Alternatively, you could just frost the cake entirely with the whipped cream frosting or another frosting of your choice and just enjoy it as a chocolate cake. Let me know what you end up using!
TRE
Can this cake be made/assembled ahead of time and frozen?
Kathryn Alexandre
You can definitely make the cake itself ahead of time and freeze it. The cherries and the whipped cream frosting are probably best if they are not frozen because freezing them could affect how well they hold their shape after they defrost. You can certainly make the cherries and the frosting a day in advance of serving the cake but they are best if they are fresh.